The Best Way To Store Your Craft Supplies Comes From A Dollar Tree Diy

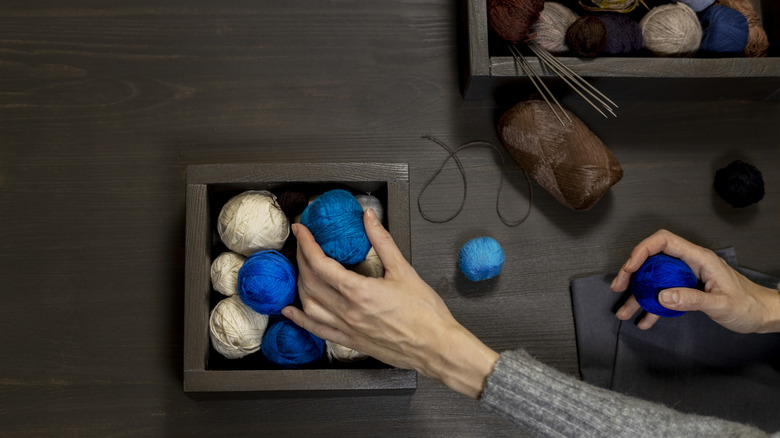
When it comes to creating an organized art supply storage system, there are endless bins and baskets to keep items like yarn neat and tidy. But all too often, these storage solutions mean tucking away your precious yarn, hiding the beautiful, vibrant colors you've worked so hard to collect. Luckily, there's another way to store your yarn that also puts it on display, and it can be done using a simple Dollar Tree DIY method.
With a drill, a few screws, and basic wooden crates from the Dollar Tree, you can organize your yarn or other craft supplies easily. Plus, you can turn them into colorful wall decor, all in under 30 minutes (assuming your craft supplies are already somewhat organized). The idea is to attach the crates to the wall with the open side facing outward to create a makeshift shelf for your yarn, fabric, or other items.
You can use large wooden crates that measure around 10 inches high, 12.5 inches wide, and 18 inches deep — they're often available at craft and home improvement stores. For a more cost-effective option to store smaller amounts of yarn or craft supplies, try the similar (but much smaller) Dollar Tree crates. These miniature crates sell for just $1.25 each and measure about 3 inches high, 5 inches wide, and 3 inches long. Yes, they're significantly smaller, but they work well if you don't have a massive yarn stash. You'll save significantly on the material cost, and you can add as many crates as you want if you need more storage space. That said, you can absolutely opt for the larger crates if the Dollar Tree versions feel too tight. Now, let's get into this exciting yarn storage method.
Best way to store your yarn using a Dollar Tree DIY method
To do this yarn storage hack, start by finding a spot in your home, perhaps above a wide window or your crafting table, and make sure your crates will fit without being too tightly packed. You can line up the crates horizontally with a few inches between each, or you can get creative with different arrangements like three rows of three crates. A good approach is to place the middle crate first, then decide how far apart to position the side crates, maybe just a few inches from the center one. You don't want awkward leftover space on the ends, so take some time to consider the crate sizing and placement.
Next, use a pencil to mark the areas on the wall where the crates will go. This step is key to getting them evenly spaced and aligned with your measurements. Even being slightly off can throw off the whole look. Before you start screwing them into the wall, make sure to peel off any stickers, do a quick sanding over any rough spots, and add any embellishments you want to include.
Now, you can either screw directly through the crates if the screws are long enough to reach into the wall, or you can go through the slats instead. You might consider adding washers to keep the crate secure and prevent the wood from getting damaged. To make it easier to screw into the crate and wall, consider pre-drilling the holes. Then comes the fun part — organizing your yarn!
Creative ways to customize your DIY yarn storage solution
While you can stick with the natural wood tone the crates come in, there are plenty of clever ways to customize the Dollar Tree wooden crates. For starters, you can spray paint them in your preferred color using wood-friendly spray paint if you want to create a bold, artistic display. For a more subtle look, apply a layer of wood stain to achieve a different finish, such as oak, maple, or cherry tones. Finish them all the same, or alternate the colors on each crate for a checkerboard look on the wall. For a creative twist, try threading textured ribbon through the slats or decorating the outside with stencils, 3D accents, or fabric embellishments to customize the crates. If you plan to use the crates for different types of supplies, consider adding decorative labels to hang from the edges of the crates to help with organization.
Now, if you have more yarn than you'd like to admit, consider using additional crates and mounting them in a different spot in your home. You could also go vertical instead of horizontal, which is a great way to liven up a narrow wall. Once your crates are decorated and installed, sort your yarn by color, type, or style — whichever method speaks to your tastes. The way you sort it affects the look at how easily you can find the colors you want. You might start with cool colors and work into warmer colors, or put solids in one crate and variegated yarns in another bin. Whether you use this idea alone or with other craft room organization hacks, you'll end up with a creative display option that keeps your supplies accessible.