Upgrade The Look Of A Bedroom Canopy With The Aid Of A Simple Shelf DIY
We may receive a commission on purchases made from links.
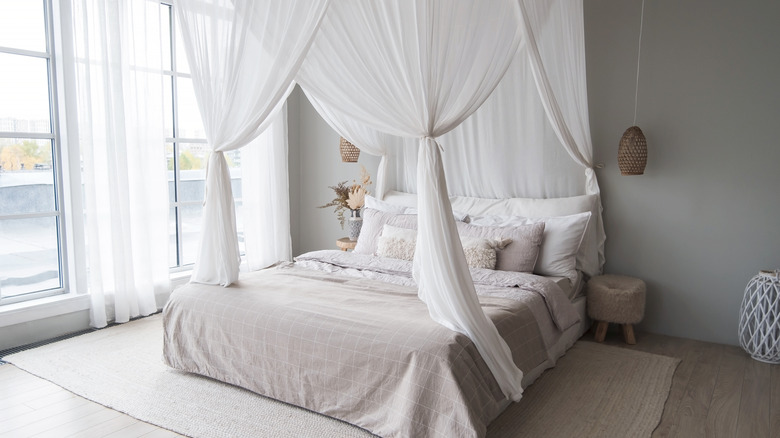
Nothing adds elegant charm to a bedroom quite like a bed canopy. While we tend to associate them with a luxurious Victorian style, bed canopies have actually been used throughout history in all classes of homes, often as a means for adding privacy to shared sleeping quarters. These days, there are bed canopies to suit any style and preference, from super sheer four-posters to thick, ruffly fabrics to magical fairy-light lit canopies. Even so, sometimes the perfect look (and the right price point) can only be found in a DIY bed canopy. It's relatively easy to create a gorgeous crown canopy — you just need a bed canopy, a floating wall shelf, and a few basic supplies.
It's important to be strategic when choosing your shelf and canopy. A simple canopy curtain with a dome top works well for this DIY, and look for options that come detached from their dome ring to make converting them to a crown canopy even easier. The Momaid Bed Canopy is a good option and is just $40 on Amazon. You can also use curtains for a bed canopy alternative that gives historical romance vibes. You'll want to find a floating shelf with crown molding or some sort of decorative framing around the bottom in order to hide and encase the canopy. Pick a more ornate shelf if you want to lean into the Victorian look, or go with a sleek and minimalist design for a modern touch. You can also get creative with your canopy's crown, using anything from a pretty box or basket turned upside down to a fancy rectangular planter. Just keep in mind how you'll attach your crown of choice to the wall.
How to make your own elegant crown canopy
Before you attach the canopy to the wall shelf, take the time to line up the fabric of the canopy so it will drape exactly how you want it. You'll want the canopy to open in the middle to frame the bed, and you can also experiment with overlaying the fabric in the middle for a nice crisscross design or leaving some space in the middle for a more open canopy. You can secure the fabric with tape to play around with it until it's perfect. You'll also need to decide if you want the crown canopy fabric to cover the back wall completely, or if you would rather cut the fabric down the middle in the back, creating an open-canopy look that reveals the wall and perhaps a decor item like a mirror as the tutorial shows. Once it's ready, hot glue the canopy fabric to the underside of the shelf.
Finally, attach the shelf to the wall. Installing the shelf as high as you can on the wall will create a more dramatic effect. It's a good idea to secure your shelf to the wall studs, especially if your canopy fabric is heavier. (Here's a refresher on how to find wall studs without littering the wall with holes.) If you would rather have an all-fabric canopy, a curved curtain rod can be used instead of the shelf, or you can also purchase crown canopy kits to pair with pocket curtains, like this one on Etsy. Whatever you use for the top of your canopy, wall hooks can help hold each side of the fabric back to frame the bed.