The DIY Way To Install Tiles Around A Toilet Flange
We may receive a commission on purchases made from links.
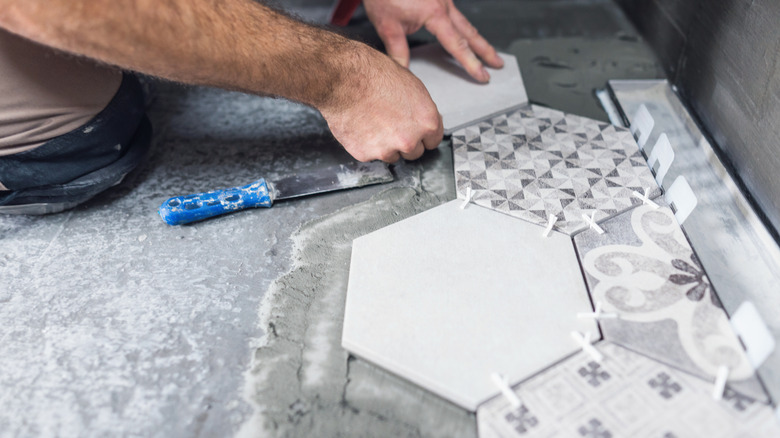
While any DIY bathroom remodel idea can involve tasks like changing up hardware or refreshing paint colors, some at-home enthusiasts are intimidated by the idea of installing their own tile floors. Tiling as a whole does require specific materials and patience to work through each step, especially when it comes to working around challenging areas like a toilet flange. However, there are steps you can take to DIY a tile installation so that it fits perfectly around a toilet flange. This requires laying the tiles directly over where the flange will sit and using the piece as a guide for where to cut each tile.
Regardless of whether you install tile before or after removing the toilet, you'll need to have a few key tools on hand for a professional-looking finish. The tiles themselves, mortar, grout, spacers, trowel, and mallet are all standard installation tools for this type of project. Yet, some of the most important materials needed for this specific type of tile placement include a tile scribe, an angle grinder, tile nippers, and a pencil or marker to note where to cut.
Easy steps to install tile around a toilet flange
One of the first steps is to avoid mistakes everyone makes when laying bathroom tile flooring, which means dry planning out the design and where each tile will sit. Essentially, this is just taking the tiles and placing them out to visualize the floor's final look. This step is also where you'll place the tiles directly over the drain hole, following the pattern and design for the entire floor. Place the flange over the tiles where it will be installed and use the marker to note where cuts are needed. Start by using the tile scribe to score along the noted lines before switching to the angled grinder to carefully cut through the markings.
When each tile has the rough cuts made, it's time to go back in on the rough edges with tile nippers or pop a diamond blade on the angle grinder. Be sure to take your time with this step and to use a steady hand to help create a smooth finish on the cut edges. Next, install your toilet flange according to the manufacturer's instructions. Now, all of the tiles and the space are prepared for the actual installation portion of the project. Cutting tile can be dangerous, especially if you are new to working with these types of tools. Be sure to wear protective eyewear and gloves, as well as a mask to protect from dust when cutting tile.
Important tile installation considerations to keep in mind
As with any home DIY project as detailed as tiling, there are some important considerations to weigh before jumping right into the work. First, you'll need to decide whether you want the toilet flange to sit flush against the tiles. Generally, this is a matter of personal preference, but some plumbing professionals recommend having the flange sit at least a quarter of an inch above the tiles. This additional space creates a strong adhesion with the wax seal and minimizes the risk of a tough-to-spot leak path from forming. When following this DIY method for installing tiles around a flange, it may be helpful to also install a flange spacer, like the Oatey 1/4 inch Closet Flange Spacer.
Another element to keep in mind is the design rules when choosing a tile for your bathroom. For example, an extremely busy tile pattern or intricate shape can make it difficult to lay out a design or find a way to make the installation visually pleasing when making specific cuts. Try starting from the middle of the room and working your way to the outside during the planning process as a way to balance the design to keep things balanced.