Erin Napier's Affordable DIY To Give Artwork A Custom Feel

We may receive a commission on purchases made from links.
Filling your home with art you actually love is one of the best means of self-expression in interior design. In just the confines of a frame, you can set the tone for the entire mood of a space, with unlimited opportunities to experiment with color, texture, and contrast. Erin Napier's DIY tip takes this idea a step further by demonstrating how artwork is not limited to the painting, picture, or print at its center. Playing around with the mat is an unexpected, very fun way to elevate the pieces hanging on your walls, and it can be as simple as painting a few watercolor stripes on a piece of paper.
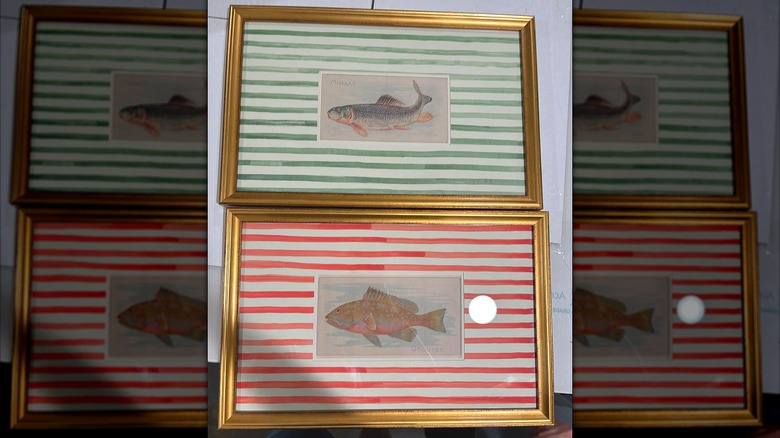
The "Home Town" co-host shared the results of her arts and crafts session on her Instagram account, featuring pictures of three paintings, in red, green, and blue. These then served as the backdrop to adorable, realistic drawings of different types of fish. The latter appear to have been simply glued on top of the striped mat, but with the watercolor playing off of the shades in the fish, the prints immediately looked more vibrant and customized. The interior designer then paired the art with antique-looking gold frames for an even more charming ensemble.
Give your wall art an upgrade with playful mats
Don't throw out old wall art! If one of the prints adorning your home right now is feeling a bit drab, giving its mat a makeover can be the simple solution you need. You can purchase a Yeestone 10-Pack of Picture Frame Mats for just under $7 to get started. Or opt for some Sadaunbe Watercolor Paper. Since this is a simple design, you don't need to worry about its quality and texture. One thing you do need to consider, however, is the value of the print that will be glued to your DIY mat. If it's a piece you wish to preserve, go the extra mile and invest in acid-free matboards to prevent your art from yellowing over time.
To recreate Erin Napier's idea, use watercolor to paint a few horizontal lines across the length of the paper. Don't worry if they're not perfect; that will add to the customized, handmade appeal. The interior designer seemingly opted for gluing her whimsical aquatic-themed art on top of the mat, but you can make it look more professional and layered by bevel-cutting your matboard. Bevel cuts are the angular, 45-degree cuts on the inner edges of most standard matboards, which give them a crafted, sophisticated look. The downside is that this effect is very hard to achieve by hand. It's a bit of an investment, but a bevel mat cutter is a tool that every DIYer needs to own, and it will give you perfect results on the first try.