The Simple Can Hack For Perfectly Spaced Holes In Landscape Fabric
We may receive a commission on purchases made from links.
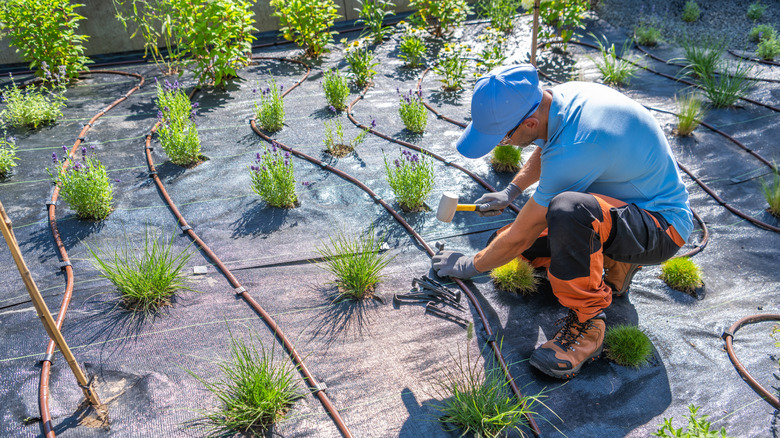
For gardeners with a lot of area to plant or homesteaders planting edible crops, using landscape fabric can cut down on the need for weeding and mulching. However, in order to get the plants into the soil beneath the sheets, holes must be cut. And cutting hundreds of holes in landscape fabric is a pain in the pruners. Thankfully, there's an easy way to achieve the same result without having to touch a sharp implement. Attach a large metal can, like the kind bulk food comes in, to a long wooden handle. Heat some coals or burn some scrap firewood in a metal bucket and plunge the can in there. Walk down your plot, pressing the hot can into the fabric at regular intervals to burn perfect holes. All that's left to do after that is collect the circular cut-outs and get planting!
For small planting holes, this DIY offers a genius way to reuse leftover soup cans. Source large-sized cans (think coffee cans or bulk-sized ready-made meal cans) if you need something for plants with larger roots systems and stems — in fact, generous holes are recommended in all circumstances over smaller perforations. Get, too, a long wooden pole — Lasnten 55 Inch Pure Solid Wood Replacement Handles cost about $39 for two, or feel free to repurpose a broken broom handle — or something metal, like a National Hardware Stanley Slotted Flat Steel Bar for about $16 with the last half a foot of one end bent at a right angle. You'll also need a metal bucket, some firewood or coals, and a lighter.
How to make a tin can landscape fabric hole punch
Should you really be using this fiery tool in your garden landscaping? If something is this easy to make, the answer is (almost) always yes. Plus, holes give your seedlings more room to grow and reduce disease compared to the often recommended but less plant-friendly Xs. Make a small hole in the top of the tin can using an electric drill, hollow metal punch, thin chisel, or even just a hammer and nail. It's just to make affixing the handle easier. How you attach the can to the end of your long handle depends on the handle material. If your handle is made of new or repurposed wood, drill or screwdriver in a screw. Use a nut and bolt if using a bent perforated flat.
If your landscape fabric comes with vertical lines printed onto it, you don't technically need a template. You can use those lines as a guide for your rows of holes and just eyeball the gaps between each hole. For something more precise, make a template by cutting evenly spaced holes — make sure you leave a species-appropriate amount of planting space between each plant — into a plywood or metal sheet the width of your landscape fabric using the material-appropriate hole saw drill bit. Add a handle of thick twine to one of the long sides to help you pull the template down the length of fabric. Another template option is to roll out large grid floral netting over the landscape fabric — use the squares to coordinate your hole layout.
Swiss cheese landscape fabric with a hot tin can
Till your soil — by hand or with a garden tiller — before laying down the length of landscape fabric on your garden bed; make sure the fuzzy side is facing the dirt. When it comes to securing your fabric, save money on ground-cover planting with an unexpected closet staple: wire hangers. Cut each curved end from a hanger for two landscape fabric staples. Insert one pin for every foot of fabric. You can also buy them: a 100-pack of Whalemon 6 Inch 11 Gauge Landscape Staples costs about $16. Alternatively, weigh the edges of the landscape fabric down with bricks or concrete blocks — anything durable and heavy, really. Place your template at one end of the length of fabric and spray paint a spot to mark the location of the holes.
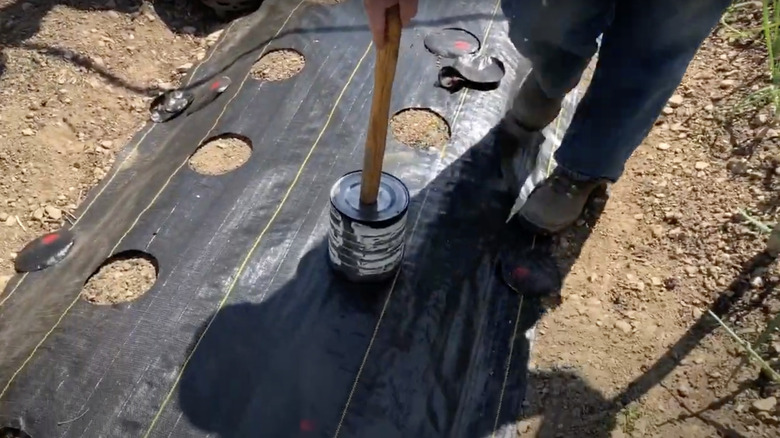
Heat the coals or firewood in a metal bucket, making sure to check for any fire restrictions in your region before lighting the fire. Plunge the tin can into the bucket until it's hot. (A weed burner or camping stove works, too.) Carefully yet quickly remove the can from the heat and walk down your planting rows, burning holes as you go. You can make about three to four holes before the can cools too much to melt the fabric, and you need to reheat it. You may need to go back through and cut off any circles left in the holes. You can also do it as you plant saplings or seedlings into each hole, if you prefer.