How And When To Change The Blades On Your Riding Lawn Mower
When you invest a few thousand dollars or more in a mower, you want to be certain you're receiving the highest level of performance and longevity. How long should a riding mower last? You can expect anywhere from 8 to 20 years of service, depending on how frequently you use it. Maintaining the mower properly can significantly increase its lifespan and can include taking steps like cleaning the air filter, changing the oil, and inspecting the spark plug.
It also involves things like installing new blades, which can aid in more efficient mowing sessions and a longer lifespan for the machine. Additionally, sharp, fresh blades reduce damage and stress on the grass in your yard. How often should you change your riding mower's blades to keep them in top condition? Most people will replace them every one to two years. People who use the mower for several hours per week may need to replace them even more often.
Instead of jumping straight to replacement, you might want to consider warning signs that it's time to sharpen the lawn mower blades, such as uneven height after a trim or brown and frayed edges on the grass. Sharpening blades twice a year is a good rule of thumb. However, some riding mower manufacturers do not recommend sharpening, meaning replacement is the only option. Learn more about how to recognize when it's time for replacing your riding mower's blades and some general steps for replacing them as a DIY job.
Signs that your riding lawn mower blades need replacing
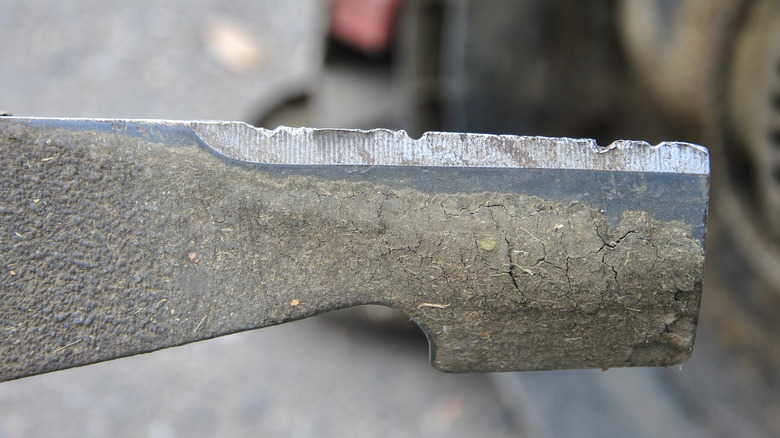
Even if you prefer sharpening your riding mower's blades, you might need to replace them if you're seeing significant signs of wear and tear. If the blades are bent or have dented edges, they will likely be out of balance. To save damage to the machine, you'll need to replace or rebalance the blades. If they have cracks or a lot of rust on them, replacement is the better option. A blade that has structural damage cannot be fixed by sharpening.
If you've already sharpened them two or more times, you should replace them the next time, as over-sharpening them will weaken the metal and cause the blade to suffer damage more easily. Heating the metal too much with a power tool during sharpening can also make it brittle. If the metal becomes too thin from over-sharpening or from contact with debris, it could snap loose while you're mowing, potentially causing injuries to anyone nearby.
For some people, it's far less hassle to replace the mower blades than to sharpen them. Most people have to take the blades off the lawn tractor deck to work on them because sharpening lawn mower blades without removing them can be tricky. If you're already going through the hassle of removing them, replacing them may take less time than using a DIY sharpening tool on them (like an angle grinder) or hauling them to somewhere they'll do the work for you, such as a local hardware store.
How to replace the blades on a riding lawn mower
Before discussing the basic steps for replacing blades on a riding mower, it's important for safety reasons to follow the instructions for your model for any maintenance or operational work, including replacing the blades and which replacement parts to use. Order new blades that match the serial number and model for your machine.
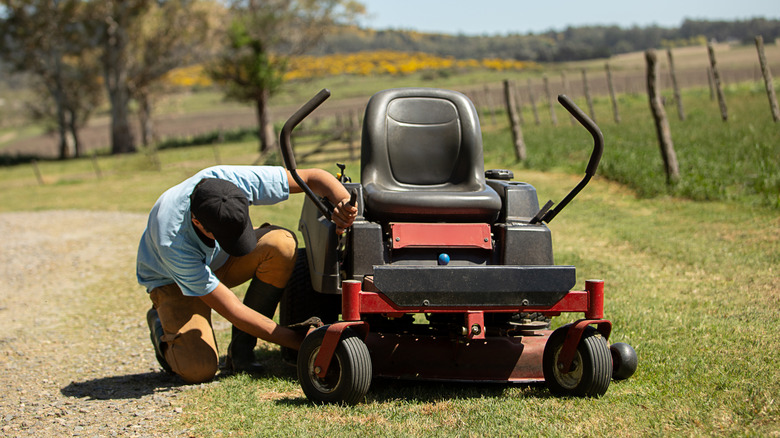
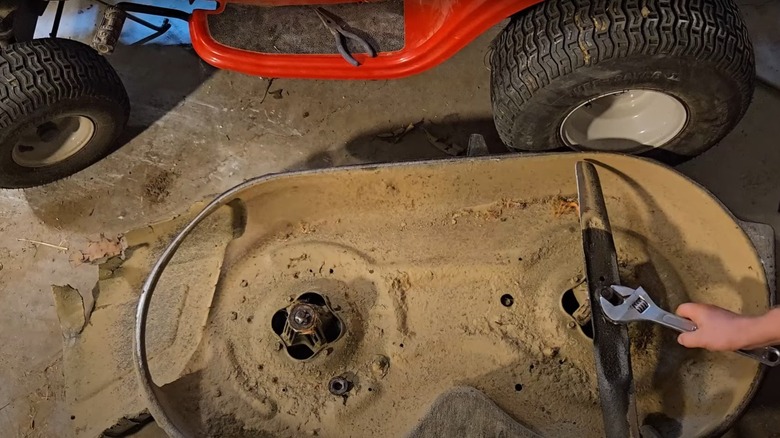
Unlike a walk-behind mower that you can simply tilt on its side to access the blades under the deck, a riding mower requires some different techniques. To access the area under the deck, some people might drive the mower onto car ramp jacks or over the span of a ditch in the yard. However, if the mower slips out of place, you could suffer injuries. The best option is to remove the deck by removing the hex bolts, hairpin cotters, and washers that hold it in place.
Flip the deck upside down — carefully — to access the nuts holding the blades in place. Use a piece of wood to keep the blades from spinning while you loosen the nut with a wrench. The nut should spin counterclockwise as it loosens. Line up the holes in the new blades onto the shaft and reattach the nut. The instruction manual should provide the torque setting to use for the nut. Don't over-tighten the nut, or you could shear it, meaning it will be extremely difficult to remove it later. If you don't know the torque setting, only tighten it to the point where it's no longer easy to move. Put the deck back on and test the machine — you should be good to go.