Don't Throw Out Old Milk Jugs: 14 Genius Hacks To Reuse Them In Your Garden
We may receive a commission on purchases made from links.
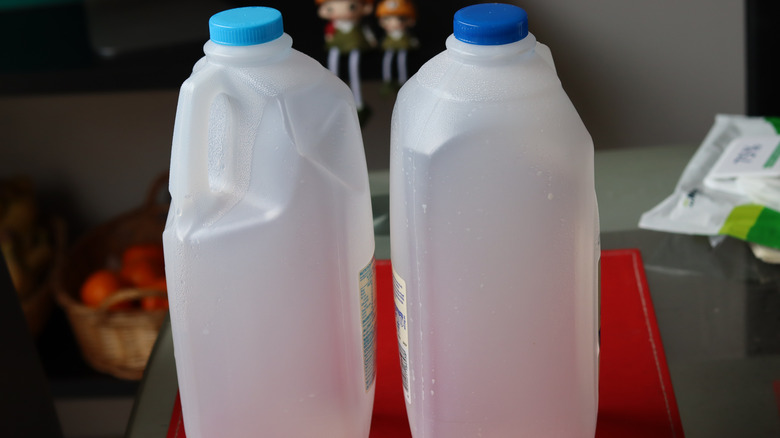
The empty milk jug from your breakfast could go in the trash, but have you considered its many uses in your garden? Made of High Density Poly Ethylene, or HDPE, these jugs are the perfect beginning for multiple creative crafts to protect and house your plants, as well as improve their care. Many milk brands feature an opaque design to protect the milk from degrading from light exposure, which also proves handy when growing plants. Most of these crafts — like DIY watering cans, plant labels, and outdoor decor — don't require a lot of materials, only a pair of scissors or something else to cut them with, along with markers.
Before starting any of these projects, prep your milk jug for crafting. Wash with soap and water carefully, making sure there's no residual moisture inside. You should also remove the label, peeling it off, if possible, although some jugs feature their label printed directly on the surface. Whether you use a pint, quart, or gallon size, you can find a handy way to repurpose it. These hacks are also applicate to water jugs or juice jugs, so you can use what you have available. You'll be giving yourself some clever garden tools or decor while also making a sustainable choice, saving your jugs from the landfill.
Create a watering can
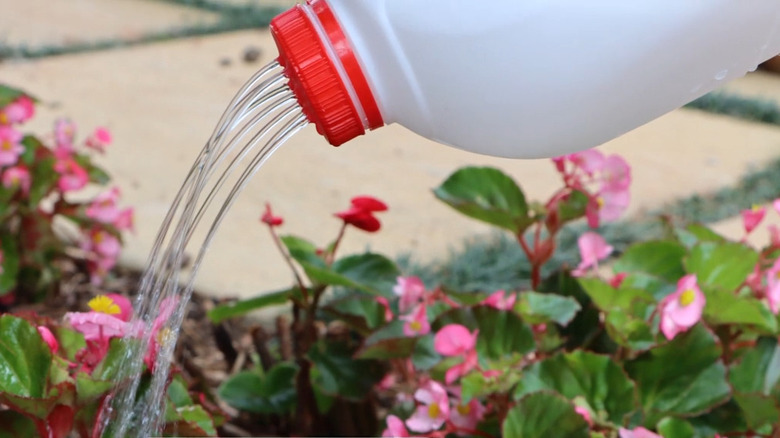
Your jug's design already features a built-in handle, which makes it an ideal watering can. By punching or drilling holes into the cap, you have a DIY watering can, perfect for making sure your plants get the moisture they need. A hole punch or hammer and nail are all you need to create the cap's holes. Then, you can just fill it up and use it like you would a store-bought can, all the while enjoying how eco-friendly you're being. Get creative and decorate it with flowers and bees so it stands out in your garden.
Cut into plant identification tags
Tired of guessing what plants are in your garden? Turn your jug into a series of clever plant labels! After cutting up the material into small plastic squares, use a marker to write a plant's name on each square. Glue to dowels or popsicle sticks, then sink into the soil. Some crafty gardeners like to take it a step further, using a hole punch to cut the plastic into whimsical shapes. You can do whatever works, just ensure the labels are written with permanent ink so the markings don't fade from rain or watering.
Feed the birds with a DIY feeder
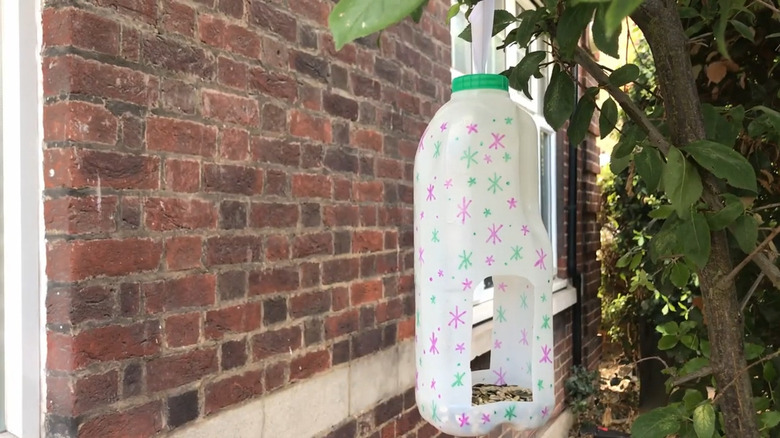
Empty milk jugs are one of the easiest ways to make a DIY bird feeder as it only needs "windows" cut out, ideally on the wider sides, to provide a feeding spot. Finish your feeder with a few holes in the bottom for drainage, keeping them small so as to not lose any bird seed. Loop a piece of twine around the jug's cap and neck, hang in the tree, filling with small black-oil sunflower seed or niger thistle seed. Consider making small holes and inserting real sticks or dowels for a perch.
Light up into a garden lantern
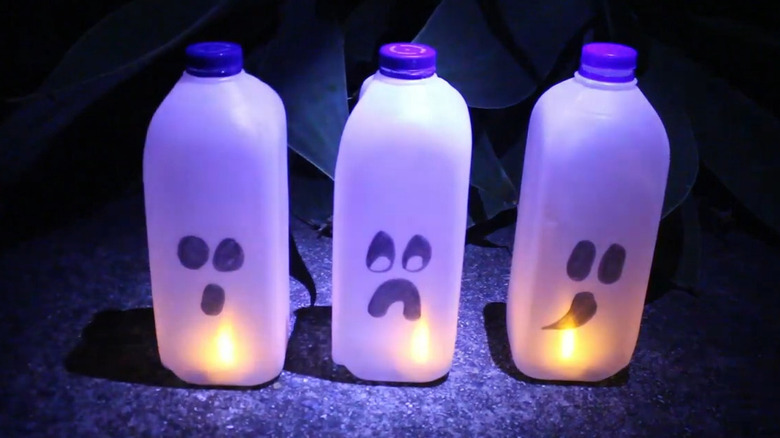
Want to light up your garden at night? Make jug lanterns! They're great for Halloween, but they also can work year-round. Consider decorating with images of nature, like birds, flowers, bees, and butterflies. Decorate as desired, untwist the cap, then stick a glow stick inside. When the glow stick fades, simply get another. You can also turn a gallon-size milk jug on its side and cut a square into it, then insert a battery-operated tea light. Try stringing them up along your fence or lining around your plants.
Shape into beautiful butterfly decor

Who would believe that your new garden accent started as a humble milk jug? Cutting a butterfly shape out of the gallon jugs is a creative way to make some sustainable decor for the garden. Using a pattern online, make the outline of a butterfly (like a monarch or swallowtail), then color with permanent markers such as the Sharpie Electro-Pop Permanent Fine-Art Set. String them up by attaching them to twine as an accent for your fence or glue to paint sticks for an enchanting addition to your garden.
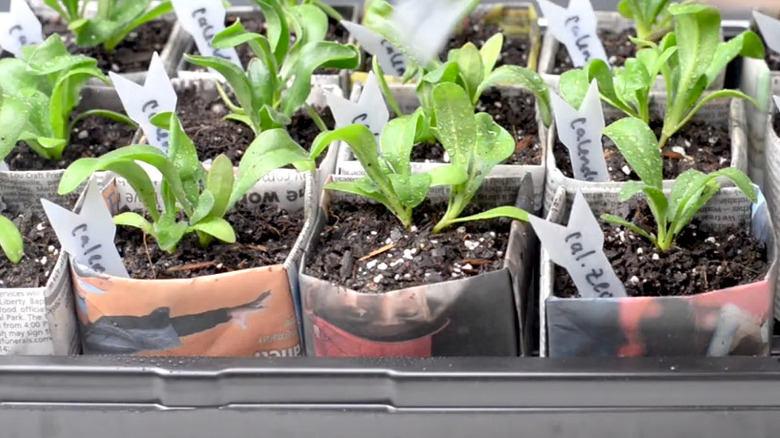
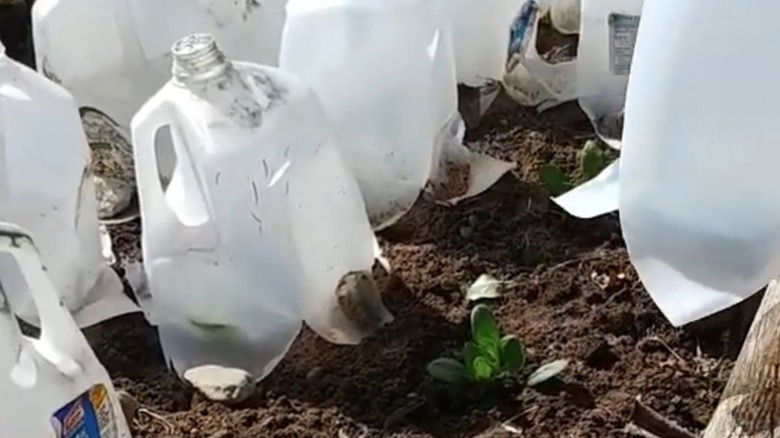
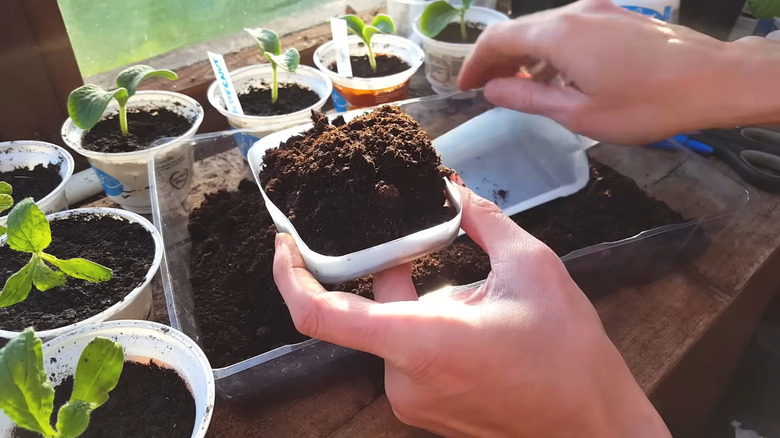
Start seeds in the winter
As winter rolls around, you can start seeds with winter sowing by turning milk jugs into mini greenhouses. You'll cut the jug in half, then attach the pieces back with duct tape. Ensure you have a few holes in the bottom for drainage and the sides for ventilation, then plant your seeds in a high-quality seed mix. After you tape the pieces together, you can label it with the seed and date sown. The jug's plastic will protect your seeds as they grow until they're ready for transplanting and let the light filter through.
Protect plants from Japanese beetles and june bugs
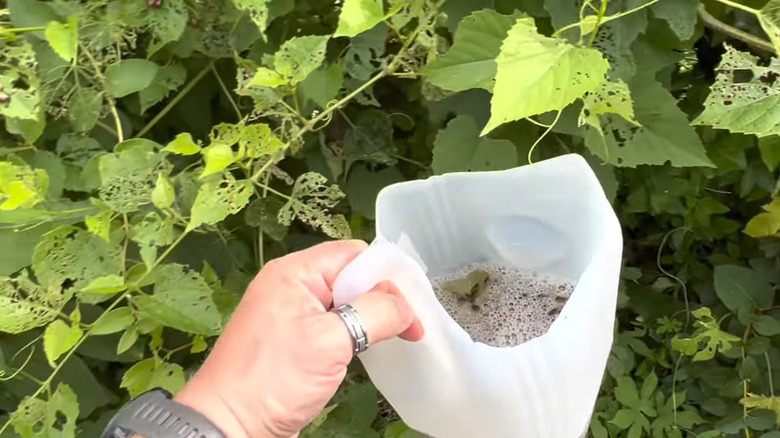
Invasive Japanese beetles can be plentiful in gardens, but a gallon milk jug can help. With your jug top cut off, fill with soap and water, then press against the leaves until the bugs fall in and drown. Another method is to keep the jug intact, fill ⅓ of the way with warm water mixed with a packet of yeast, rotten fruit, and dish washing detergent. Shake well, then hang the jug near your plants. Enticed by the smell, the insects will climb in and won't be able to climb out.
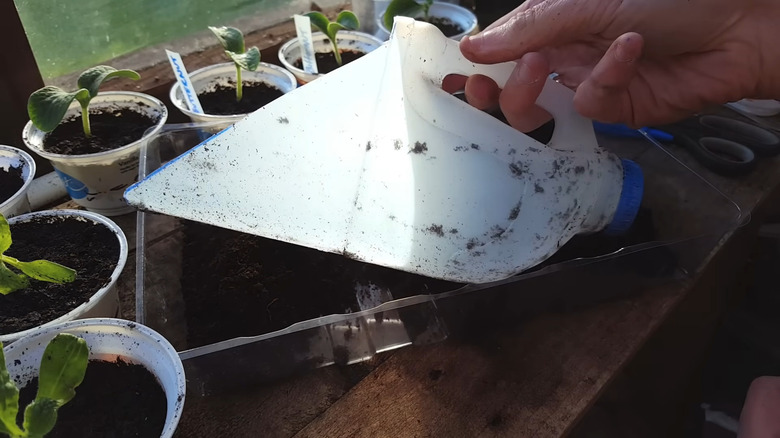
Cut into a funnel
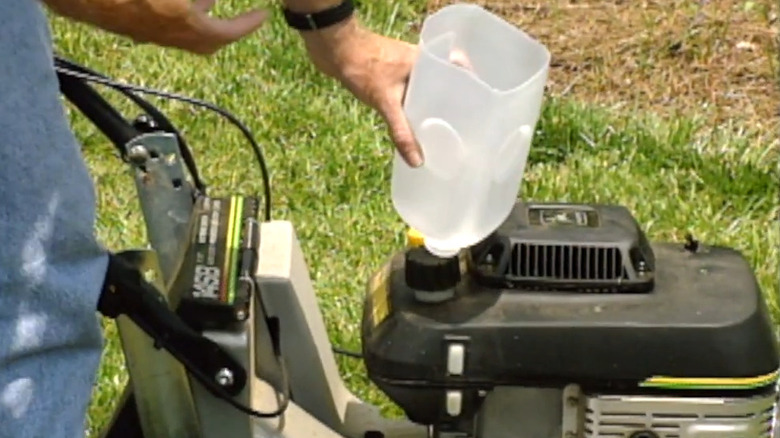
Whether used to plant seeds, guiding water around your plants, or refilling your lawnmower, a funnel is a handy tool to have in the garden. Instead of buying one, why not make one with a milk jug? This project can use either a quart-size or gallon-size jug. It requires cutting the jug in half, removing the cap, then turning upside down to make a funnel. That's all there is to it — it couldn't be easier.
Craft a scoop for compost or soil
Scooping out a bag of compost or soil can be a time consuming process if you need to fill a large pot, but you can save time with a large homemade garden scoop. Punch a hole into your jug so you can easily insert your scissors, then cut around the bottom while holding the handle. Because you didn't remove it, you'll have a handy handle while you plunge it into the soil or compost. If you're wondering which cuts to make, there are multiple tutorials in blogs and on YouTube.
Shield plants from birds with a DIY cloche
Garden cloches can run anywhere from $20 to $100 depending on their size. For smaller plants, make your own with a milk jug. Remove the cap and cut an "X" on the bottom. The X-shape forms bottom flaps so you can place your cloche over the plant, anchoring it down with rocks or using a bamboo stick in the hole in case of wind. The plastic will protect your plants from curious nibbles by birds, while the open top will ensure they get their much-needed air ventilation.
Make a planter for smaller plants
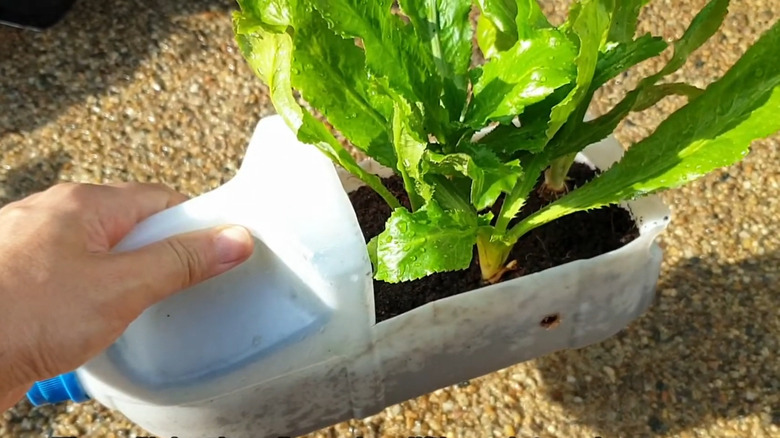
With your jug on its side, handle-side up, cut a large square underneath the handle, and add a few holes in the bottom to drain. Make sure the square is big enough for you to put your hand in so you can fill it with enough soil and a plant. Keep it on its side, fill the jug with your potting soil, then place it on the ground. Now you can grow herbs and smaller plants easily.
Carve a plastic trowel
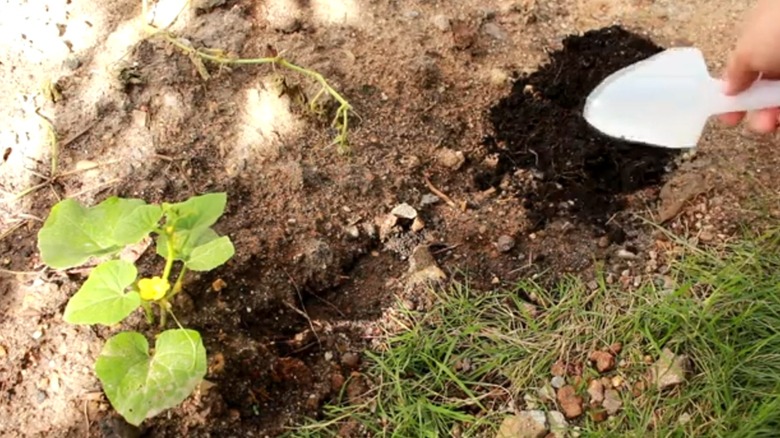
Need to dig into the dirt but you don't have a trowel or spade handy? Or maybe you need a backup because you misplaced your current trowel. Either way, a milk jug can save the day. This project can be done with a gallon-size jug for a larger trowel, or a quart jug for a smaller one. Laying the jug sideways, cut a large spade shape into the plastic, then remove. You've got a makeshift trowel to help you sift and dig into the dirt.
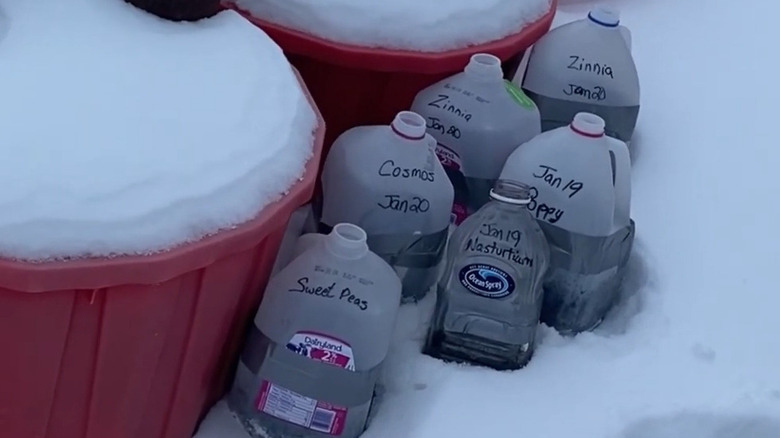
Keep up with and organize seed packets
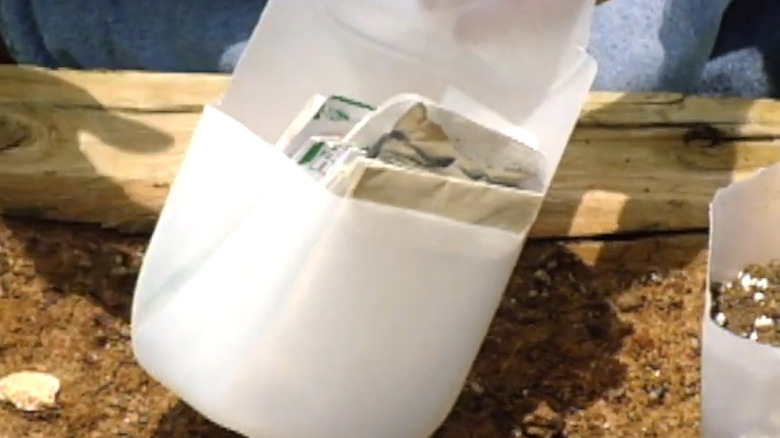
With so many seeds to plant, keeping up with all of your seed packets can be a chore. By slicing off half of the side of an empty milk jug, you can make it into a handy carrier to tote your seed packets through your garden. When you're not carrying them, they can also stay safe and sound in the jug in your garden shed or porch. And best of all, it didn't cost you a thing. If you have a lot of seeds, arrange them in two jugs divided by categories like "flowers" and "vegetables."
Fashion a seed tray
Have a lot of seeds to plant and want to maximize your space? Make a seed tray with your jug. With a marker, draw a line all the way around the jug's bottom. You can make it as high or low as you like, but the bottom will form an easy seed tray for planting all of your favorite seeds. Make a few holes in the bottom to provide sufficient drainage.