The Best Way To Attach Laminate Countertops To Your Cabinet
There are a few ways to update existing laminate countertops on a budget, but at some point, you may feel the need to totally replace them. Installing a new laminate countertop on your cabinet may sound like an intimidating task — something only professionals can do. But you may be surprised to know that the process is as straightforward as it gets. All you need is some spare time, a can-do attitude, and the right tools. When it comes to attaching laminate countertops to your cabinets, you have three options: you can either use screws, brackets, or construction adhesive.
Driving screws through corner blocks from below gives the countertop stability and makes it easy to remove if desired, but you'll be running the risk of cracking the countertop base if the screws are not aligned. You'll also need to drill pilot holes to prevent the wood from splitting. Brackets, on the other hand, are easier to install, with no need to drill pilot holes, and offer similar removability. As for construction adhesive, this is the most DIY-friendly method that bonds the countertop really well and is a near-permanent solution.
Since you're working with a laminate countertop, you'll want to keep in mind that the material doesn't last very long, which means you'll likely need to replace the countertop at some point. That's why you'll need a temporary solution like screws or brackets. Considering that not all cabinets have corner strips, the latter option is the most viable. Plus, there's no risk of splitting or cracking, and you can easily detach the countertop when the time comes. All you'll need is angle brackets, screws, a drill or screwdriver, masking tape, and silicon caulk.
Brackets are DIY-friendly and make future replacement easy

Starting with prep, you'll need to wipe away any dust, debris, and grease from the cabinet frame. This allows for a solid connection between the brackets, screws, and surface. If this is a replacement project, make sure to get rid of any previous glue, silicon, or brackets. You can use the old countertop as a template while cutting. If you're also ready to replace your kitchen sink or range top, simply trace the outline by positioning the new item upside down on the countertop.
Before moving on to the installation, you'll want to cover any exposed edges of the countertop using the iron-on ends that come with it. If your edge banding isn't the iron-on type, you can also apply contact cement on both the band and the exposed edge and let it sit for 15 minutes or so to become tacky before putting the two together. Use a sharp razor blade to trim off any excess banding. If you're installing your laminate countertop above a dishwasher, attach a diffusion strip on the front end of the countertop's underside. This protects the countertop from any moisture and steam that the dishwasher releases.
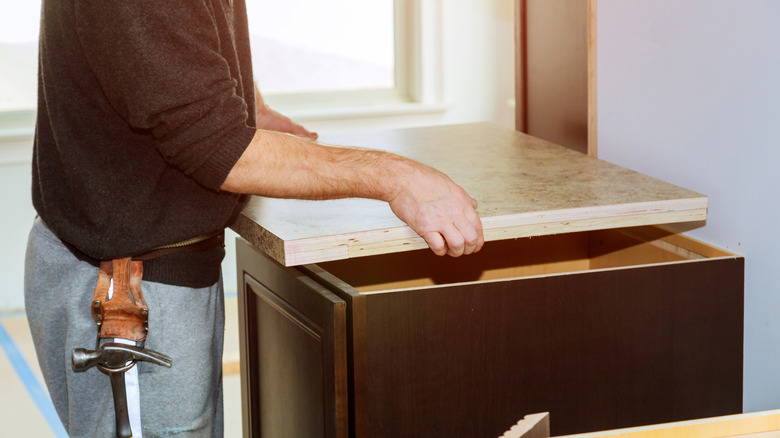
Once the countertop is ready, carefully position it on the cabinet and screw in brackets on each corner of the countertop from below, securing the other side to the inside of the cabinet. If you're working with multiple countertop sections, apply silicon caulk to the connecting ends and wipe away any excess silicon after pressing the slabs together. Make sure to also apply caulk at the seams, using masking tape to protect the surface — same way you'd use it to cut laminate or Formica countertops like a professional.