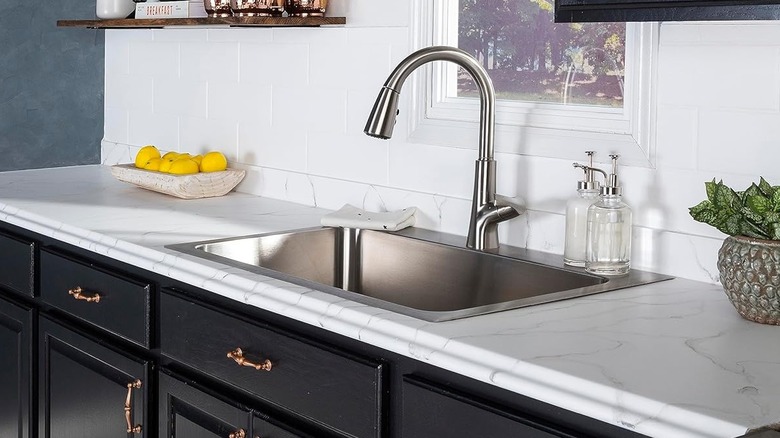
10 Ways To Update Laminate Countertops On A Budget (Without Replacing Them)
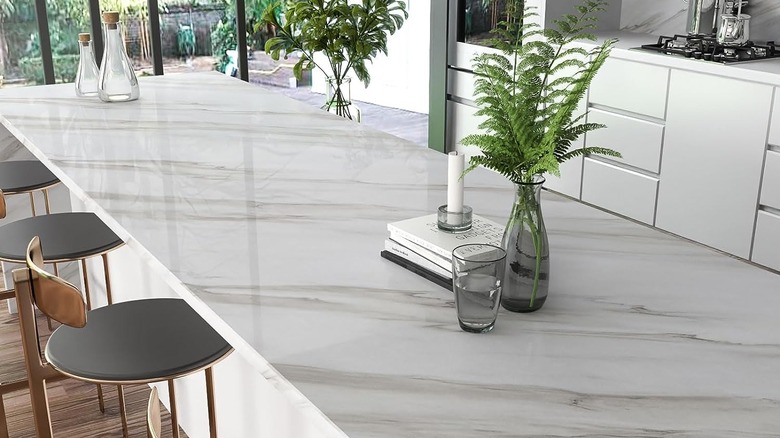
Brand-new kitchen and bathroom countertops can be expensive to install. Most kitchen countertops are around 30 square feet, and for a modest space with materials averaging around $10 to $150 per square foot, even a mid-tier renovation can get expensive, making it a heavy investment for most households. Instead of dropping thousands of dollars on this aesthetic change, you can bring life back to your laminate countertops using more budget-friendly methods.
If you're looking for a change that stays within a couple of hundred dollars, there are several ways to revamp the laminate instead of replacing it. Below are 10 laminate redesign projects that don't involve tearing it out and replacing it with another material. Most of these projects are under $100 to complete, mainly if you already own your own paint rollers, brushes, buckets, and other home DIY supplies. These methods can emulate natural stone, wood, concrete, and even unnatural patterns and designs just by adding a few layers over pre-existing laminate.
Change the color of laminate countertops with tinted paint
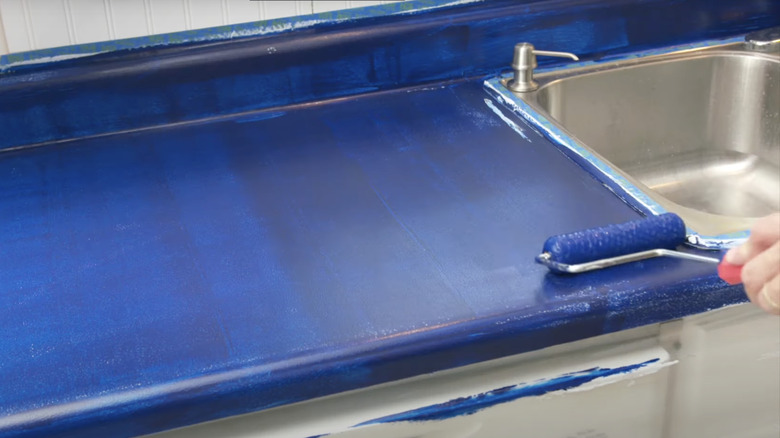
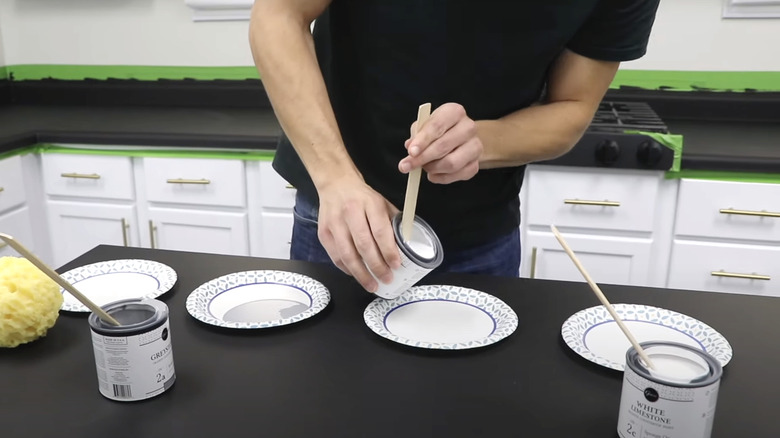
Painting a laminate countertop a new color is the most straightforward way to give your kitchen a makeover without breaking your budget. You'll need to start with a food-grade countertop coating before applying the paint. If not already in your possession, you'll also need a paint roller, a small brush for the corners, and a disposable paint tray. A single quart of paint should suffice for an average-sized kitchen, and online reviewers say they only used half of the can.
Make sure the countertops are completely clean before you begin. If the current texture and finish are shiny, gently sand the surface with medium-grit sandpaper. Use the roller to apply the paint in back-and-forth motions, and leave the coat to dry for at least two hours. Add another coat for a bolder color or to touch up any missed spots.
Lay wood planks over laminate countertops for a butcher block look
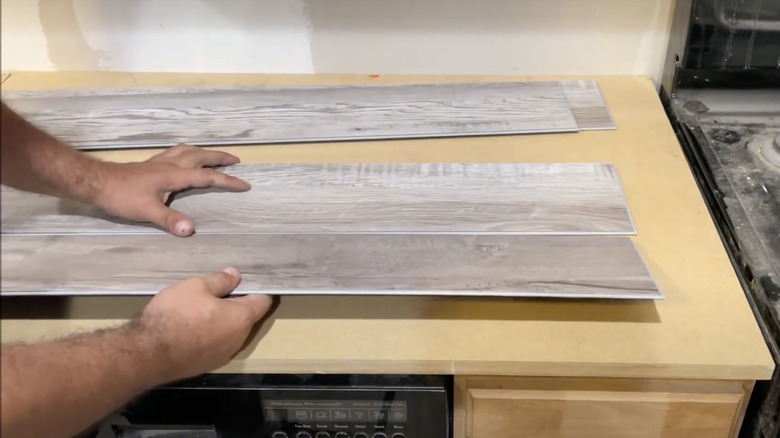
Tearing out an entire laminate countertop to replace it with authentic butcher's block is an expensive exchange. Save considerable time, money, and hassle by cutting your own wood planks and laying them over your current counters. You can get thin wooded boards from online or local retailers. If you don't have your own saw, a local home improvement store can cut softwood boards for you, eliminating the need to purchase a table saw for this project. You'll also need a liquid nail product, matching wood filler, a sander and sandpaper, a wood finish, and brushes or rags.
Once you have all the supplies, stagger the wood boards over your laminate, using the nail glue to adhere them to the top. Make sure they fit together as tightly as possible and fill in between the seams with the wood filler. You'll have to sand down, paint a finish over the final project, and give it roughly two days to set before using your new countertop.
Visually transform laminate's edge with stone form liners
A hallmark of rustic stone countertops is their chiseled edges, which have the bumpy appearance of natural rock formations. You can recreate this dramatic look on your current laminate by using slate form or stone form liners from a countertop retailer. Along with the liner, you'll also need polyester mounting tape to adhere the forms to your countertops' edges. You may also need slate or stone texture mats to help create a cohesive look.
Make sure you clean your countertops with a safe cleanser and scrub the backs of the form liners with denatured alcohol before you begin. You can hire a professional to place the form liner or follow the manufacturer's instructions or a DIY tutorial. It takes careful, tightly fitted adhesion to make the form liner look natural, which is why you may want to rely on professional handwork for the installation.
Refinish your laminate to be more matte or glossy

If you like the color of your current laminate but still want a noticeable change, consider changing its sheen. You'll need medium-grit sandpaper and a water-based topcoat, both of which can be found online or at a local retailer. Depending on your preference for the topcoat, you can choose between dead flat, flat, gloss, satin, or semi-gloss to mirror the laminate finish type.
You can clean up stains and such on the laminate before starting the project. Start by sanding down the entire countertop using circular motions with an electric sander. It should be visibly rough and scuffed up, and you'll need a wet rag or vacuum to remove all the dust. Once you clear away the debris, use a spray primer to help the topcoat adhere better to the laminate. Once the primer is dry, you can apply two to three layers of a water-based top coat, waiting one to two hours for drying time between applications.
Cover unsightly laminate countertops with self-adhesive vinyl
With a few rolls of self-adhesive contact paper and no extra supplies, you can cover your entire countertop – and even add a pop of color to your cabinets if you're up to a bigger project. You can completely alter your laminate countertop in under an hour and for under $20. There are various patterns of vinyl out there, allowing you to disguise your countertops as granite, marble, terrazzo, wood, and other eclectic patterns. If you make any mistakes or parts of the vinyl get damaged, they're easy to replace with a fresh sheet.
Contact paper rolls are available in various sizes. Measure the surface area of your kitchen or bathroom counter to determine how many you'll need to complete the project. Start by wiping down your counters and clearing off all debris and dust. Peel off the back of the vinyl adhesive and lay it down slowly, smoothing it down as you go. You don't have to wait before using your new countertop.
Use a wood finish kit to create a sleek wooden look on old laminate
Liquid wood is another option for updating old laminate. Wood countertop kits are designed to transform your laminate (or other hard surface) into a weathered wood look. The colors range from light to dark natural wood colors and come in gloss, matte, satin, or semi-gloss options. Each set includes brushes, gel stain alternatives, graining tools, primer, and sealer.
Start by prepping your counters, using denatured alcohol to create a clean canvas to apply the finish. Brush, roll, or spray the primer in the same direction as you want the faux wood grain to appear on the laminate countertops, and wait two hours before the next step. Once you've waited, put a thin coat of stain overtop, adding more coats until you like the look. You'll need to wait two hours between brushing on the stain and using one to three coats. Speed up your drying times with a blow dryer; however, ensure every inch of the laminate countertop is thoroughly dry before moving on to the next step.
Combine vinyl chips, paint, and epoxy to emulate terrazzo-style laminate countertops
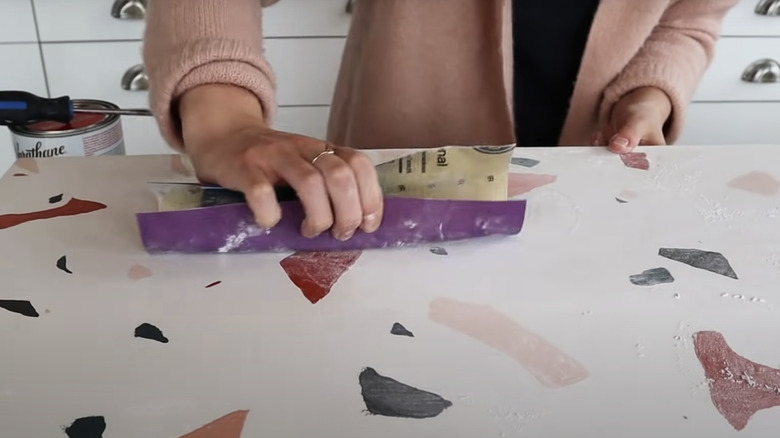
Terrazzo designs are on the rise due to maximalism design coming back in style. To transform the countertop itself, you'll need bonding primer, epoxy, colored vinyl chips, and latex paint. Also, make sure you have mixing buckets, paint brushes, rollers, and trowels on hand, which you can find at a local home improvement store. The total cost of supplies shouldn't exceed $100 unless you're covering a larger countertop area or an additional kitchen island.
Begin by wiping down the countertops and using painter's tape to tape off areas you don't want to paint accidentally. Use a roller to place two coats of primer, and give it four hours to dry. Follow the primer with two layers of latex paint for the base color. Next, you begin sprinkling the chips, which is the hardest part. Paint a third coat of paint in small sections. Every time you complete a section, sprinkle the chips evenly across the surface. Repeat the process until the whole countertop is covered, then wait twelve hours before applying the epoxy with a trowel.
Use Giani countertop paint to give old laminate a granite appearance
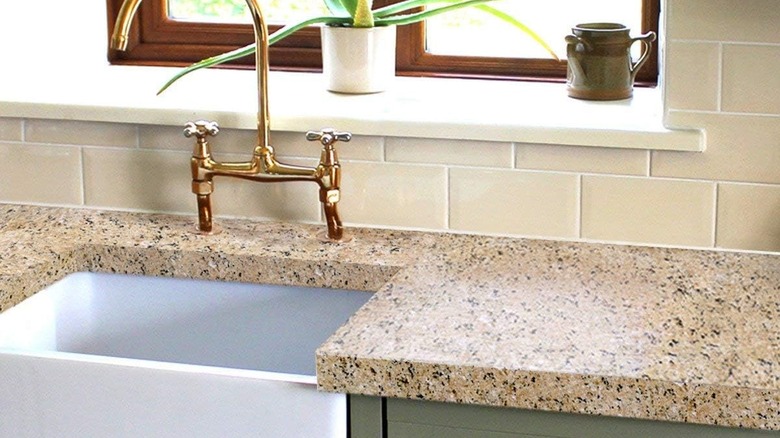
The Giani sells a countertop paint kit that revamps laminate into a granite paradise. There are typically multiple colors to choose from, all of which come with a gloss finish. The kit includes multiple paint cans, primer, a topcoat, brushes, a practice board, rollers, and sponges for the application process. There are several kits to choose from, which are differentiated by their topcoats. You can use a 100% acrylic topcoat or an epoxy resin topcoat. Whichever kit you choose should cover about 35 square feet, so multiple kits are only necessary for exceptionally large kitchen spaces.
This massive visual transformation takes only one weekend to complete. The exact instructions for completing this process differ depending on which finish you choose. Keep in mind that replicating granite takes longer than emulating other natural stone formations. Instead of rolling or brushing on the paint, you'll have to sponge the different paint colors, which doubles the estimated painting time to about four hours.
Transform worn laminate countertops into marble with a home marble coating kit
Several manufacturers make countertop paint kits and marbling coating kits. The kits typically include a base coat, heavy-duty cleaner, top coat, and veining paint. However, the kits won't include paint brushes or rollers, so you may want to invest in your own if you don't have them on hand. It's best to consult the manufacturer's instructions before purchasing the extra supplies to know exactly what you need.
You don't need to strip, sand, or prime your counter before starting the paint project. Use the included heavy-duty cleaner to prep your laminate countertop, and begin with two layers of base coat, utilizing a brush for the trim and a roller for the surface. Wait about four hours before adding the veining paint with a thin paintbrush, and then the top coat to finish it off. It'll take two hours to dry, but you'll want to wait 24 hours for the coating to fully set before you can start fully using your countertops again.
Skim coat with a cement-based material for a concrete look
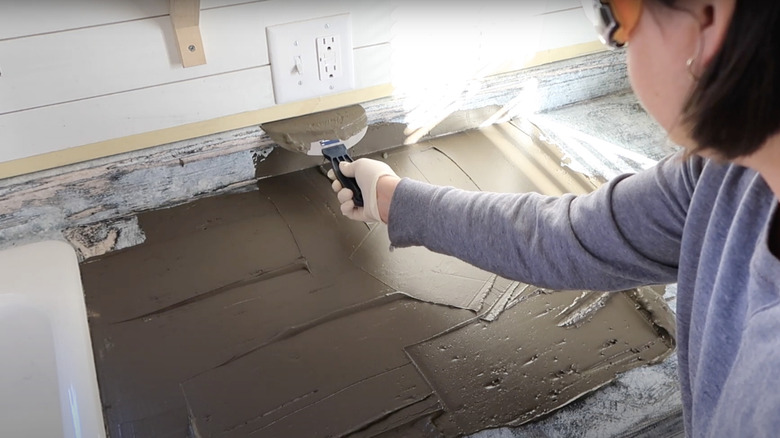
Skim-coating laminate countertops with cement creates an aesthetically pleasing industrial look, but you must make sure your cabinets are strong enough to withstand this project. Test that your countertops are reinforced and sturdy by adding weight and making sure they don't budge or lower under the pressure. Once you're sure, begin collecting these materials, which include cleaner wax, concrete protective sealant, and skim coat material. You may also need to pick up coarse, medium, and fine-grit sandpaper and a trowel or putty scraper if you don't already own them.
Mix small batches of the concrete in a bucket, using one part product for every two parts water. Spread the mixture with a trowel, applying it evenly over the laminate. Smooth down the coats with the coarse sandpaper, re-applying coats and sanding as you go. Each coat only takes about 15 minutes to dry, so be modest with your batch sizes. Also, be ready to move between steps quickly before the concrete dries. Sand the final coat with increasingly fine sheets of sandpaper before putting on the final sealer and a coat of wax.