How To Fit A Vintage Rounded Door Into A Square Frame
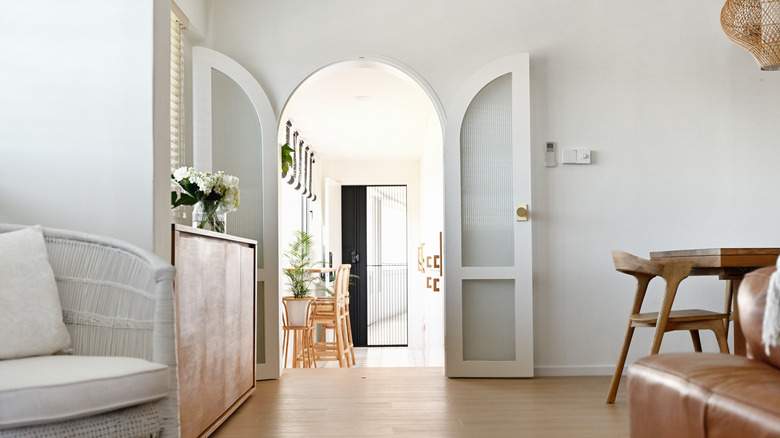
Rounded, vintage doors offer a romantic, timeless look. But if you're working with a square doorway, you might balk at the idea of tackling this project on your own. Before you call a contractor, don't dismiss your own home improvement prowess. While this project can be challenging, it's still possible to DIY. With a can-do attitude and a few important tools, you can absolutely fit a vintage door into any doorway. You will essentially need to create a new frame complete with an arch header. If you have a slab door instead of a pre-hung door, you will need to create a door jamb.
For this project, you'll need a drill, a drywall scraper, a jigsaw, and a circular saw. If you don't have these tools on hand, don't panic. You can avoid wasting money by renting tools for your DIY project. As for material, you'll need plywood, drywall, drywall mud, vinyl corner bead, screws, door trim, adhesive, and of course, your door of choice. Vintage or salvage stores are a great place to find a vintage door, but if you have trouble tracking down one that speaks to you, search online sources like Facebook Marketplace, eBay, or even Etsy. In order to make this DIY a bit easier, purchase a pre-hung door rather than a slab door, but we'll explore both approaches.
Plywood arches and drywall will fill in square corners
To transform your square door frame into a rounded one, first remove any existing door, casing, frame, or trim. Now remove the drywall above the doorway to expose the wall studs. Measure the width and height of your door's arch. Use a pencil and nail to trace the arch shape on plywood and cut two matching arch shapes to fit along the top of the doorway. One arched plywood sheet will be at the front and one at the back of your doorway. Use small wood blocks and adhesive to connect the two arched plywood pieces in the same width as the door frame. Take your newly constructed arch header, lift it up to the wall opening, secure it to the wall studs.
Once your arch header is in place, install horizontal blocking for extra support. Gently score, bend and place a strip of drywall under the new arch header to cover the wood blocks. Install a vinyl corner bead along the arch and replace your drywall above the arch. Once in place, apply drywall mud, taking care to fill out any gaps. Allow to dry for around 2 hours before finishing the job with wall paint. This is also a good time to paint your door or give it a stylish upgrade with new hardware before installing it. Finally, you can install your door and its frame in place and enjoy your hard work.
Using a slab door requires some extra steps
While a pre-hung door includes a door frame and hinges, a slab door is just the door itself. Working with a slab door requires more advanced DIY capabilities. Instead of just creating an arch header and installing the door, you'll have to undergo the additional work of creating your own door frame. If you choose to go this route, you'll need all the materials listed above plus framing lumber, hinges, and additional screws.
Between installing drywall and installing the door, you'll need to build a frame or door jamb. Measure your opening vertically and horizontally. Using 1-by-4 or 1-by-6 boards, create a rectangle frame matching your door measurements. Secure together with screws. Next, trace your door slab and cut two arched pieces out of plywood. Secure the plywood to your newly built door frame with adhesive, allowing for a gap between the two arch pieces. Place your door slab into the door frame to make sure it's a good fit. Once you're sure the frame looks like a fit, attach the hinges, strike plate, and latch. Install your custom door jamb in the wall and finish off with trim as desired. Once you've done it in one room, you'll be eager to explore all the creative places you can add arched doorways in your home.