The Telltale Sign You've Over-Fertilized Your Hydrangeas (And How To Save Them)
A fertilizer is meant to boost growth, but for hydrangeas (Hydrangea spp.), too much can do more harm than good. It's a mistake even experienced gardeners make when trying to coax bigger blooms or faster recovery. But that effort often backfires, as the plant suddenly looks worse instead of better. You'll notice your hydrangeas' leaves appear to be scorched or have brown edges, even when the soil is well-watered. That's the clearest sign that over-fertilization has started damaging the roots.
As the plant enters stress mode, the damage appears in the roots, which become browned or blackened and limp, the lower leaves yellow and wilt, and growth becomes very slow or stops entirely.. Even if you know how to grow and take care of hydrangeas, over-fertilizing is an easy slip, and one that can quietly undo a lot of progress. But if caught in time, there's still a chance to reverse the damage. Here's what to look for, why it happens, and how to help a stressed hydrangea recover without adding more stress on your plant.
What over-fertilization looks like in hydrangeas and why it happens
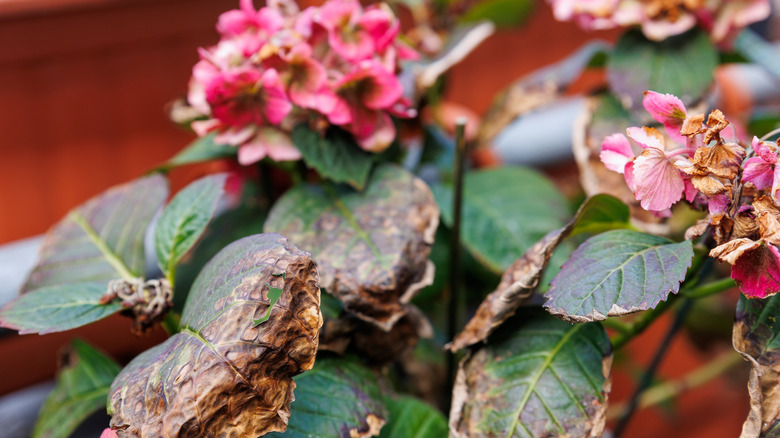
Over-fertilized hydrangeas usually show symptoms in their leaves first. You'll see scorched, brown, or dry edges, even if the soil is moist and you're watering regularly. That's because excess fertilizer builds up salts around the roots, which pulls water out of the plant instead of in. Older leaves turn yellow and drop off, and new leaves start to wilt and lose their firmness. Even with extra watering, the leaves won't recover, which shows that the roots have been damaged. Over time, you'll notice that your plants growth rate has slowed down and in other cases the seedlings may also die.
Another clear sign is a white, crusty layer on the soil surface, left behind by excess salts from over-applied fertilizer. High nitrogen levels make this worse, raising salt concentrations and leading to root dehydration. Eventually, the roots become soft and dark, and begin to decay which is a classic sign of root rot, which can be treated but is best prevented. During this phase the roots no longer absorb water or nutrients properly. That root damage travels upward, affecting the entire plant. Over-fertilization also weakens your hydrangeas' defenses. With too much nitrogen in the soil, they're more likely to get fungal diseases such as anthracnose, which causes leaf and flower blight.
Step-by-step recovery for over-fertilized hydrangeas
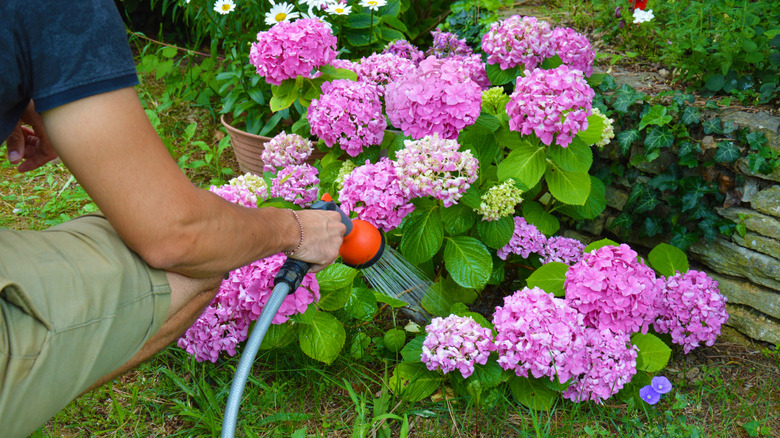
The first step to saving an over-fertilized hydrangea is to flush out the excess salts. Use slow, deep watering to leach the salts from the root zone. Be careful not to overdo it, as too much water can lead to waterlogging and root rot. Hydrangeas need steady moisture while they recover, but avoid frequent, shallow watering. Instead, use a soaker hose or slow drip method to water deeply and less often. You can use a time-released fertilizer for your hydrangea in spring and again in early fall. When it starts blooming again watch for yellowing leaves in the center of the plant, as it's often a sign they need a fast-acting fertilizer.
Once your hydrangea starts to recover, you can fertilize again, but go easy. Use a balanced N-P-K fertilizer or one with higher phosphorus. Bone meal is a good natural option for adding phosphorus. Trim off only the most damaged leaves or flower heads as it helps hydrangea to bloom again more quickly. When pruning hydrangeas, cut ½ to 1 inch above a bud at a 45 degree angle, and remove dead, woody stems to support new growth.
Knowing when and how to prune hydrangeas properly makes a big difference in their long-term recovery. Recovery takes time. If the roots were badly damaged, your plant may need the full growing season to fully recover. As long as new growth shows up, your hydrangea is on the mend, just keep giving it gentle, consistent care.