How To Grow And Take Care Of Hydrangeas
We may receive a commission on purchases made from links.
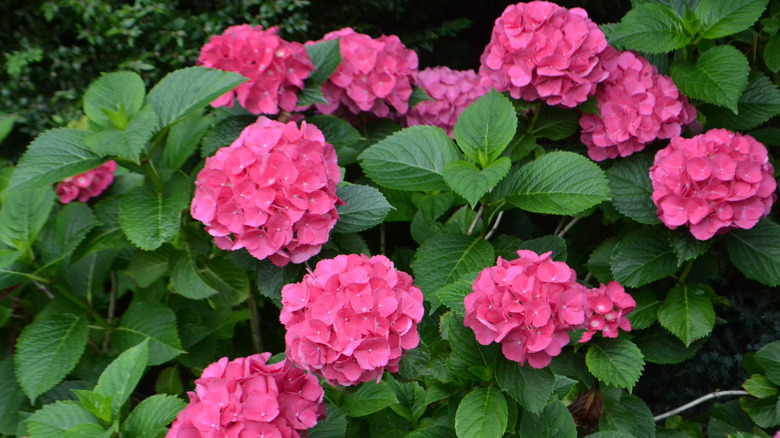
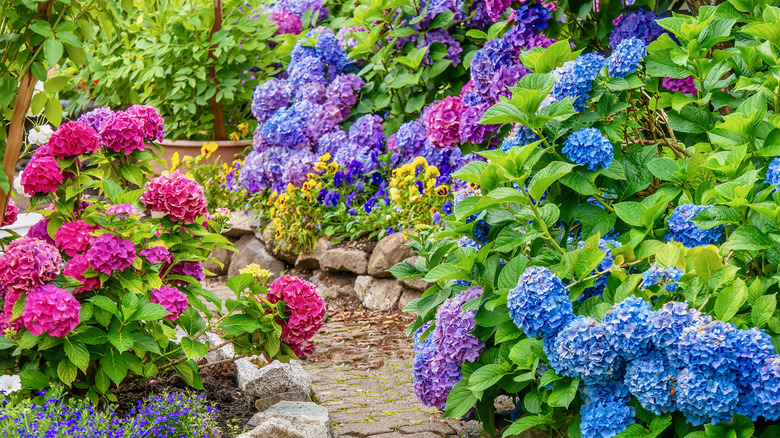
Hydrangeaceae (also known as hydrangea plants) are a great display for folks' gardens and are fairly easy to grow. They may look high maintenance but with the right tools and space, they'll be flourishing in months. Hydrangeas grow up to 15 feet tall and can be found in a variety of colors such as pink, blue, purple, and white. The best time to grow hydrangeas is during the spring and summer months; they'll reach their full growing point by the end of them.
The popular flower is native to Asia and the Americas according to the National Garden Bureau. Some hydrangeas are viewed as a symbol of gratitude in Japan due to ancient emperors giving them to their maidens, per Better Homes & Gardens. But the Victorians had a different perspective. They saw hydrangeas as a sign of vanity because they produce so many flowers without dropping many seeds. The flower's colors also have different meanings: Pink represents love and sincerity, blue is forgiveness, white symbolizes bragging, and purple means understanding.
How to use in garden
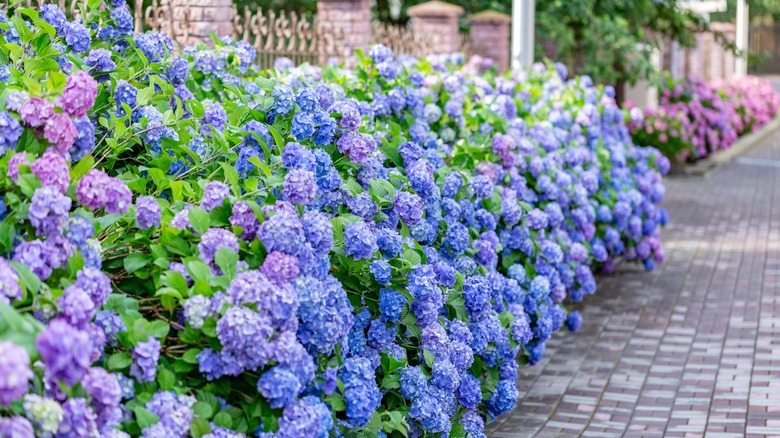
Hydrangeas are wonderful plants to use in your garden because they're so versatile. HGTV offers a multitude of suggestions on how to include hydrangeas in your space. If you have a fairy-like garden, you could grow dwarf hydrangeas (which only grow up to 36 inches tall) with a mix of other low-lying plants and moss. You can also create privacy for your home by growing hydrangeas as hedges. Don't forget that hydrangeas lose their leaves in the fall, so be sure to plant them with boxwood or other shrubs to fill out any potential gaps in the hedge.
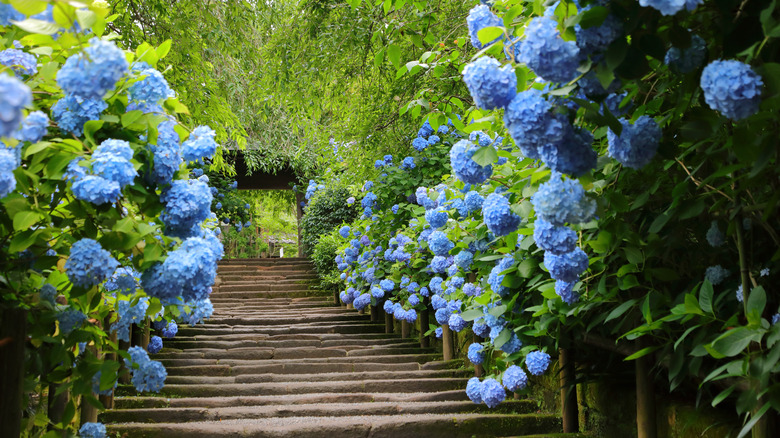
To create a romantic setting, you could create a path lined with hydrangea hedges on either side. Thanks to their vivid petals, these flowers are also ideal for brightening up dry areas of your yard. And if you want to bring some of hydrangeas' beauty indoors, you can also cut a few of their flowers off and put them in vases to decorate your home.
How to grow hydrangeas
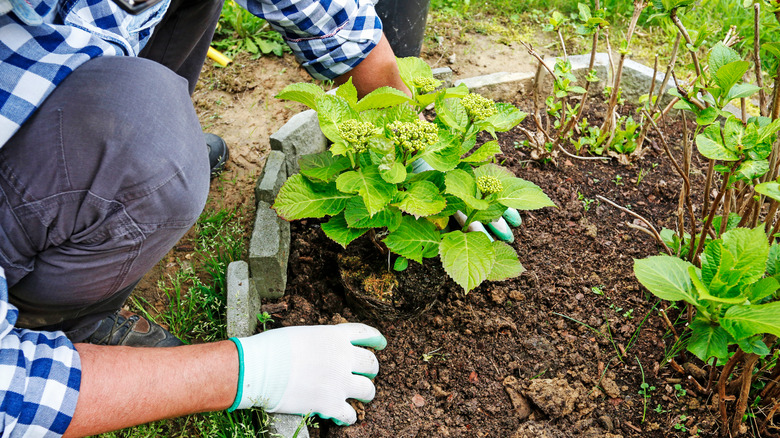
While hydrangeas may look high maintenance, they are relatively easy to plant. You should try and plant the flowers either in the fall or early spring to give them time to establish roots before blooming. The perfect location for hydrangeas is an area in your yard that gets sun in the morning and shade in the afternoons. Once you are ready to plant and the location is chosen, the next steps are relatively easy.
First, dig a planting hole 2 feet wider than the size of the root of the ball. Make sure the depth of the hole is about the same height as the root of the ball, as you want to the root to be level with, or just a little higher than, the soil. Place the root into the hole and create a mound around it so that the water has better drainage. Once everything is in place, fill the hole with the well-draining soil until it reaches the top.
How to care for hydrangeas
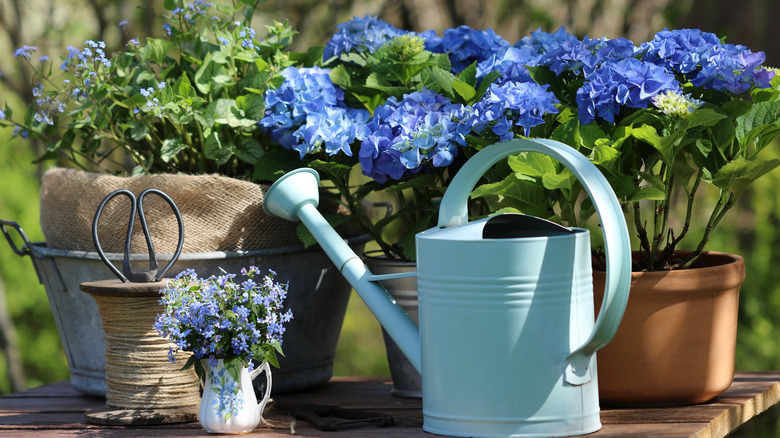
While hydrangeas are very low maintenance, they still need some care. They require lots of direct sunlight in the mornings, but shade in the afternoons. Knowing how often to water them goes a long way. Glimour suggests watering hydrangeas with 1 inch of water per week during the growing season. Some hydrangeas, such as the bigleaf and smooth hydrangeas, differ and they need more water. But the others can live off of 1 inch of water. Hydrangeas need to keep their moisture levels up, so surrounding their soil with mulch will keep it moist.
Fertilizer helps hydrangeas grow as well, but the timing of when to add fertilizer is different for all varieties of hydrangeas. Bigleaf hydrangeas need light fertilizer throughout March, May, and June. Oakleaf and panicle hydrangeas only need two sprinkles of fertilizer throughout April and June. Smooth hydrangeas need fertilizer one time in the later winter.
Hydrangea varieties
Hydrangeas have about 80 different species around the world, and are mostly popular in the Americas and Asia. They are an evergreen plant and can grow from 2-feet to 15-feet tall. There are four specific variations of hydrangeas that grow in the United States, according to Southern Living Plants.
- Bigleaf hydrangeas (also known as Hydrangea macrophylla) come in two main flower types: large mopheads, that include 'Big Daddy' and 'Dear Dolores' cultivars, and frilly lace-caps. Depending on the pH level of their soil, bigleaf hydrangeas can change from blue to pink.
- Panicle hydrangeas (or Hydrangea paniculata) can tolerate any weather conditions. They thrive in hot, humid temperatures, but can also survive cold winters. Examples of these are White Wedding and Moon Dance.
- Oakleaf hydrangeas (scientifically known as Hydrangea quercifolia), such as the Tara hydrangea, are lauded for their year-round beauty, large size, and oak-shaped leaves.
- Smooth hydrangeas (called Hydrangea arborescens), including the Incrediball Smooth, produce large, rounded flower heads in white, pink, and green hues. This species grows best in moisture-filled environments.
Are hydrangeas toxic?
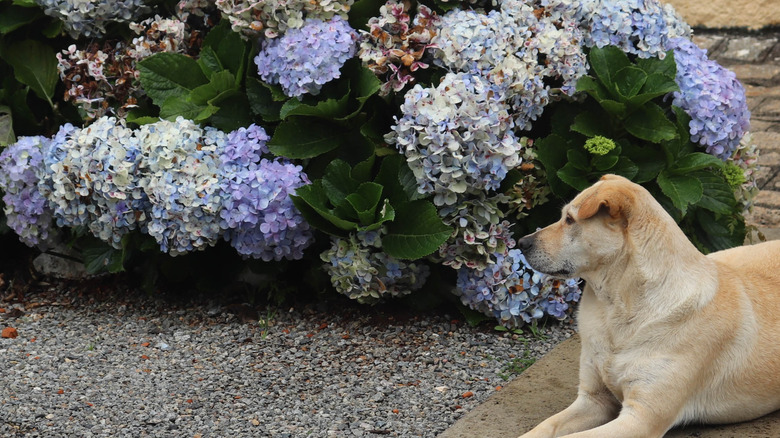
Hydrangeas can be more toxic to animals than to humans. While it's best to keep the little ones away from ingesting any sort of harmful plant, animals should especially be watched over when they're near hydrangeas. Dogs, cats, and horses are the most prone to being affected if they ingest hydrangeas, according to Plant Addict. All parts of hydrangeas are poisonous because they contain cyanogenic glycoside, which causes serious stomach issues. Some clinical signs to look for in your pets include diarrhea, vomiting, loss of appetite, nausea, and fatigue.
Pets become curious of new things they've never seen before. Most of the time they'll sniff around the new object or try to chew on it, so planting your hydrangeas away from where your pets normally wander would be best for their health. If they happen to ingest any part of the hydrangea, check for any symptoms, and, if they have any, take them to their vet.
How to repot hydrangeas
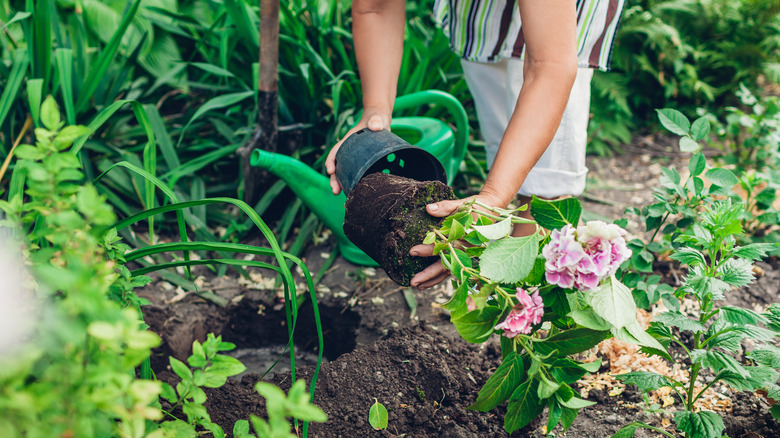
Whether you decide to plant your hydrangeas directly into your garden or in a container, they should be replanted once you buy them. Repotting them into a larger container or directly into your garden helps with their growth. Hydrangeas should be repotted when their roots are starting to grow through the draining holes of the container, according to Garden Guides. Replanting when they're actively growing in the spring or summer provides the best results.
Garden Style has some easy tips on repotting. Start by preparing the soil that the hydrangeas are going to get transferred into. Use a soil that is rich in organic matter and previously acidified. Carefully dig out the plant from the current pot. If you need to pull out the plant because the roots are too long, do so gently, so as to not harm the roots. Prune the plant if needed due to black or rotting roots. Then, place the plant in its new pot covering the roots and stem with soil. This pot should be much larger than the first pot to allow new growth. Keep the new potted plant in a humid environment with plenty of shade for the first couple days. Water only the soil, to allow the plant to get comfortable in its new pot. After a couple days you can move it into a sunnier area.
How to propagate hydrangeas from cuttings
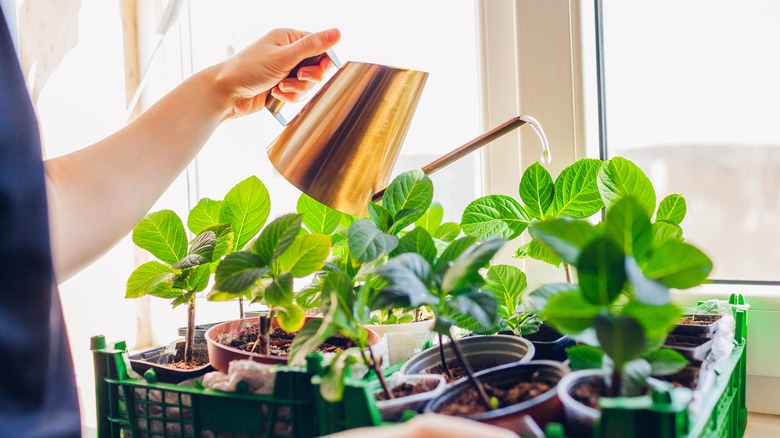
If you've got a gorgeous hydrangea bush flourishing in your front yard, you're probably thinking it's time to make room for a dozen more. There's something about these gorgeous blooms that gets everyone in the neighborhood excited. The good news is that hydrangea cuttings tend to have a high success rate when propagated at the appropriate time of year and given proper care. You'll have the best results with a softwood cutting taken from new growth sometime around late spring or early summer. Head out to the garden with some clean cutting shears in June, and you should be all set.
A healthy hydrangea can withstand quite a few cuttings; you can take cuts from the ends of various stems or cut one long piece and then divide it into smaller cuttings. Either way, make each of your cuts directly above a leaf node. Move quickly back to the garden shed because you don't want the stems to dry out. Trim the lower leaves and dip each cut end in a high-quality rooting hormone before planting them into your grow pots. You want a few of the exposed leaf nodes (where you removed the bottom leaves) to be buried in the soil. Keep the soil evenly moist but never waterlogged, and maintain bright, indirect light and warm temperatures for about four weeks. Established and rooted cuttings should be transplanted into a larger container before adding them to the landscape. This will give them extra time to grow healthy and strong, giving them a better chance at success outdoors.
Common pests and diseases with hydrangeas
Hydrangeas can suffer from a handful of common diseases, often brought on by pests like aphids and red spider mites. Both of these pesky insects can be dealt with by blasting them with the garden hose anytime you see them. You've probably heard of or dealt with botrytis blight and powdery mildew around your garden before, perhaps even cercospora leaf spot, which shows up as tan spots with red borders. The most recommended prevention tips for issues like these are keeping your garden free from debris that could become a welcoming environment to mold and bacteria, watering from below early in the day, and applying appropriate fungicides when necessary.
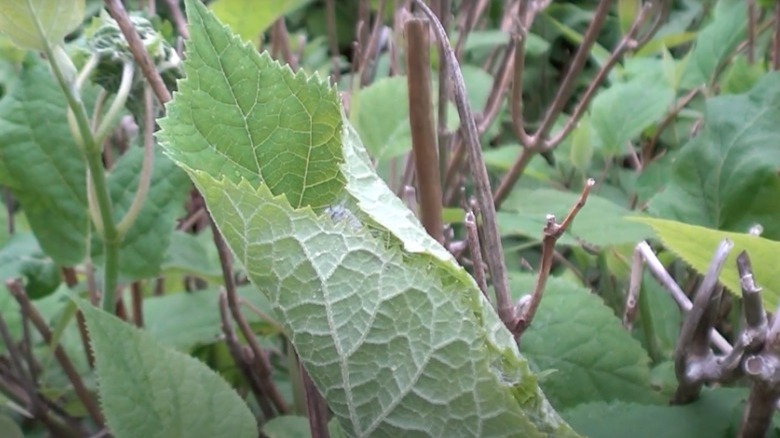
One pest that is specific to these shrubs is the hydrangea leaftier. The University of Illinois Extension explains that you'll immediately recognize the condition it causes because it's so particular. Shown in the image above, a half-inch long green caterpillar wraps itself into a leaf to make a cocoon, sewing it closed with silk as it goes. After its metamorphosis, a brown and white leaftier moth emerges. Ultimately, the damage is unsightly yet minimal. You can individually remove and destroy the caterpillars to save the leaves or just remove the affected leaves entirely. If the problem persists and really starts to bug you, apply a pyrethroid-based pesticide.
Common issues with hydrangeas
Nutrient deficiencies, improper watering schedules, and insufficient light exposure can all lead to problems with the foliage of your hydrangea bushes. Yellow leaves may occur if the soil lacks iron, nitrogen, or magnesium. You can add compost or fertilizer to fix that. If you've tested your soil and checked in with a specialist regarding proper feeding, consider that the yellowing could be due to a fungal disease. Overwatering is a common problem, so check for root rot and poorly draining soil. You might be able to save the plant by allowing it to dry out sufficiently before your next watering. Dry brown edges around leaves are often a sign of too much fertilizer resulting in foliage burns. You can basically wash away the excess chemicals by flushing the soil with water; just be sure to give it time to properly drain and start to dry out before watering the plant again.
Unfortunately, as confirmed by Tennessee State University, if your hydrangea is suffering from a virus such as mosaic or ringspot, it's a sign of a systemic infection, and there is no way to cure it. Leaves will become damaged and discolored, and the plant will continue to suffer. Other signs of viral infections include blistering, reddening, stunted growth, and green blotches from leaf chlorosis.
When and how to deadhead hydrangeas
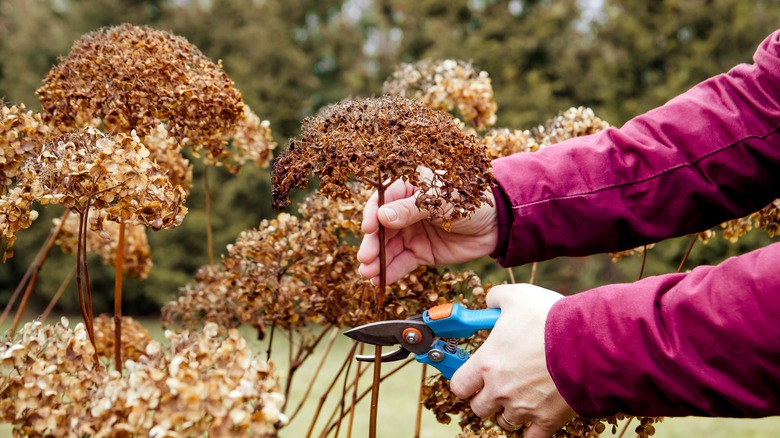
Anytime your gorgeous blooms dry out and turn brown is a good time to attend to the gardening chore of deadheading. Don't put it off for too long as the season comes to a close, because deadheading needs to be done before the end of fall. Removing spent blooms is important because it signals the plants to stop worrying about seed production and, instead, focus their energy and resources on keeping the roots and foliage healthy.
Before starting any new task in the garden, it's recommended that you clean your cutting shears to reduce the risk of accidentally spreading disease-causing bacteria or fungi from one plant to another. Besides your cutting implement of choice, the only other thing you need is a bucket to collect the dead flowers. Hold the stem directly under the spent bloom and slide your cutters down to the first set of leaves to make each cut. If you're certain the entire hydrangea bush is healthy and disease-free, these cuttings can be added to the compost pile. On the other hand, if you have had any trouble with fungal infections or discolored leaves throughout the season, it will be best to destroy the debris instead.
How to protect hydrangeas in the winter
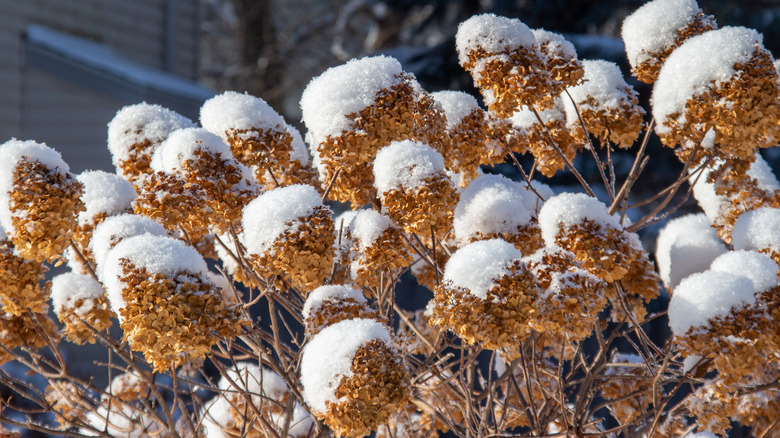
There's a wide range of hydrangea varieties, most of which are cold hardy and can survive a frozen winter. That said, it's a good idea to give your shrubs some love and attention before the temperatures drop so they fare well and are ready to provide you with more stunning beauty come spring. First of all, it's no coincidence that the name hydrangea sounds a lot like hydration. The word comes from the Latin for water (hydro) and pitcher (angeion). These plants require continuous watering right up until the first frost so that their root systems don't get thirsty in the middle of the coldest months (via MasterClass).
Just as winter is about to hit, cover the roots and the base of the plant in mulch. Then consider taking a final step of wrapping the entire shrub to keep it protected from snow and gusty wind. This can be accomplished by creating a simple A-frame with scrap wood or chicken wire. Once the structure is in place, wrap it loosely with burlap. To improve the frame's insulation, fill it with leaves. It should be left in place until after the final frost.
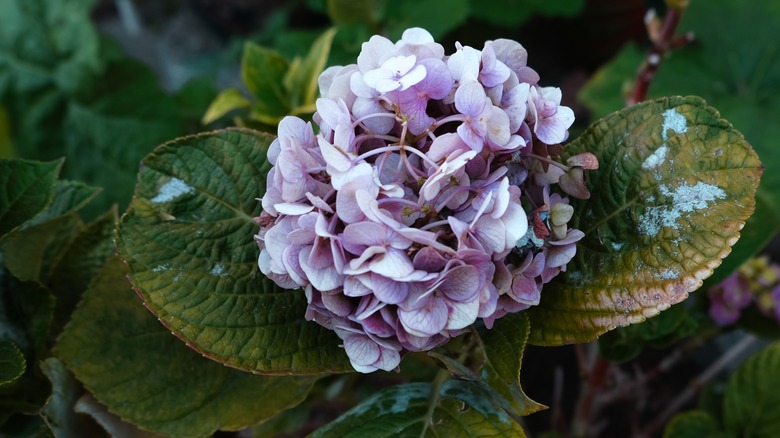
How to control the color of hydrangeas
Blue, white, pink, purple, red, green — something unique and fun about hydrangeas is that they not only come in an abundance of bright colors, but they can also change over time. Like colorings eggs for Easter, you can affect the colors of your blooms by managing the soil's pH level. It'll take a bit of experimentation, so if you're interested in giving it a shot, slide into your chemistry lab coat and get ready to tap into your mad scientist brain. This is a late autumn or early spring project at the latest because you need to appropriately amend the soil long before the plant begins to blossom.
The tools of this colorful trade include aluminum sulfate, garden lime, nitrogen, phosphorous, potassium, and a pH meter. (Check your moisture meter to see if it measures pH before buying a new one.) For blue flowers you need to hit a soil pH level of 5.0 to 5.5 — add aluminum sulfate along with a fertilizer high in potassium and low in phosphorous. Then sprinkle in coffee grounds and acidic fruit peels from the kitchen. If you prefer pink blooms, you'll aim for a pH of 6.0 to 6.5 — go with garden lime as your additive and mix it with a fertilizer high in nitrogen and again low in phosphorous. Hit up the kitchen compost this time for eggshells which you'll crush and mix into the soil (via Garden Design). Have fun experimenting!
Reasons why hydrangeas may not bloom
You may feel excited to manipulate the pH levels of your soil to create blue flowers, only to walk out into your garden and realize all you have is foliage, no flowers. A few things could be going on that would inhibit blooms from developing. First, consider the age of the plant and remember that a young shrub will often refrain from blossoming until it's a couple of years old. A bit frustrating, yes, but also completely normal. Other considerations to bear in mind are proper sunlight and sufficient watering. These plants are thirsty by nature, and it takes even more water to grow flowers.
When you have an older, more established shrub that stops flowering, take a look at the NPK ratio of the fertilizer you're using. NPK refers to nitrogen, phosphorous, and potassium. In regard to plant health, nitrogen encourages lush foliage, and phosphorous gets the flowers blooming. A quick consult with your local extension service or a trip to the nursery will get you on track with the best option.
If you're still not seeing bud development after improving the shrub's environmental conditions and nutritional needs, the problem might be with your pruning practices. There's an art to knowing how to prune hydrangeas. First, you'll need to determine what type you have, meaning old or new wood. From there, you'll be able to figure out what degree of pruning they can handle and whether you should cut them back in the fall or wait until spring.
How to train your hydrangea shrub to grow into a tree
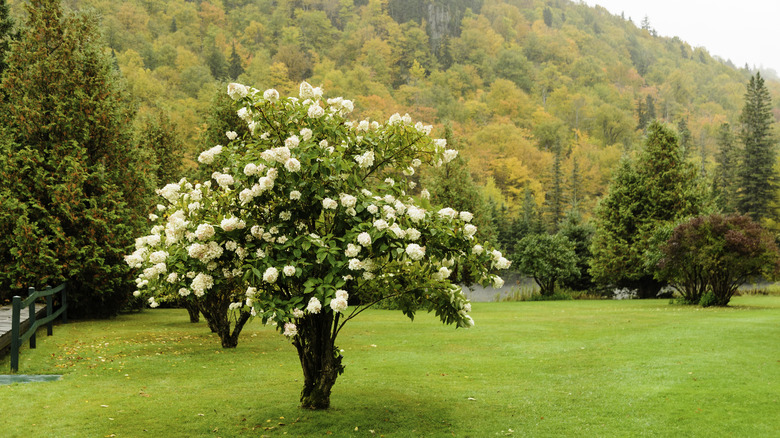
With some focused attention and a vision for the desired end result, a bushy hydrangea shrub can be trained into a flourishing tree, trunk and all. Per Gardener's Path, panicle hydrangeas, sometimes referred to as tree hydrangeas, are the best type for this. Even so, patience is a virtue here — this process can take years. When the plant is very young, start by locating the strongest and straightest stem. This will be your leader, and the rest need to go. Give your leader some support with a sturdy stake and cut the others all the way back to the soil line.
To begin to shape the shrub into a tree, remove strays and suckers shooting out from the crown and continually snip new growth along the leader as it thickens and becomes a true trunk. As your tree grows, keep removing branches that impede the rounded shape you're aiming for with the top. In time, you'll find you need a ladder for this. Also, remember to thin the tree out when and where appropriate to ensure that the inner branches receive sunlight and sufficient air circulation. Give it time, and a beautiful tree will eventually emerge.
Can you grow hydrangeas indoors?
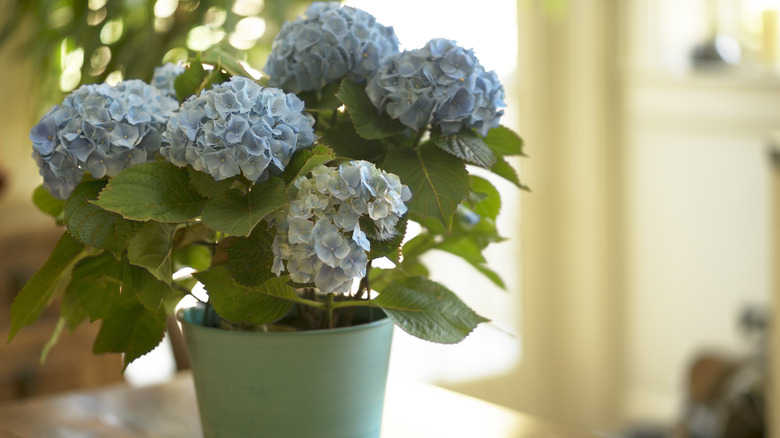
Potted indoor hydrangeas are often considered temporary — enjoy the flowers while they're blossoming and let the plants go when they're done. One reason they don't tend to make it through a winter is that they require 6 to 8 weeks of chill hours, or stratification, to bloom again the following season. Chill hours occur when temperatures hover around freezing for an extended period of time, which is not something you're likely to achieve inside your home. Indoor hydrangeas also need a significantly high amount of bright, indirect light without exposure to harsh, direct sunlight. Remember, too, that hydrangeas drink a lot more water than average plants. Couple that with the fact that container-grown plants dry out faster than those in the ground, and you can see that your plant care routine is getting a bit complicated.
Growers at Bachman's note that dry, hot air may cause damage to the foliage, so you'll need to stay aware of humidity levels in your home. For some, a humidifier may come in handy; for others, you may just need to position the plants away from heater vents. So, yes, hydrangeas can indeed be grown indoors, but brace yourself for a bit of effort ahead of you, and don't let yourself feel like a failure if it doesn't work out in the long run.