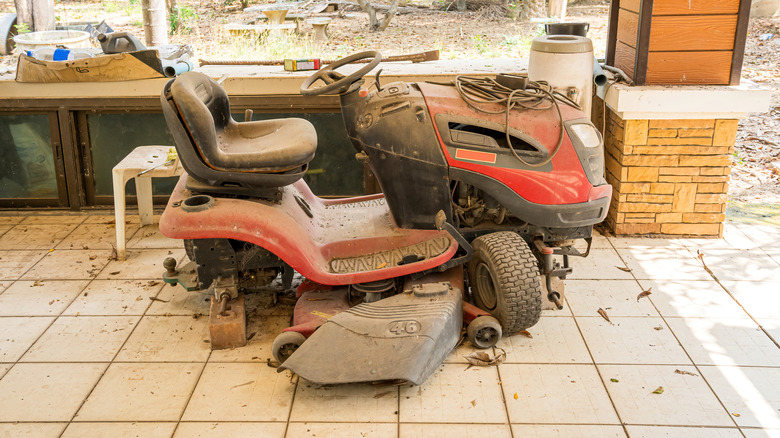
The Lawnmower Maintenance Tasks You Should Be Doing After Every Mow
Lawnmower maintenance lists can be daunting. The older the lawnmower is, the more complex the maintenance list. The more features the lawnmower has, the more complex the list. The less attention you paid to maintenance in the past, the longer the list. Sometimes, the deck seems a bit stacked against you as you try to keep your machine in good condition.
The best approach turns out to be paying more attention, more frequently. In that weird way some carpenters talk about their tools, caring for a mower is more about your relationship to the work than to the maintenance tasks themselves. The goal is to be in tune with your push or riding mower, and the way to do that is by giving it a good going-over every time you use it. Fix what you notice when you're using or inspecting the mower, even if the problem seems minor, and you'll stay ahead of the game. It really comes down to just a few tasks ... cleaning the deck, cleaning the air filter, keeping the blade(s) sharp, checking the oil, and just keeping an eye on everything else.
Maintenance lists are usually organized by period — things to do before or after every use, things to do monthly, and seasonal or annual tasks. A lot of the inspection chores commonly put in the annual or seasonal bucket make far more sense in the "after every use" bucket, because annual maintenance doesn't mean you can ignore those items the rest of the year. Relegating tasks like "check and tighten loose bolts" to an annual task is absurd. What you're essentially doing is using a mower with a loose screw for 364 days.
Cleaning the mower deck, top and bottom
It's easy to understand why anyone finishing up their half-acre of push-mowing on a 92-degree-Fahrenheit day will balk at standing in the sun even longer to clean the mower's deck. But there are good reasons to do it ... and the fact that you can also give yourself a good spray with the garden hose isn't the least of them.
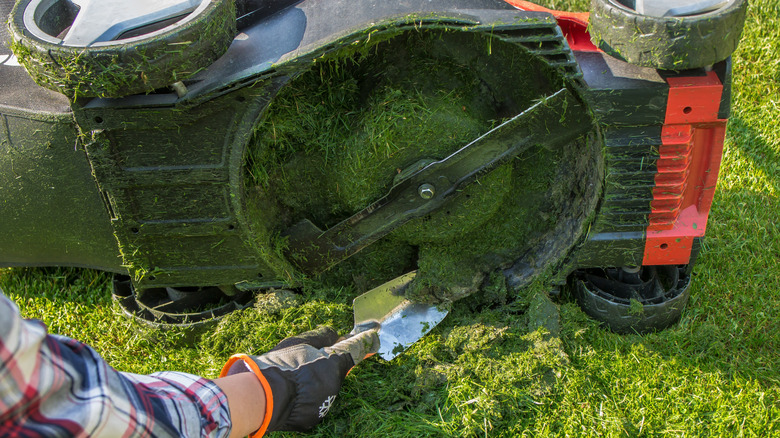
But the mower deck itself really does need a good washing, as well. You don't need to scrub it with a toothbrush; it's still a lawnmower, after all, and if yours isn't a little dirty, everyone will think you're a lawn maintenance YouTuber. At a minimum, you must rinse the mower deck, top and bottom, along with the blades and the discharge chute ... but it's also a good time to clean your entire lawnmower from top to bottom. This is easiest to do if your mower has a deck wash port that connects to your garden hose, but it's simple enough even if your mower lacks that feature. Just let the mower cool down, then spray every surface down and wipe or scrape away any debris and grass clippings. Vinegar is a household staple you can use to clean grubby lawn equipment if you need a little extra cleaning power.
The reasons for cleaning your mower are simple. Obviously, left uncleaned, the clippings will turn into a kind of fescue papier-mâché attached semi-permanently to your mower, which will be a pain to remove later. But more importantly, leaving those moisture-filled bits stuck to your mower blade, deck, and other parts invites rust and corrosion, shortening the life of your mower and making future maintenance even more challenging.
Clean the mower air filter
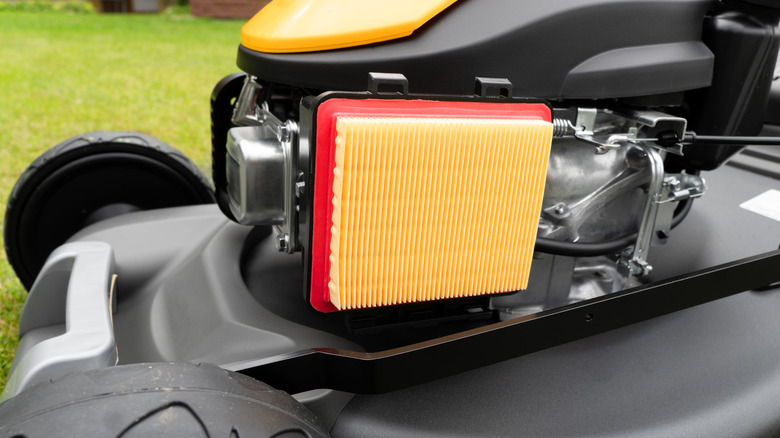
Your lawnmower's air filter is easy to ignore, but it does the important work. It keeps airborne particles from getting into the mower's carburetor and engine, where it can gum up the works and ultimately reduce fuel efficiency and potentially damage the engine. What we're talking about here is foam air filters. Paper filters are meant to be disposable. You can (and should) buy some time by tapping or blowing out paper filters regularly, but you're not cleaning as thoroughly as you think, and you should replace them regularly. The same goes for the paper filter in dual-element hybrid air filters.
The foam filters (or pre-filters, in the case of hybrids) can be washed, and it's not difficult. Start by disconnecting or removing the spark plug, which is a good first step with any engine or blade maintenance. Remove the housing over the air filter. Remove the filter itself, and submerge it in a mixture of water and a little mild dish soap, then squeeze the water out; repeat this step as necessary.
Next, submerge the filter in clean water, and squeeze it out several times. Wring water from the filter, and press it with a towel to get the last of the moisture. Place the filter in a zipper-top bag with a capful of four-stroke engine oil, seal the bag, and work it with your fingers until the filter is coated with oil. Then, simply replace the filter, filter housing, and spark plug/wire.
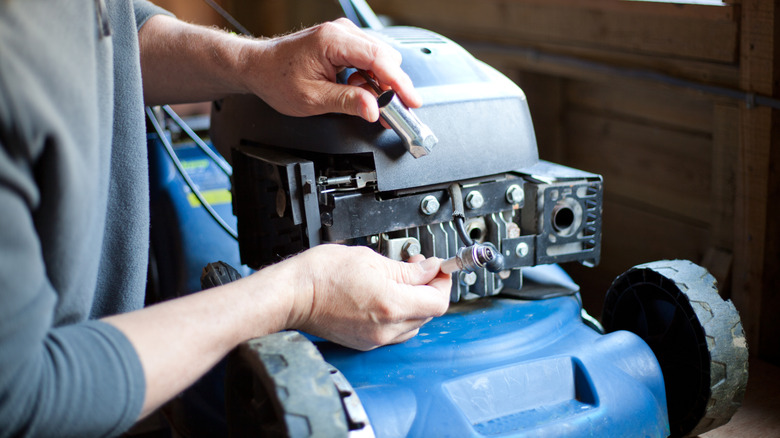
Inspect and sharpen the mower blades
Mowing your lawn with dull or damaged blades is like wrapping gifts using terrible scissors — but at 3,000 RPM. You can discover that your blades need sharpening by the way they cut your lawn. If the mower tears the grass rather than cutting it (or if it passes over swaths of grass without cutting or tearing at all), it's time to sharpen the blades.
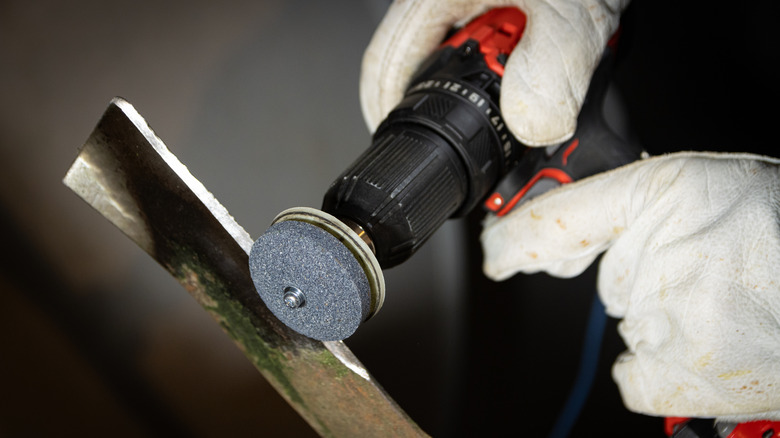
If your blade needs sharpening, start by disconnecting the spark plug. Remove any remaining gasoline from the tank, then set the mower on its side with its carburetor and air filter assembly on top. Mark the bottom of each blade at this point, so you can put it back on correctly later. Use a ratchet, air wrench, or impact driver to remove the nut that holds the blade on. If necessary, wedge a length of wood into the blade area to prevent the blade from turning. Clean the blade, and remove any rust with a rust-removal product.
You're finally ready for the actual sharpening. Don protective gear, like gloves and eye protection, then clamp the blade into a vise with its cutting edge on top. Sharpen the blade according to your preference (with a file, a rotary tool and attachment, an angle grinder, etc.) to the sharpness of a butter knife; any sharper is counter-productive. Since you're removing material from the blade, check its balance before you reinstall by attempting to hold it by its center hole on a thumb or knuckle. Bolt it back on if everything looks good.
Check and add engine oil
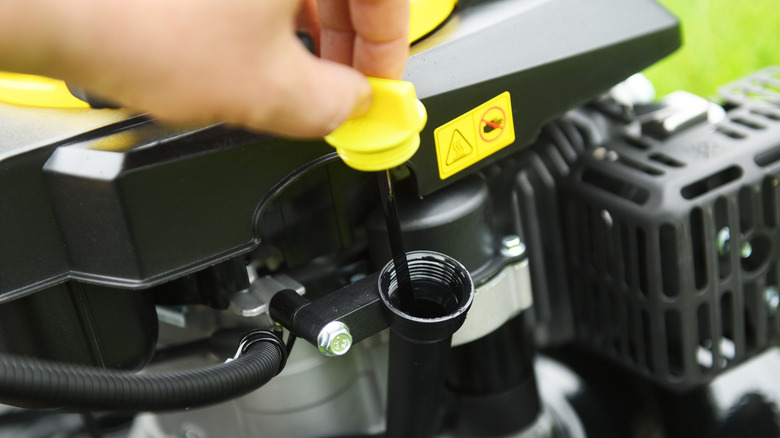
You know someone, or at least know of someone, who never changed or checked their car's oil and eventually blew up the engine. This isn't a topic for Overstatement Corner, folks; there's no more serious maintenance issue for an internal combustion engine than checking the oil and adding more as needed. Fortunately, it's not difficult, and all you need is to have a little four-stroke engine oil on hand — and perhaps a paper towel.
Find the engine's oil fill cap; they're often yellow and can be removed easily by hand. Before you go any further, clean the area around the cap, then you can remove it. Depending on the model of mower you have, you will determine the engine's oil level either by inspecting a dipstick attached to the oil fill cap or by sighting into the fill tube to determine if the oil is at or near the fill line. Consult your owner's manual for detailed instructions. Dipsticks typically need to be cleaned with a dry cloth or paper towel, reinserted, and then removed again to get an accurate read on the oil level. Add oil as necessary to bring the engine's oil up to its prescribed level.
Inspect everything you would like to keep working
The final task you should do after every mow isn't much of a chore, though it can occasionally lead to challenges. What you're going to do in this phase is look the lawnmower over. You're basically inspecting it for current or developing problems, and there turns out to be a surprising number of things to check. Pay particular attention if you've noticed any strange noises, vibrations, wobbles, smoky exhaust, or anything else out of the ordinary. And remember: If you find signs your lawn mower needs to go to a professional to be fixed, there's no shame in doing just that.
You can use a checklist if it helps, but you're basically giving everything a quick look. Check the condition of cables. Make sure your battery terminal connections are secure, and tighten any loose bolts, nuts, and screws anywhere you find them. Look around for potential fuel and oil leaks. If you've noticed the engine starting or running poorly, remove the spark plug, check it for black carbon deposit, and set its gap if you do that sort of thing.
Riding mowers, unsurprisingly, have a significantly longer inspection checklist than push mowers. You'll want to check the tires' pressure and tread, and make sure all the wheels' lug nuts are securely tightened. Check all belts for wear and alignment to their pulleys, and have a look at the pulleys themselves as well. Finally, check the garage fridge for a cold beverage. That water you sprayed yourself with earlier has already evaporated.