Installation Mistakes To Avoid With Your DIY Landscape Edging
We may receive a commission on purchases made from links.
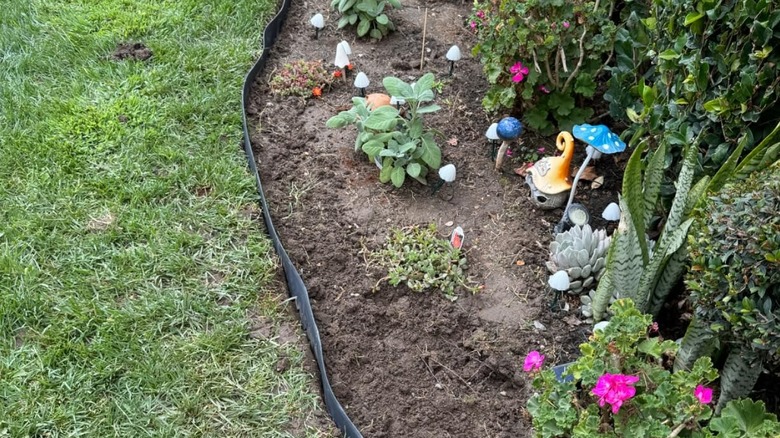
Installing edging around your lawn, walkways, and gardens is key to a gorgeous and well-designed exterior. These decorative and functional outdoor features come in many materials and styles, adding decorative appeal and subtle organization to landscaping features. Many people opt to install these borders themselves, which provides more creative freedom and cheaper costs. Fortunately, there are multiple landscape options that are DIY-friendly as long as you know what you're doing.
It's important to understand the landscape edging material you're working with and how to avoid mistakes throughout the installation process. It takes a multi-step project, no matter the material, to ensure a sharp DIY lawn edging job. Prepping the space, following the correct directions to install it, and securing it correctly are all essential steps to create long-lasting and visually appealing results. However, there are some common mistakes people make when installing landscape edging. So before you start the project, learn about different garden edging ideas that make for the perfect landscape, and how to perform a professional-looking job.
Not considering the natural flow of water
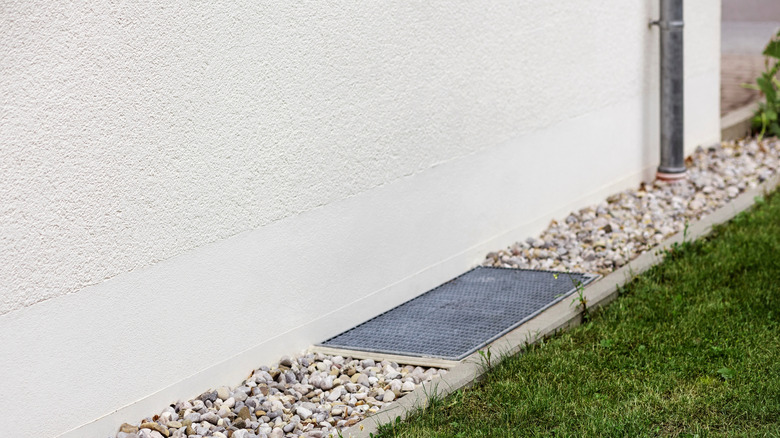
Remember that no matter how well you DIY your landscape edging, it's still at the mercy of outdoor elements. Storms and rainfall are inevitable, and if water doesn't have anywhere to go, it can pool and put pressure on your edging installation. This can dislodge the material and cause unsightly gullies instead of neatly-edged borders.
There are several workarounds to ensure water can properly drain without eroding your landscape design. Drill holes in plastic edging, grade surrounding soil to flow in a specific direction, or create a gravel trench to run alongside the edging. Planting native plants with deep roots around the borders of beds can help absorb excess water. You can also add compost, mulch, or more soil to lower areas, leveling the land so water doesn't pool in one corner. Just be careful not to accidentally bury the material if you use a low plastic design. This option is better suited for more decorative materials, like masonry or lumber.
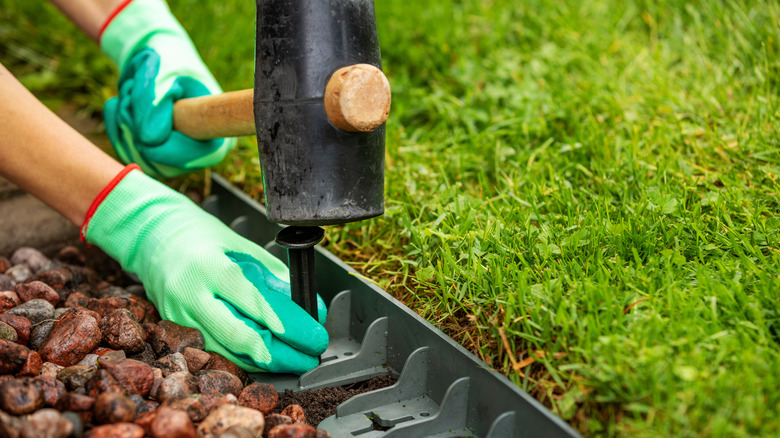
Failing to anchor plastic and metal landscape edging
Another common mistake among landscaping DIYers is trying to cut corners by not anchoring the material. The material may seem sturdy when you first set it up, but anchors are necessary to keep metal and plastic landscape edging from shifting over time. During the winter, freezes cause soil movement, which can dislodge unsecured edging. High traffic areas are also highly vulnerable to this problem, since constant movement disrupts the soil. Both circumstances can lead to uneven boundary lines,
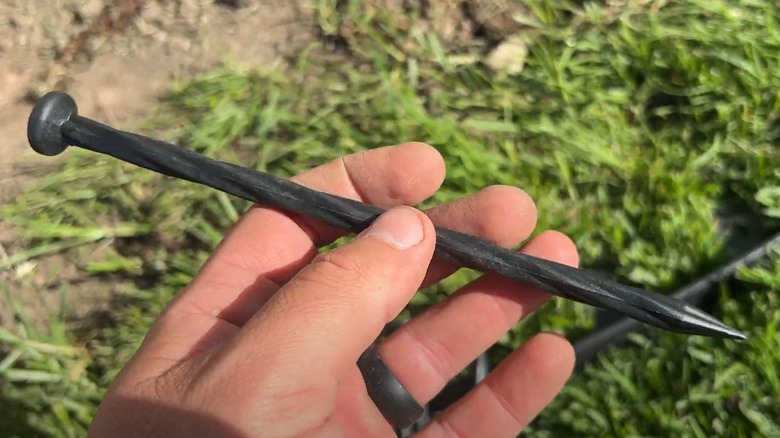
Fortunately, many materials come with anchors, nails, or stakes to secure them in place. If your material doesn't come with anchoring materials, you can find them separately at home improvement stores, big box chains, and online. For example, Orvpmvp's Metal Landscape Edging Stakes are a good choice for holding thin-profile edging down from the top. On the other hand, Neuermond's Plastic Landscape Edging Anchoring Stakes are shaped like nails and are useful for securing materials with pre-drilled holes into place.
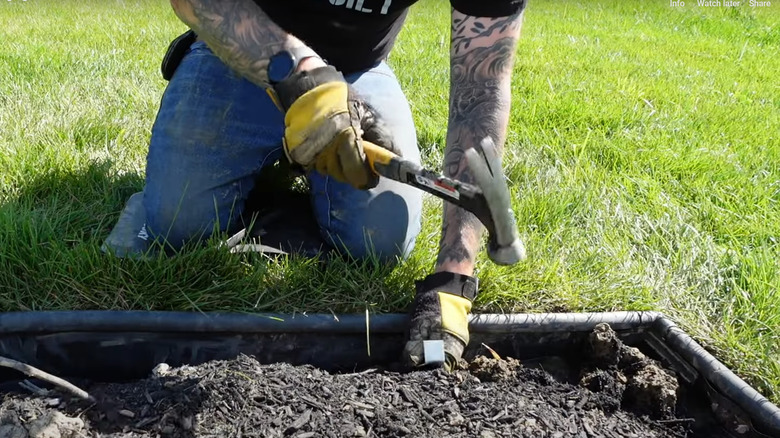
Carelessly installing stakes with large gaps and at the wrong angles
Purchasing the right garden stakes is only half the battle. You also need to install them with care, placing them close enough to seamlessly hold the edging in place. Flexible edging material benefits best from stakes placed closely together, which keeps it running in a straight line. You also have to install them at the right angle to ensure they stay properly affixed in the ground.
When lining up the stakes, angle them at a 25 to 45 degree angle. Insert them about two to three feet from one another to ensure the setup holds up over time. The curve of the garden bed should have a natural contour, and the secret to maintaining a smooth curve is to place stakes in regular intervals from the beginning to the end of the rounded path. Yaneyrie's Landscape Anchoring Spikes come in packs of 25 to 350, giving you a range of quantities to choose from.
Neglecting to remove rocks and tree roots from the trench
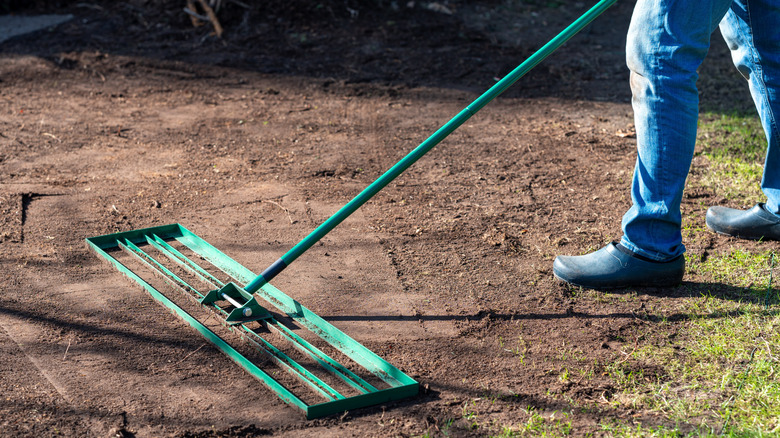
Like most landscaping projects, the best results come from a blank canvas. So, clear your space before you start edging a landscape. Natural debris like branches, roots, rocks, and twigs must be removed before you begin. Otherwise, the edging won't sit properly. Move these items out of the way and smooth out the soil to make laying the material easier and create a more attractive final product.
Unless you have excessive amounts of debris littering your yard, common yard tools are all you need to clear out the area. Use a hoe, rake, or shovel to remove small to medium rocks or other hard objects from the soil. If a particularly large rock or boulder stands in your way, it may take more than a basic tool to dislodge it. In this case, consider renting a mini excavator. Tree roots may also be in the way of your landscape edging's intended path. Smaller roots can be removed using a hatchet, such as Fiskars' IsoCore Pickaxe Mattock with Shock-Absorbing Handle.
Improperly fitting connectors on edging or not using them at all
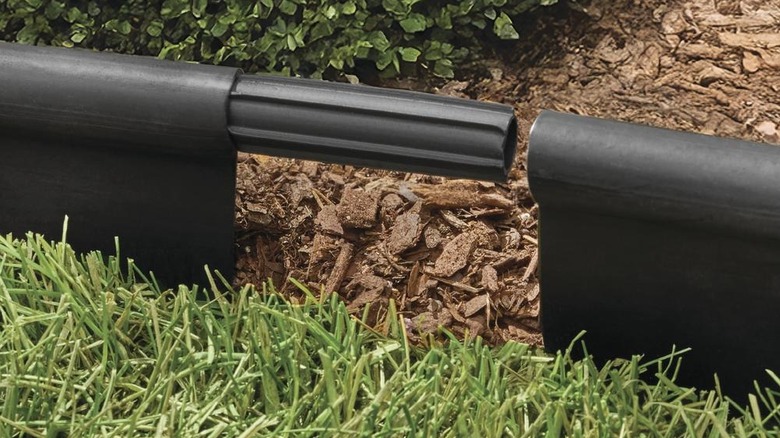
Larger gardens and landscapes may require longer strips of border material. In these cases, connectors are necessary for a seamless look. These combine landscape edging pieces end-to-end and are also useful for creating 90-degree angles in a border with sharp edges. When they're securely connected, they ensure there aren't gaps or unattractive, sharp bends in the material.
When putting two linear pieces together in a straight line, push the connector halfway into each piece. For example, if using an eight-inch connector accessory, you would push it four inches deep on either side. When dealing with a 90-degree angle, push the end of the two edging pieces you wish to connect into either side of a corner coupler. If you struggle to find a connector in-store in your local area, you can find designs like Master Mark's Pro Corner Coupler and other models on Amazon.
Choosing a landscape edging material beyond your skillset
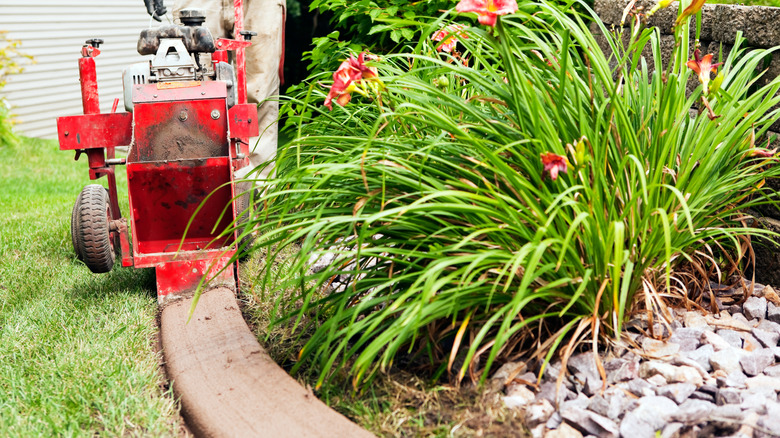
Before starting a DIY project, it's important to be honest with yourself about your capabilities. Don't choose an edging material that requires specialized techniques to install unless you are willing to put in the extra work or take the time to learn new skills. For example, concrete and brick tend to require more precision or special tools, making them more difficult projects to pursue. Stone has a gorgeous aesthetic and gives your landscape a French feel, but it's a bulky material to maneuver. All of these materials also tend to be heavier than plastic and wood and require more physical labor.
Ensure your DIY garden edging is doable by sticking to options that are best for your skillset. Plastic, no-dig, and pound-in designs are the best choices for beginners. It's flexible enough to make curves and straight lines as needed, and products like Garden Zen's No-Dig Plastic Landscape Edging Kit include the anchors for holding it in place. EasyFlex's Pound-in Landscape Edging also comes with anchors and has a similar straightforward design with spikes along the bottom to help keep it secure.
Not working out the correct depth at which to bury your edging material
Different landscape edging designs and materials are meant to be installed differently; therefore, the recommended depth can vary. When installing one that's partially obscured underground, make sure you aren't inserting the material too much. If buried too deeply, a landscape border won't be clearly defined, which can affect the aesthetics. This can also cause the line to shift over time. The same problem can occur if it isn't buried deep enough and only has a shallow layer of soil constraining it.
Remember to bury your landscape edging according to the product instructions. A wood material like Linshry's Wood Garden Fence is mostly decorative. Therefore, only the wooden stakes should be buried beneath the ground, with most of the wood panels displayed up top. Products that serve functional purposes over decorative ones will require a different method. Basic plastic and metal landscape edges without special designs or stylistic features are designed to function below the ground. They prioritize blocking root and weed growth while retaining the soil, and can be installed a bit deeper. An example is the Grass Barrier 10 Inch Landscape Edging, which has three installation methods: the standard, low-profile, or flush method. All of these approaches are mostly or completely inserted into the ground.
Not mapping out your landscape edging before you begin
One of the most important steps of doing your landscaping yourself is planning ahead. Mapping out the route of your edging before you start ensures you gather the right amount of supplies, including the primary material, stakes, and connector pieces. This also gives you the chance to make adjustments before putting in the work, so you don't waste time uprooting and re-installing this feature.
A rope or garden hose can give your DIY landscape a professional look. Uncoil whichever you choose to use, and run it along the intended path. Take note of any corners or curves. If there are sharp corners, remember that you'll need the right connectors for your edging material. On the other hand, you'll need a more flexible product if you'd like to create soft and gradual curves. Before stowing away the hose or rope, spray paint the intended path so you have a visual guide when laying the landscape edging.
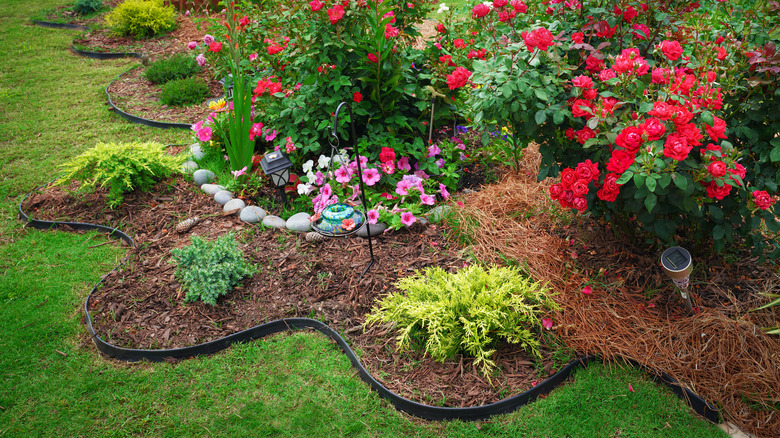
Using too many materials for your garden edging

This tip is for the more indecisive DIYers out there. Don't use too many materials to craft your landscape's edging. Simple designs are more practical and attractive to look at, and too many styles and material types won't look cohesive. Different materials also vary in their strengths and weaknesses, require different installation methods, and have separate upkeep needs, which complicates the initial install and future maintenance.
Minimize the types of landscaping materials used throughout your property to avoid a busy look. Your trees, shrubs, and flowers should be the focal point of your landscape design, not the border that surrounds them. Ideally, you can find an edging design that works for various areas around your yard, serving both decorative and functional needs. However, there may be a time when certain areas may need a completely different material. For example, if you're having trouble keeping weeds or water runoff away from a newly planted tree, you may need to surround this spot with a heavier-duty edging, rather than the decorative one that was used for the rest of your landscape. Or, you may have wooden logs bordering all of your garden areas. Wooden logs aren't flexible, so they cannot curve around rounded walkways and paths. Instead, you'll need to resort to a more flexible plastic or rubber edging to properly conform to these curves.
Picking an edging material without considering your local climate
Landscape edging is available in various materials for both aesthetic and functional reasons. Specific types are better for certain climates and situations. Untreated lumber edging is prone to rot and pests, making it less ideal for humid climates. In contrast, plastic resists these issues, but is more vulnerable to freezing temperatures, which can make it brittle. This makes plastic less practical for cold climates with harsh winters. Treated metal is great for many climates, but is still prone to rust, so it may not be ideal for coastal areas. With too much water and humidity, treated metal can still erode over time. In other regions with less extreme amounts of humidity, rainfall, and salt content, metal could develop a light patina rather than corrosive rust.
Before selecting a material, consider these pros and cons in accordance with where you live. Residents of humid and coastal climates should avoid lumber and metal. Instead, they should choose plastic or rubber, which will hold up better, especially if their winters aren't too severe. People in dry, cold climates can more safely pick metal or wood. Just keep in mind that metal can be difficult to work with as a DIYer. If you take this route, make sure you pick an aluminum material, which isn't as hardy as steel, but is much more flexible.
Not buying the correct tools for the job
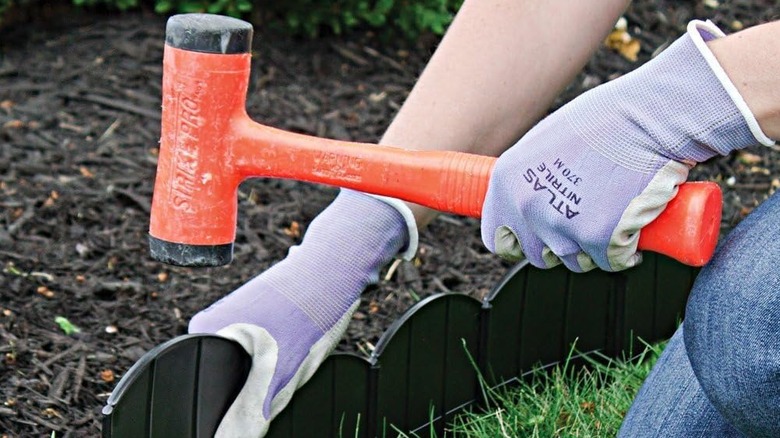
DIYing landscape edging is a great way to cut costs, but don't let a strict budget override your need for basic tools. Buying (or borrowing) tools is still cheaper than hiring a professional to do the installation, and you shouldn't skip this necessary step. Using the wrong tools can lead to sloppy results. For example, using a hard hammer to pound in plastic stakes could destroy and disfigure the material.
Rubber mallets, such as the Lozagu Rubber Mallet Hammer, are good for installing pound-in and staked edging. This tool also comes in handy for creating curves in flexible metal without cracking it. A simple level, like a Craftsman Beam Level, is fairly cheap and can also help you make sure your garden or walkway follows a flat line. Even comfort purchases like a foam landscape pad may not seem necessary, but it will make the job easier and less strenuous on your knees, which can lead to better results.