The Budget-Friendly DIY That Makes Dated Popcorn Ceilings A Thing Of The Past
We may receive a commission on purchases made from links.
Nubby popcorn ceilings were once a common way to add texture to drywall and diminish the appearance of imperfections at the top of the room. These ceilings are ubiquitous in mid-century homes, in particular, where many of them still remain, much to their current owner's chagrin. It's often difficult and messy to make a smooth surface, involving a complex scraping and repainting process that can be derailed by hidden downsides of popcorn ceilings, like asbestos concerns in older homes. Keeping them, however, can have long-term effects on your home's resale value. Luckily, there are some great ideas for covering these ceilings up and forgetting about them, which can be done with a variety of materials, including easy plywood planks installed over the popcorn finish. Even better, this DIY does not cost much, making it perfect for small and large-scale ceilings alike.
Sheets of 1/4-inch plywood typically run less than $30 dollars for 4-foot by 8-foot segments, which can be cut down for the project as needed. Measure how much you will need, and account for moldings and trim, which can be created with inexpensive 1-by-4s in your desired choice of wood. You get the same look as pricier shiplap or tongue-and-groove ceilings at a fraction of the cost with this easy DIY that expertly covers dated popcorn ceilings.
Installing plywood planks over popcorn ceiling
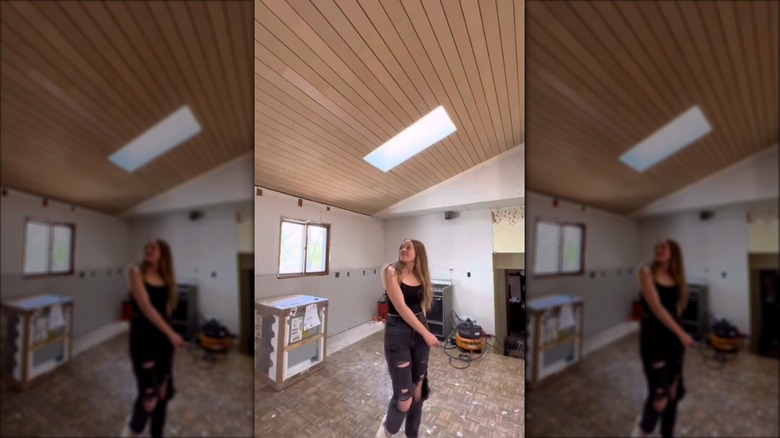
One of the easiest ways to create a paneled ceiling over popcorn is to use segments of 1/4-inch plywood, which can be cut down from larger sheets. Remove any ceiling fixtures, and measure and mark your panel placement so the seams are symmetrical and properly aligned on the ceiling. Using planks cut from sheets of plywood allows you to fully customize the width of the planks you cut. Once you have cut the segments, stain and paint them as desired. Bright white can give your home a farmhouse look, while lighter wood stains can complement more modern and boho style rooms. Go for deeper stains if you want a more traditional look. You may also want to paint your ceiling black or another fitting accent color first for a more cohesive look where the boards come together.
Add liberal dabs of a construction adhesive, like Liquid Nails, to the back of each piece to attach them, using spacers to get them equally distanced from each other. Then, use a nail gun to attach each segment to the joists to secure them fully. At the edges of the room, use segments of inexpensive lumber, sanded and painted the same shade, to serve as trim. If you start your planks in the middle of the ceiling, working outward, the trim will hide any uneven edges you may encounter as you reach the perimeter of the room.
There are variations of this project that use larger sheets of beadboard, allowing you to get the look of slender cut planks and install larger segments in one go. For a rental-friendly solution, you can also use a mounted track system that allows you to float the pieces along a rail attached to the studs