Why You Should Never Skip Orange Oak Furniture At The Thrift Store (Despite What You've Heard)
We may receive a commission on purchases made from links.
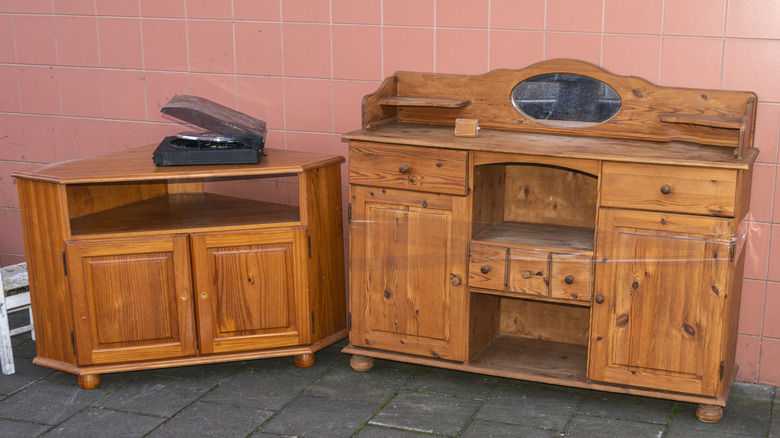
Wood stains with orange undertones were the desirable furniture finish for most of the 20th century, but since the 2000s, that golden hue has become less and less popular. Even with the resurgence of mid-century modern aesthetics in fashion and interior design, the particular orange hue found on many vintage oak products is not seeing any love. Trends aside, the rich orange stain that covered everything from wood floors to furniture for decades is difficult to match, leaving designers and homeowners resentful of a color that seems to fit nowhere in a modern home.
However, if you spot a promising piece of furniture at your local vintage shop, don't pass up on an otherwise fantastic item simply because of its hue. Wood is a beautiful and versatile material that can be molded and changed in a variety of ways. That Garfield-colored oak table you found at the thrift store is not a lost cause — quite the opposite. Oak furniture, especially solid oak furniture, is valuable and durable. With a little elbow grease and a lot of sandpaper, you can take a table from outdated to refinished showstopper.
How to remove orange finish from oak furniture
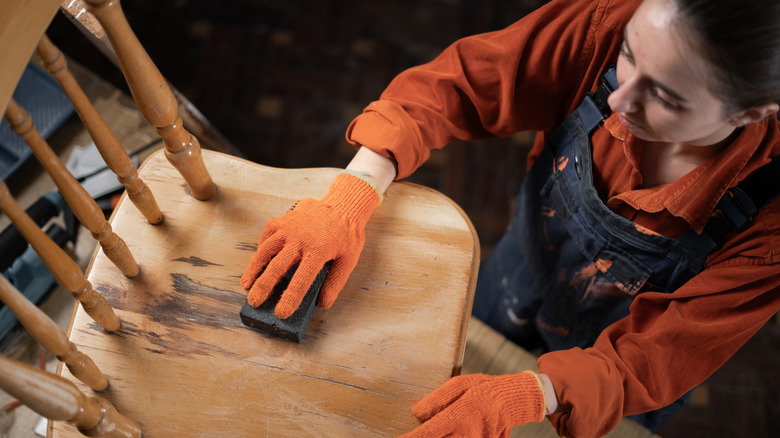
To refinish oak furniture, you'll need to strip it down to the original wood, revealing the distinct and sought-after grain. Coat the piece with a paint and varnish stripper like Max Strip Paint and Varnish Stripper or the less caustic Citristrip Stripping Gel, which will remove thick layers of old paint or varnish before you sand. During the application process, make sure to wear gloves to protect your fingers. After application, wrap the furniture item in plastic to keep it moist, as stripping gel stops working when it's dry.
Follow your product's instructions to give the stripping gel enough time to set. Then, scrape the product — and the old finish— off with a scraper tool, and wipe the piece down with mineral spirits, which will neutralize and clean away any remaining residue. Beginning with 120-grit sandpaper, sand the entire piece, repeating the process and gradually increasing the number until you reach 220-grit, a super fine sandpaper that is ideal for staining. Though time-consuming, skipping this step is one of the most common mistakes when sanding wood projects. To get into any grooves or rounded edges, use a foam interface pad on your orbital sander. This pad conforms to tricky corners that are tedious to sand by hand.
Give your oak furniture a modern upgrade with stain
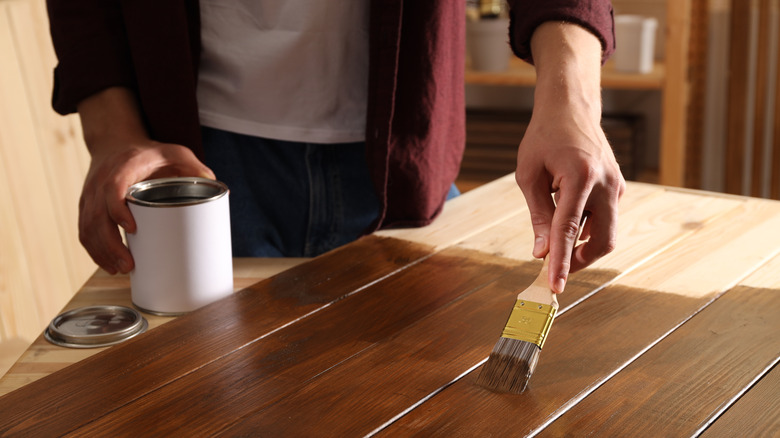
Staining your oak furniture will allow you to transform it into a modern statement piece. Before you pick your stain, dust off any sanding remnants and take a good look at your wood. Oftentimes, only two types of oak are used for making furniture — red oak and white oak. In recent years, white oak has become more desirable, as it has a natural grey-beige or "greige" undertone. However, red oak is especially common for older furniture. Red oak's pink undertones will be highlighted by any warm stain, so you will need to choose your stain strategically if your goal is to produce a cooler shade.
Social media is full of tips on how to make the perfect beige paint wash for wood furniture, but there are ways to neutralize warm undertones with stain. To cool down orange or red wood tones, use the color wheel to find the opposite shade, which in this case would be green. A video by Sawinery Woodworking suggests using Varathane Premium Fast Dry Wood Stain in the color "Rustic Sage." Apply it to the wood and wipe it off before it has time to set, and layer a darker stain over the sage green for an even cooler result. True orange and yellow tones can be treated with a blue stain like Varathane's "Bleached Blue." If you like the look of bare oak wood, apply a clear finish over your sanded surface, which will still draw out the pink tones in red oak, but with a fresher, more modern result. Make sure to test your colors in an inconspicuous place before you commit to staining the entire piece. If your furniture has a lot of nooks and crannies, apply your stain with a spray bottle — a clever hack that'll make staining tight spaces so much easier.