How To Repair A Ripped Lawn Mower Grass Bag
We may receive a commission on purchases made from links.
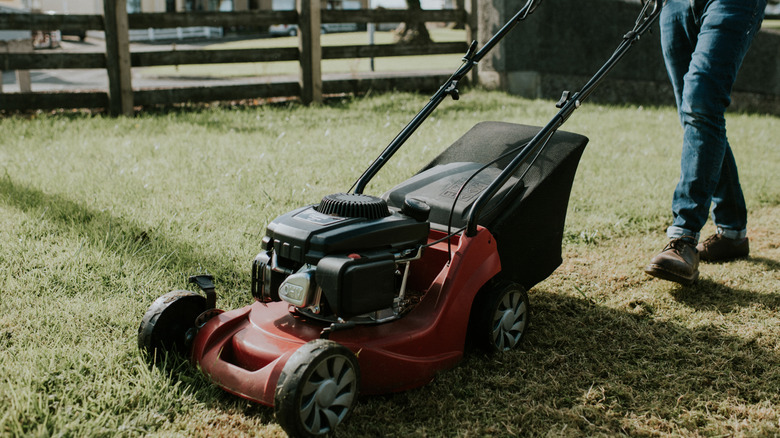
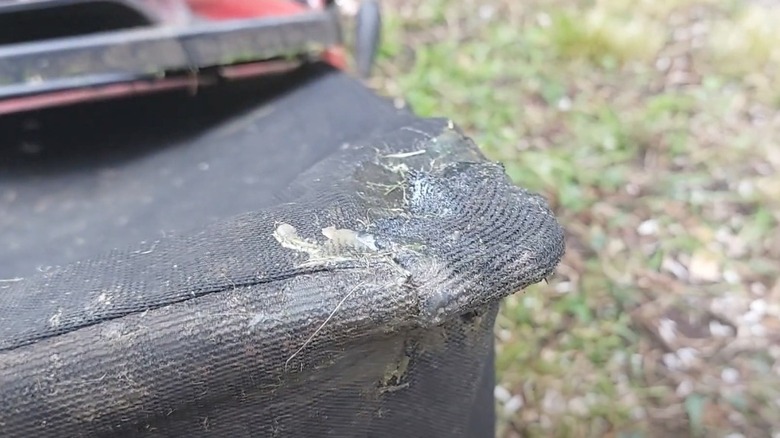
Lawn mowers come in different sizes and variations. There are compact push mowers that are ideal for maintaining small spaces and riding lawn mowers that allow you to sit comfortably while cutting the grass. No matter the kind you have, maintaining mowers typically involves ensuring all components are in tip-top shape. However, there's one element that's often overlooked until a problem arises: The lawn mower bag. Designed to catch any grass debris produced while mowing, these bags can truly simplify an outdoor maintenance routine. So, what do you do when that bag becomes damaged? There are several approaches to fixing a mower bag, including using a two-part epoxy patch DIY, as well as stitching or using an outdoor fabric tape.
Before diving into a DIY fix for your lawn mower bag, it's important to understand the different types of bags or attachments available. The most notable differences between mower attachments are the material used for the structure itself. Fabric and mesh bags are more common (and the focus for these DIYs), yet there are more sturdy options like hard plastic or composite catchers. Regardless of your attachment type, there are some types of glue you can keep on hand at home to help with repairs like this. For fixing fabric and mesh mower bags, you'll need to have a two-part epoxy on hand, like Gorilla 2 Part Epoxy.
Use a two-part epoxy DIY to fix a ripped lawn mower bag
The first step to repairing a ripped lawn mower bag is to gather the supplies: The two-part epoxy and some sort of scrap fabric for the patch. Start by cutting your chosen fabric slightly larger than the size needed to cover the damaged area. Next, prepare the epoxy product according to the manufacturer's instructions. Be sure to wear gloves when working with epoxy and work in a ventilated area. Epoxy adhesive may be a handy product that can repair (almost) anything around the home, but it's still important to use safety precautions else you may mar the success of your repair with an avoidable home accident.
Detach the mower bag from the mower, then work carefully to apply the adhesive patch over the ripped area. It might be helpful to brush the epoxy across the fabric to create an even seal, though this method is more about practicality than final appearance. Be sure to lay the bag flat while the adhesive sets. This can take around 24 hours to dry, but in some cases it may take several days to fully cure. While this DIY repair may not look as polished as a new bag, it serves its purpose to keep grass clippings contained and saves you from having to replace the bag altogether.
Additional methods for repairing a mower bag
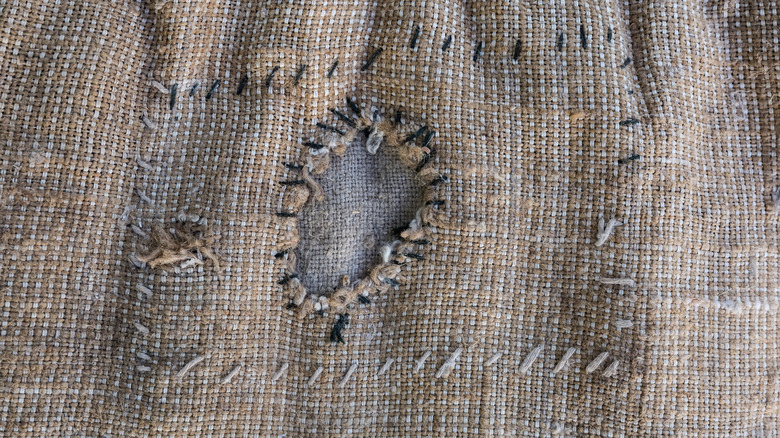
There are additional repair methods to try for those who don't want to run out and purchase an epoxy adhesive. For example, one traditional method you can use to fix numerous types of rips and tears is to grab a needle and thread to stitch up the opening. However, you'll want to opt for a heavy-duty thread to help it withstand the outdoor elements during use. Also, for very wide tears, you'll need to sew on a similar sturdy fabric to cover the hole. One added benefit of this DIY fix to a crafter is that it's a great opportunity to practice stitching where appearances don't matter.
Another fix for a ripped mower bag is to use an outdoor fabric tape to temporarily seal any damage and make the bag usable. A heavy-duty product like Gorilla Double-Sided Tape is also suitable for outdoor projects and can make repairs easier for those who don't have time for more involved DIY methods. If you're working to repair your ripped mower bag and can't mow the lawn, there are quirky fixes, like the hands-free TikTok mowing solution, you can try in the meantime.