Keep Shoe Clutter Neat And Tidy With An Affordable Dollar Tree DIY
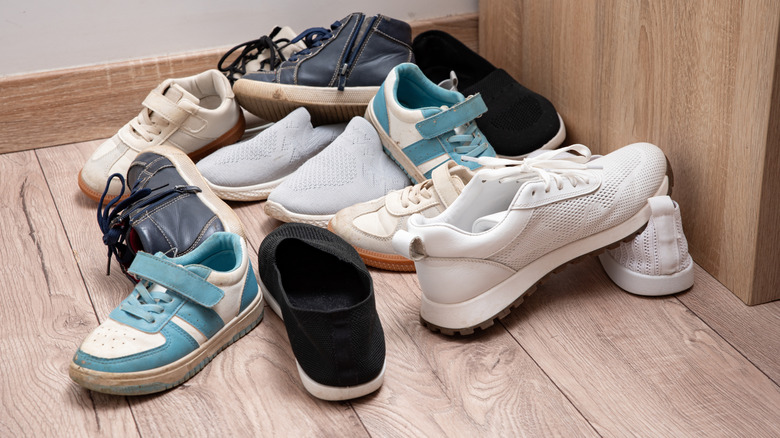
If you struggle to declutter all the shoes in your entryway or closet, don't worry — you're definitely not alone. It's pretty common for people to kick off their shoes the moment they walk in the door or toss them into the closet. The trouble is, once everyone does it, that pile quickly turns into a tripping hazard — not to mention a total eyesore. Sure, a shoe rack can fix the problem, but even the most basic ones can run upward of $20, while the sturdier, more stylish versions cost even more. If you don't feel like shelling out that much money or you're fully embracing your DIY era, you can make a two-tier shoe rack using a few Cooking Concepts Metal Cooling Racks from Dollar Tree and some zip ties. Sounds crazy, but it works! And we can thank YouTuber LifeDIYJoise for the inspiration.
Each shelf can actually hold about four pairs of shoes, two pairs on the top shelf and two on the bottom, and depending on your collection, you can build multiple and line them up side by side (if space permits). They can also be tucked neatly under your closet shelves for an instant organization refresh. Here's what you'll need to create your two-tier Dollar Tree DIY shoe organizer: eight of the Dollar Tree cooling racks (they're sold as two-packs for $1.25 to $1.75, depending on the store); zip ties, which you can grab there, too; a pair of wire cutters or sharp scissors; and a hot glue gun or a tube of E6000, which you might already have on hand.
Steps to build a budget-friendly shoe rack with Dollar Tree supplies
Before you build this low-budget, easy DIY shoe rack, keep the tags on each cooling rack as they'll act as guides. Begin with one pack of racks and gently stretch them apart as far as they'll go. You'll notice the two racks overlap, forming small rectangular sections on each side. Secure those areas with two zip ties at the top and two at the bottom, then repeat on the other side. This creates your first shelf, held together with a total of eight zip ties. It should measure just over 17 inches wide. Trim the excess ends, cut off the label, and repeat the process with three more packs.
To assemble your shoe rack, start with the bottom shelf, keeping the rack feet facing outward. Attach the side shelves vertically with their feet pointing inward, then secure the spots where the feet meet using zip ties. Add the top shelf with the feet facing inward and secure it. At this point, you'll have two shelves, though they may feel a little wobbly. For extra stability, take the final set of cooling racks, separate them, and place them side by side to create the backing. Position the feet inward and secure them to the back with zip ties. Once everything is in place, trim the zip tie ends and add a dab of glue to give your shoe rack a sturdier finish. Check for any loose spots and add extra zip ties if needed. Then, load it up with your shoes and enjoy a clutter-free entryway or closet.
Clever ways to modify your Dollar Tree shoe rack
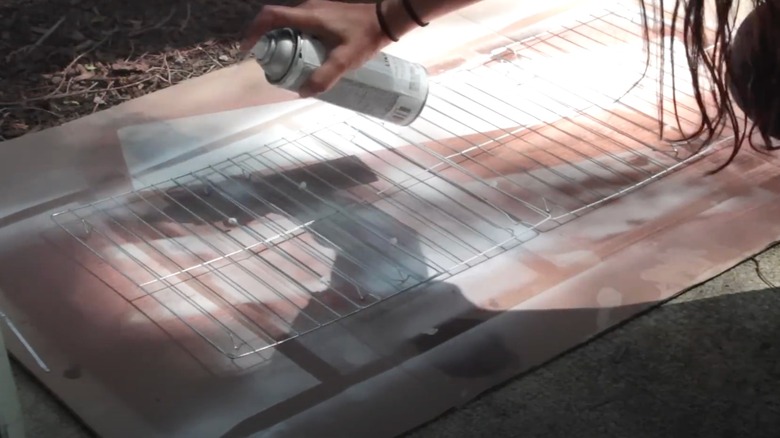
While it's always exciting to dive into a new DIY project, especially one that helps clear up closet clutter with a shoe organizer, you don't have to settle for an as is approach. Most DIY projects can be modified to fit your style, and this shoe shelf made from Dollar Tree cooling racks is no exception. The racks themselves look a little plain in their standard silver finish, but a quick coat of spray paint can immediately elevate the look. Consider black, a light gold, or any other color that matches your home's aesthetic. Just make sure you're using metal-safe spray paint and finish it off with a protective top coat.
If you plan to use this as an entryway piece, you might want to build two shelves and place them side by side. Attaching them is optional, but if you do, simply secure the finished racks together with zip ties at the top, middle, and bottom. Add extras anywhere that still feels loose. To give it more of a bench vibe, add a box cushion on top, either one you make with fabric of your choice or one you purchased to fit. (Just make sure you don't actually sit on it, because it's unlikely to hold your weight!) The bottom shelf can then be reserved for shoes: up to four pairs if you create two shelves, or two pairs if you stick with one. What's also nice about these DIY cooling rack shoe shelves is that they can be placed by the garage door, tucked inside your closet, or set up in your kids' rooms so everyone has a designated spot for their shoes.