These Budget-Friendly DIY Wall Sconces Add A Sleek And Modern Touch To Any Room
We may receive a commission on purchases made from links.
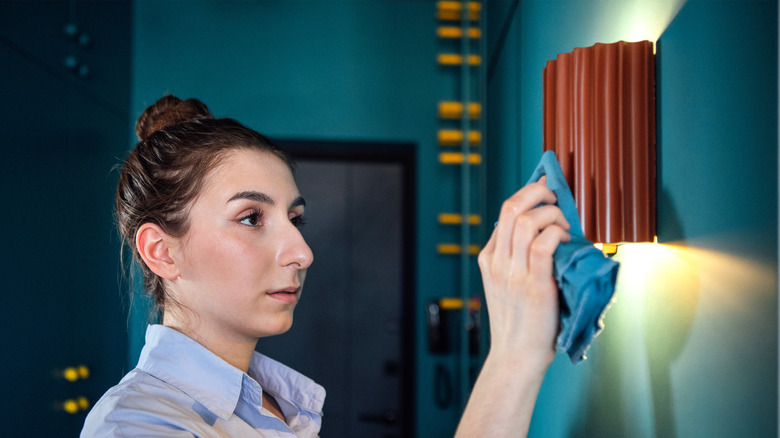
What cool, unique lighting does for a room is similar to how the right accessory can perfect an outfit; it can be the accent that "makes" the look. Like so many stunning accessories, the ideal modern lighting element can set you back a large chunk of your paycheck. Instead, DIY an expensive-looking wall sconce with a few pieces of wood, a roll of drawer liner, and adhesive, cuttable LED light strips. Top it with paint, power it with a concealable battery pack, and no one will suspect it didn't come from the store where most of us can only afford to window-shop at. A black wooden frame supports a translucent tube made from a sheet of translucent drawer liner. A color-changing LED strip that you can cut to fit the length of your wooden frame glows in an array of colors or just white. A pair of these sconces look stunning, but one will stand alone beautifully, as well.
Construct each custom light with two 3-foot wood shims, two small rectangles of wood no wider than 2 inches and about 3 to 4 inches long, wood glue and/or a nail gun, strong adhesive like E6000 that's great for holding two different materials together, a roll of translucent drawer liner (like this PaBUSIOr Clear Cabinet Shelf Liner), hanging hardware, a glue gun, and a battery pack that fits the needs of your strip lighting. Some have a USB fitting while others have wall plugs. If you don't mind the cord, you can always plug the lighting right into a wall socket rather than hide it.
Frame out your modern light fixture
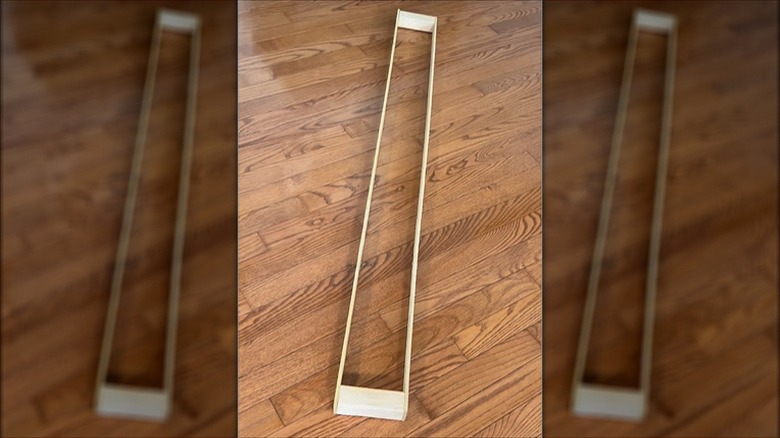
Before moving forward with the build, attach the hanging hardware to the back of one of the shims. It will be easier to do now than after assembling the structure. A couple of small sawtooth picture hangers, one at both the top and the bottom, will provide a stable hold for this lightweight light fixture.
Assemble the simple wood frame first by attaching the width ends of the small wood rectangles to the ends of the shims in a box-like fashion. While the quick, nearly invisible nails a nail gun shoots out would hold the wood pieces together discreetly, don't fret if you don't have this tool. Wood screws will do the job, but they are hard to disguise. Surprisingly enough, a high-quality wood glue that's applied well can provide a strong enough hold to make nails or screws unnecessary. If you go the glue route, add a clamp at each end of the frame to hold the shims to the wood blocks, and give it a good 24 hours to dry and cure fully before manipulating it. Give yourself extra wood glue insurance by checking out how to use it for best results.
Top the wood with black paint. If this color doesn't mesh well with your decor, or if you're looking for something more bold or luxe, swap it out for another color. Paint the wood in a striking primary color, give it a gilded treatment with gold paint, or stain the wood to bring out the grain.
Add the light element to your sconce
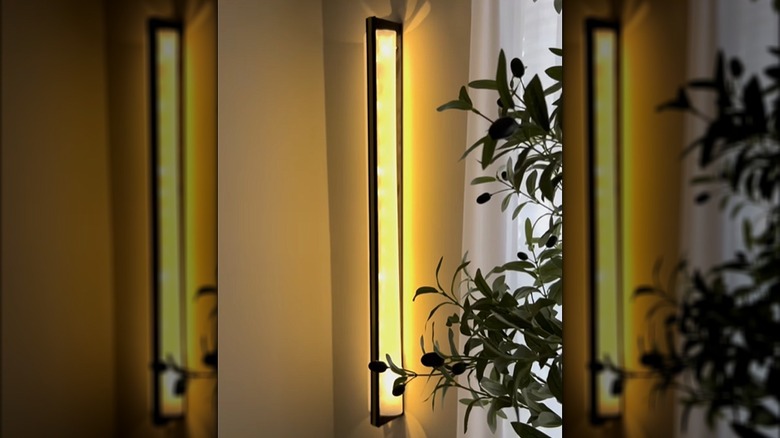
Time to turn your attention to the star of the show: the light itself. Cut a piece of drawer liner the same length as the frame. Affix the strip lighting to the inside of the frame opposite to the side that will hang on the wall, making sure the plug end is near what will be the bottom of the sconce. You'll be adhering the edges of the curved sheet of drawer liner on each side of the light strip, forming a cylinder. Dab a line of E6000 along one side of the lighting strip, and smooth one of the long edges of the liner sheet over the glue. Let this dry and cure before gluing the other side. A strong, established bond will help hold the shape in place as the glue on the other edge dries.
Curl the rest of the sheet into a tube inside the frame, trimming excess liner if the tube is too large. Heat up the glue gun while you draw a line of E6000 along the other side of the light strip. Press the loose edge of the liner onto the glue. Between the outside of the liner tube and the frame, squeeze on a generous amount of hot glue. This hot glue hack provides temporary hold while the heavy duty glue cures.
Since the tube is only attached along the lighting side of the frame, the material should be flexible enough to slip a battery pack inside the frame. It can rest on the lower edge like a shelf, making it easy to access. Then your classy wall sconce is complete.