The DIY Project That'll Transform How You Store Your Vinyl Records

We may receive a commission on purchases made from links.
Storing your vinyl records isn't just about practicality — it's about showing off your carefully curated collection. However, finding a way to store records can be difficult since you have to accommodate the size and shape of a record while keeping them easily accessible. If you haven't been able to find anything that suits your needs (or your taste), just make your own record storage with some dimensional lumber.
Creating your own vinyl record storage is simple and approachable, and you can do it for less than $100. All you need is some wood, nails or screws, and a finishing product like wood stain or paint. There are a variety of ways to construct record storage, so the first step is to measure the space you want to use before you plan your design. Pro tip: Vertical storage may work better for you than horizontal. A record storage shelf works as a great way to store all the records that don't fit on your record wall, allowing you to keep your vinyl neat and organized.
Break out the hammer (or drill) for this record storage DIY
To begin your DIY vinyl storage shelf, determine the desired size, shape, and orientation. Then, head to the hardware store to collect your materials. There are a few ways to approach this project depending on your desired outcome and budget. You can build the shelf entirely out of plywood or solid wood sheets, or you could incorporate 2-by-4 wood boards to separate the top and bottom sheets of wood. Plywood is a cheaper and lighter option when compared to solid wood, but the plys will be visible on the edges. Some don't mind that look, but if you do, you could cover the plys with a wood veneer edge banding, like the Edge Supply Birch Iron On Wood Veneer Tape.
Using your desired measurements, cut the wood pieces to size and sand the edges to remove any blowout or splinters. Sanding also ensures your records are not scratched when you put them away. If you can't cut the wood at home, it may be time to grab some of the key tools you should invest in to start woodworking at home. Or, you can take your measurements and have the wood cut for you at a place like Home Depot or Lowe's. Assemble the shelf using screws or nails. But before installing your fasteners, drill pilot holes to prevent splits, and apply wood glue along the joints to reinforce the connections — just make sure to wipe off any excess before it dries. If you want to hide the screws, use a counter sink to give your shelving unit a seamless finish.
Finishing notes for your vinyl record storage build
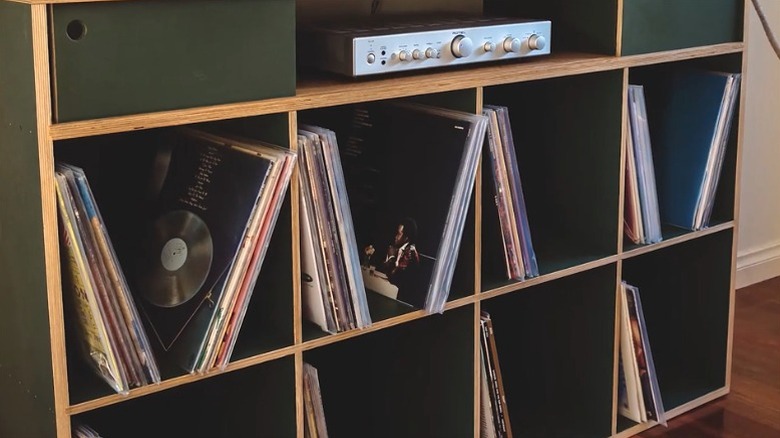
How you complete your record storage piece comes down to your personal aesthetic. You can paint, stain, or even leave the wood unfinished. Some even opt to cover an unfinished surface with stickers to add extra character. While you could add legs to lift the record shelving unit off the floor and give it some more style, it might be more practical to attach casters to the bottom, allowing you to wheel the shelving unit wherever you like.
Regardless of how you finish the piece, you should top it off with a coat of polyurethane to protect the surface and your vinyls, which might stick to unprotected paint. Once the polyurethane thoroughly dries, all you have left to do is decide whether to alphabetize your records or not. As an added bonus to this build, you can place your record player and speakers on top of the finished shelving unit, creating a unified music experience in your home.