The Maintenance Mistake That Could Be Causing Mold In Your Shower—and What To Do About It
Showers are arguably some of the most challenging spaces to keep clean. While you may diligently stick with a cleaning schedule, these spots are prone to problems ranging from soap scum buildup to mildew and mold. This can be attributed to moisture and humidity, which allow such concerns to thrive. If you're currently battling mold in your own shower, you should consider whether any maintenance issues might be contributing as well. It turns out that not recaulking your shower seams is among the maintenance mistakes that may lead to mold problems.
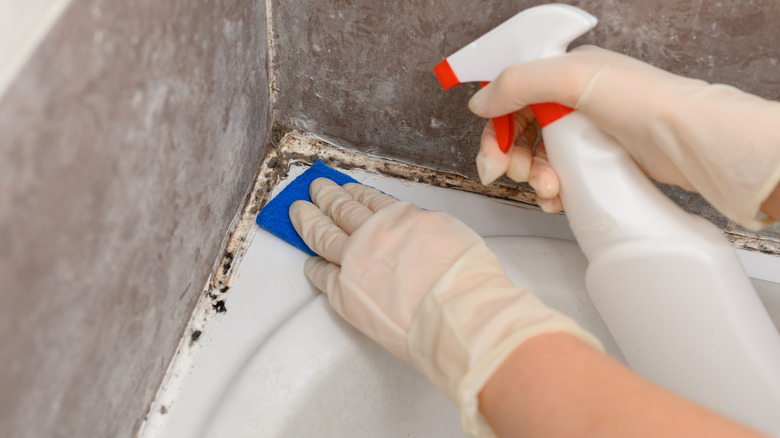
When dealing with mold in your shower, the first step is to clean it up right away. Whether you choose to scrub the moldy surface with an all-purpose cleaner or DIY solution is up to you, but you should always wear gloves and work in a well-ventilated area. For more stubborn mold stains, consider a solution of ¾ cup of bleach per gallon of water. Leave on for five minutes before rinsing with plain water. Then, you can dry the surfaces with a clean microfiber cloth. This solution works particularly well for hard-to-clean caulk and grout lines. Never use multiple cleaning products at once, as this can lead to potentially dangerous chemical combinations. These include bleach, hydrogen peroxide, and even white vinegar.
Once you're done cleaning grout lines, you'll need to determine whether any recaulking is needed. Not only will recaulking your shower improve its overall appearance, but it will also fix cracks and gaps that may lead to both mold growth and water damage. It's important to recaulk your shower on a regular basis to help prevent mold problems before they develop.
How to address mold problems from neglected shower recaulking
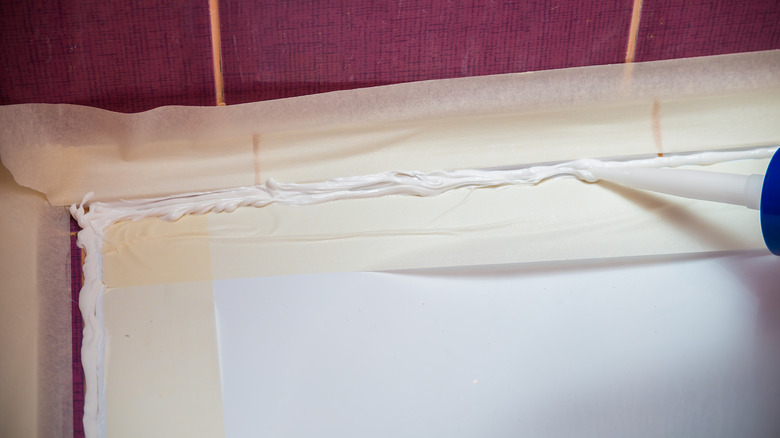
As a rule of thumb, you may need to recaulk your shower at least once every five years. You can also tell it's time to recaulk your shower if you see signs of damage, as well as a dark-colored stain that can indicate mold. Before applying new caulk, it's important to clean your shower and then to remove the old caulk lines with a scraper. Clean the area once more and allow it to dry because any remaining moisture might not only promote more mold growth, but it can also prevent the new caulk from sticking like it should. You can then follow tips for caulking the bathtub and shower like normal. Keep in mind that you will need to let it set and cure for at least 24 to 48 hours before anyone can use the shower again.
Once you've finished recaulking, you'll also need to take steps to stop mold from returning to your shower, and to help the caulk last longer. First, you can help reduce mold growth by increasing air flow in your bathroom. You can either open a window or door, or turn on a ventilation fan while showering. These steps can help remove moisture in the air before it gets trapped and stays on shower surfaces. It's also a good idea to wipe down caulk lines regularly with a dry cloth to prevent moisture accumulation in these areas. Finally, do your best to always dry the shower after your bath, as it is the easiest way to prevent shower mold that doesn't include harsh chemicals.