The Crafty DIY That Turns Dollar Tree Wood Pallets Into The Cutest Fall Decor
You're the type who loves filling your home with fall touches. But you don't love the price tag that comes with trendy store-bought décor. This is the perfect project for you. Seasonal decorations can get surprisingly expensive, especially if you want a number of items. With a quick trip to Dollar Tree and a few craft supplies, you can DIY pumpkin-themed table ornaments that help you decorate for fall without spending a dime. All in all, you're looking at a project that costs well under $10 if you already have some basic craft supplies. It's affordable, fun, and easy to make in an afternoon.
Ready to transform Dollar Tree's mini Crafters Square Wood Pallets into the cutest pumpkin-inspired fall decor? Most of what you'll need to complete this DIY project is either super cheap or something you may already have in your craft supply collection. You might, for example, hold on to extra paper napkins for creative repurposing ideas. First, buy four mini wood pallets from Dollar Tree. Then, gather together your supplies: matte-white acrylic paint, a tub of Mod Podge, festive napkins in a preferred color and design, four natural-looking sticks, a hot glue gun, ribbon or raffia, a set of stick-on poster letters, and a couple of buttons.
How to turn Dollar Tree wood pallets into tiny tabletop pumpkins
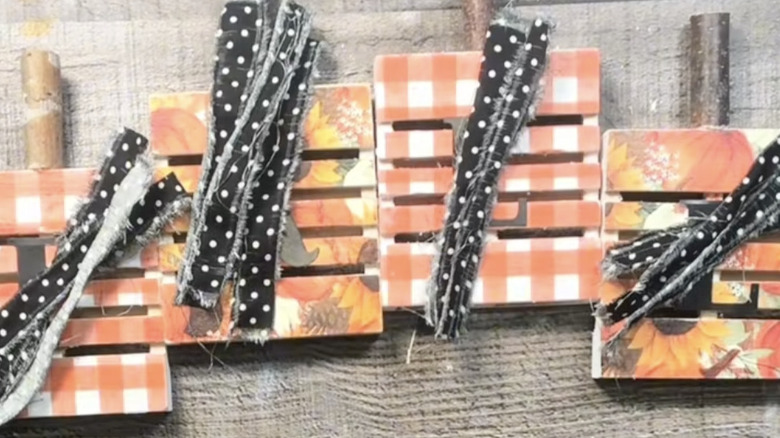
Paint the Dollar Tree mini wood pallets with matte-white acrylic paint. Once the paint is dry, brush the pallets with Mod Podge. After that dries, peel the napkin and peel it apart and spread the top layer across two pallets. Place a piece of parchment paper on top of it, and smooth everything with a hot iron. Trim away any excess paper, then use an emery board to sand the edges. Focus your attention on the gaps between the slats. Seal everything with another coat of Mod Podge. Next, pick out the poster letters that spell F-A-L-L and stick one letter to the front of each pallet. Glue a stick to the top of each pallet, mimicking a pumpkin's stem. Tie a length of raffia or ribbon into a bow and glue it to the base of the stem. Embellish the center of the bow with a button.
@therusticvine FALL crafting is in full force, and I'm here for it! This fun, inexpensive DIY is perfect to do with grands, women's groups, girls night in or by yourself!! Happy FALL crafting y'all #fall #fallcrafts #falldiy #dollartreediy #crafts #crafting #crafter #craftersgonnacraft #FallDIY #autumnvibes #craftersoftiktok
The fun part of this DIY project is in the customization. You can swap in plaid napkins for a rustic farmhouse look or solid orange or purple napkins for a bold Halloween vibe. Embrace this creative way to use decoupage in your home and try your hand at collage. You can also change up the bow, using twine or fabric ripped into strips in place of the raffia or ribbon. You could layer different kinds of materials and textures to create interesting contrast — think burlap for a cozy farmhouse feel and velvet for something fancy. Switch out the button on the bow for another ornament: dried seeds, mini pumpkins, or a cute felt turkey. With just a few tweaks, this DIY Dollar Tree project becomes boutique-worthy festive décor.