5 Creative Ways To Use Decoupage In Your Home
We may receive a commission on purchases made from links.
For centuries, the art of decoupage has artfully created mini masterpieces on surfaces from jewelry boxes to tables to walls. Like many interior design touches, it has had moments of popularity, then fell by the wayside before once again getting noticed. You might remember decoupage from your childhood, but it is finding its way back into homes, this time in many new and creative ways.
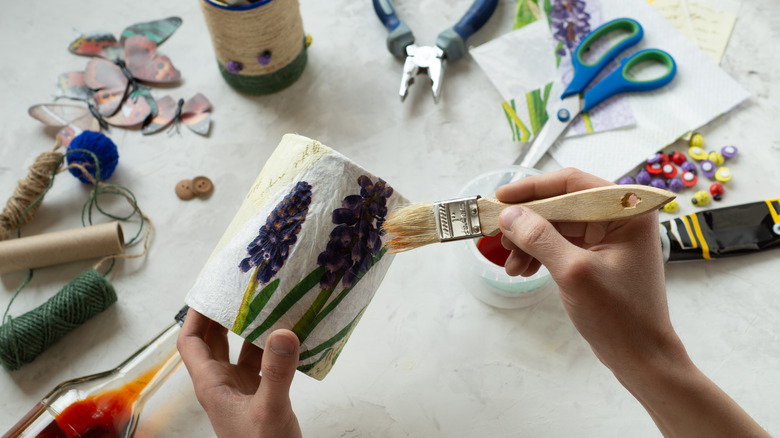
Decoupage has a long history, according to the nonprofit organization Friends of Maple Grove. They note that the term originated from a Middle French word, "decouper," that translates roughly into "cut out." That task was and is generally part of any decoupage project; the first thing to do is cut out the image you'll want to affix to a surface.
The Historic Deerfield Museum staff in Massachusetts also did a little sleuthing and discovered that early decoupage enthusiasts typically varnished their projects to seal and protect them. They hosted a workshop that began with a spray-painted shoe box. The project involved attaching cut-out images using ordinary white glue that they thinned with one part water to three parts glue. As for the varnish, apparently, today's glue allows us to skip that step. Shoe boxes, however, are just the beginning of the many creative ways to decoupage items for your home.
Give furniture a total makeover
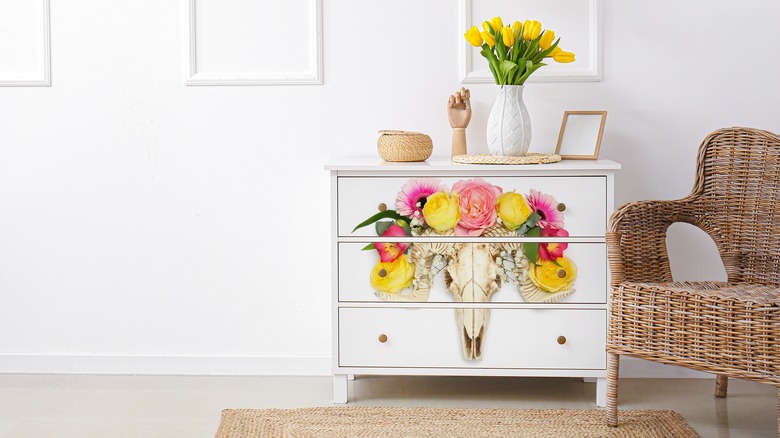
Decoupage can completely transform an old coffee table, nightstand, dresser, or other pieces of furniture you have or that you pick up at an antique shop or garage sale. Most of the time your first thought might be to strip the furniture and then stain or paint it. If the furniture is a big piece, you'll probably still do that unless you really want to decoupage the entire credenza. (You'll need a pretty big vat of glue for that project.) Most of the time, you will want decoupage to be an accent, like the top of a table or the front of dresser drawers.
Salvaged Inspirations took a pair of nightstands left on the curb, cleaned them up, and worked more magic than a fairy godmother with a wand. As with many such projects, it all starts with elbow grease; scrub the item until it's very clean, even if you "salvaged" it from a corner in your own basement. It's a good idea to remove hardware and any unnecessary design elements that come off easily and that might make the piece look dated. Use a wood filler to smooth out any gouges and deep scratches, then sand it and prime it. Now you're ready to make the furniture beautiful again. Salvaged Inspirations painted their nightstands and then decoupaged rice paper onto the front of them. Rice paper, says Crafting Pal, is a good choice because it's thin but sturdy.
Let your decoupage style frame the real you
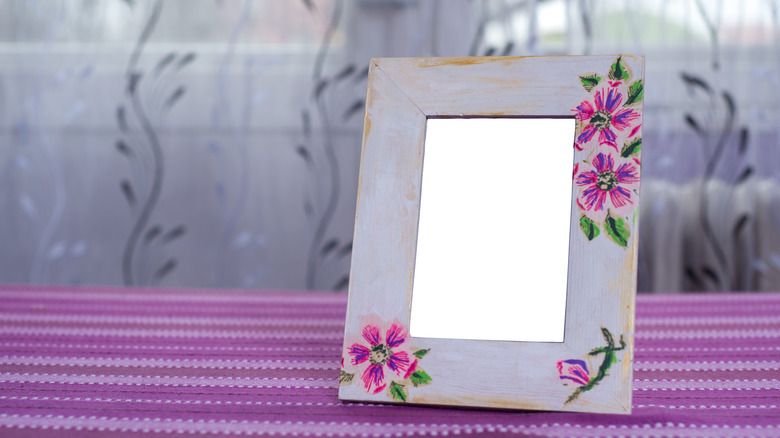
We here at House Digest showcased how to paint picture frames to spruce them up, but the art of decoupage can take that style refresh up a notch. Picture frames and mirrors can be decoupaged to change their ordinary, off-the-shelf look into something uniquely "you." As with decoupaging furniture, wooden frames work best with acrylic paint. If you are working with other materials such as plastic or ceramic frames, try the Mod Podge Dishwasher Safe method, which works on a variety of surfaces, as described by the makers of the crafting glue Plaid Enterprises, Inc.
Plaid advises using rubbing alcohol to clean the surfaces to which you will be applying any decoupage. When working with Mod Podge, they recommend a soft brush, thin coats, and thorough drying (an hour or two) between each application. While the product listed as "dishwasher safe" can be placed on the top rack of most dishwashers, the company notes that projects will need to air dry for 28 days before they can be run through the appliance.
You also can do more than just decoupage the frames of mirrors or picture frames; you can use the glass surface to decoupage designs that reflect your style or whimsical outlook. Just be sure to use a glue that is formulated for that surface.
A box as pretty as the trinkets inside it
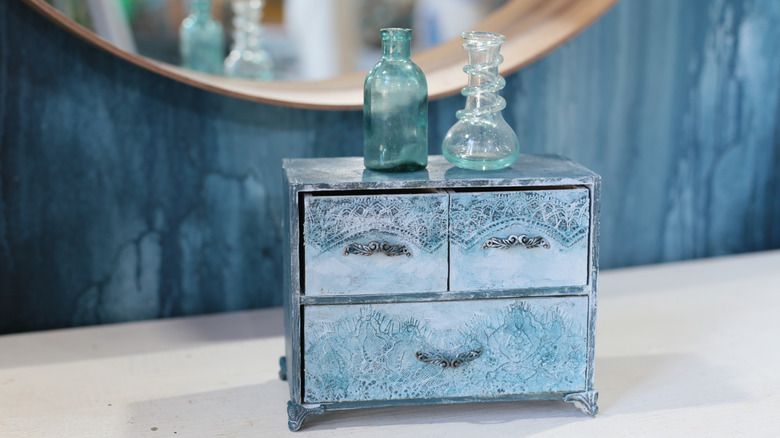
Admit it. You have more than one box in your house holding a myriad of trinkets and what-nots. You might have one on your desk with miscellaneous office supplies, such as stamps, binder clips, note pads, etc. But there is also one on your dresser that collects memorabilia like ticket stubs, greeting cards, and photos. Maybe you have one in a handy spot where you stash some cash, gift cards, and coupons. Whatever treasures find their way into your trinket boxes, personalizing the container with a one-of-a-kind decoupage design can make it feel more like a part of your décor and less like just a box to dump things into — even if your trinket box ends up looking a little like a face, like the one above.
The trinket box can easily begin life as an upcycled shoe box or other sturdy container. The size is limited only by your imagination and need. If you plan to place the box in a bathroom -– perhaps filled with sample-sized shampoos and other toiletries for guests to use -– Craft and Query suggests using a water-resistant decoupage glue and for extra protection, a coat of gloss varnish or liquid epoxy to seal it from the inevitable splashing. The Pretty Prudent blog recommends using Aleene's Spray Acrylic Sealer to waterproof a decoupaged trinket box. Unlike some polyurethanes, the acrylic sealer won't yellow over time.
Decoupage a tray for gathering anything
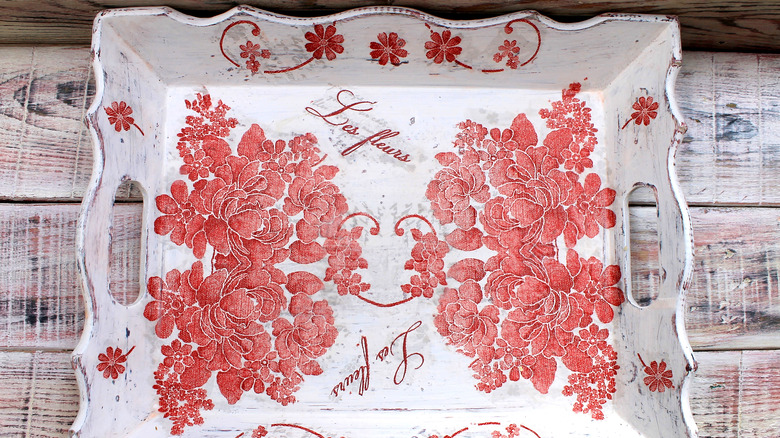
From cosmetics to the day's mail, you need a place for the things that tend to pile up around your house. Take a quick look around you. It won't take long for you to find many uses for platters small or large, shallow or deep.
You can decoupage something you already own, perhaps repurposing an old metal tray passed down through the years that is a bit rusty and in need of new life. Or perhaps you have a wooden tray that is looking shabby without the chic to go with it. If you have nothing on hand, a quick trip to a garage sale or resale shop is sure to turn up a few diamonds in the rough.
As with all upcycled projects, begin by thoroughly cleaning the surface to be decoupaged, and be sure to select the right glue or Mod Podge for the surface for the best adhesion. Make your tray pretty with your own pressed flowers or a page torn from a calendar. There's no need to buy a tray from the White House Historical Association for hundreds of dollars.
If you want to use the tray for food (who doesn't love a great charcuterie board like the one featured on Mashed?), be sure to use a food-grade sealant. SSP Manufacturing Inc. notes that polyurethanes are safe and Home Depot offers tips for wood sealants, which protect and make your tray more washable.
Love your decoupage project and hang it anywhere

Decoupage your baby's name and hang it in the nursery. Decoupage the date of your wedding and place it over your bed. Decoupage the alphabet for a play room, or holiday cutouts or fruit shapes for the kitchen, or just about anything you can think of to hang on most any wall in your house. The possibilities are endless!
Craft stores make decoupaging wood cutouts very easy. They stock many sizes and shapes, and online sources provide an even greater variety. If you or someone you know has the right equipment, you might be able to source patterns, including free ones, such as the ones offered online by Free Saw Patterns.
First Day of Home notes that sanding and priming an unfinished wood surface will yield the best results and help the project last longer. Also recommended is gently smoothing out whatever image or item you decoupaged (napkin, scrapbook paper, etc.) using a brayer or roller, similar to a squeegee. The end result will be more professional, and the project will last longer. Multiple thin coats of Mod Podge or other glue coupled with thorough drying in between coats help to ensure project success — and pretty home décor that makes you happy for many years to come.