Upcycle Milk Jugs Into DIY Ghoulish Skulls For Unique Halloween Decor
We may receive a commission on purchases made from links.
If you want to take advantage of this clever DIY for a bone-chilling Halloween display, start saving your old milk jugs. Whether you want to create a wall of skulls or craft spooky masks for a party, this simple DIY helps you upcycle old plastic instead of throwing it in the garbage. With a bit of heat and a reference skull model, the empty jugs make an excellent material for molding new Halloween decorations. To save even more trash from the landfill, you can also turn milk cartons into spooky haunted house Halloween decor or make adorable ghost DIY Halloween decor out of egg cartons.
Gallon-sized milk jugs will provide the largest amount of plastic for the craft. You will also need a heat gun, a sponge or towel, and a reference model, like this READAEER Resin Skull. To ensure stability, build a simple stand the resin prop skull can rest on during the procedure. To fashion the stand, drill a hole into a plank that will serve as a base. Then insert a dowel or a PVC pipe into the hole — this vertical piece will hold up the prop skull. Depending on how you want to decorate the skulls, you may also need paint, stain, brushes, a hot glue gun and glue, contact cement, and string.
Molding milk jugs into a skull shape
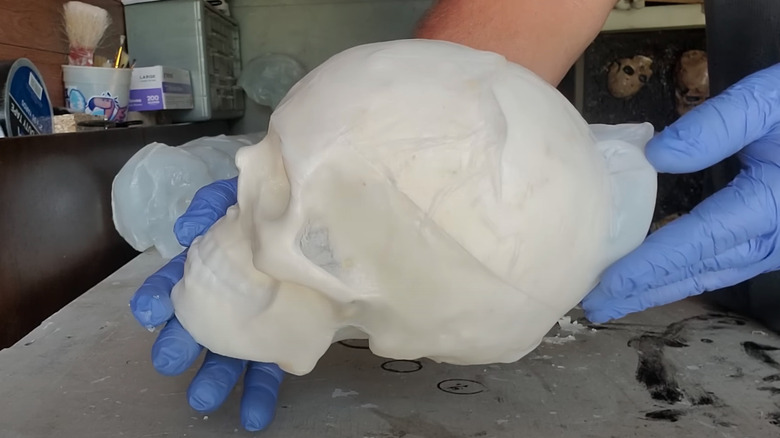
To begin, remove the label from the jug and cut out its handle. The remaining piece should fit nicely over the prop. Next, place the jug cutout over the resin skull; ideally, the plastic will expand beneath the prop skull's jaw (and if its jaw won't stay shut, you can glue it together with hot glue). Then, grab your heat gun, and, starting just beneath the cheekbones, heat the plastic until it melts and tucks under the prop skull's contours. This will ensure that the jug stays firmly locked onto the resin mold. Then continue heating the plastic in portions, starting from the top of the head and working your way down. As the plastic melts, press it down firmly, so that it takes the shape of the reference skull. The plastic you're melting will get hot, so wear heavy duty gloves or use a sponge or a towel to push it in (if any kids are helping out, ask them to stay clear and observe).
Once you're done molding, use a sharp knife to make an incision from the top of the skull all the way down along the back. The mold should peel off the reference skull easily at this point. Seal the slit at the back using a hot glue gun. Finally, if the skulls are meant to serve as outdoor Halloween decor crafts, give them a bit of weight before taking them outside — otherwise, they'll blow all over the place with the first gust of wind. One easy solution is to place some rocks or pebbles into the cavity, then fill it with expanding foam.
Ways to give the DIY skulls some character
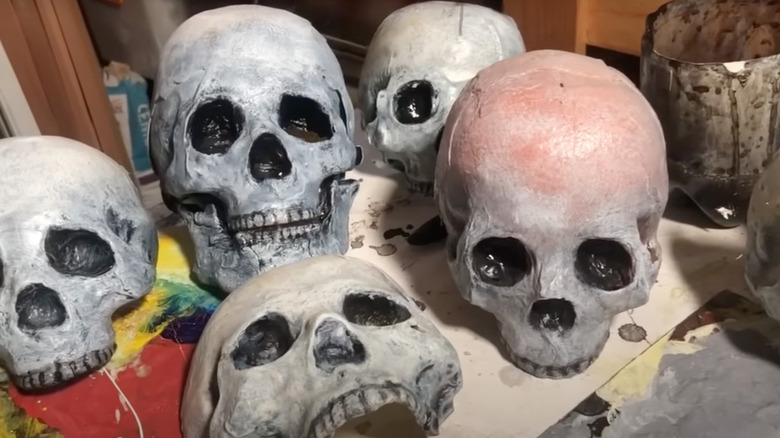
Now that you've got the basic shape of the skull crafted, give it a creative finish. You have many themes and visual options to pursue, ranging from terrifying to spooky to fun and exciting. But you just can't go wrong with painting the skulls to give them a natural, aged look.
To do this, take the skulls to a well-ventilated area and paint them with a white or off-white spray paint, like this Rust-Oleum 331181 Painter's Touch Matte White product. When the paint is dry, use a suitable black paint — this Apple Barrel Acrylic Paint should work — to color the eye sockets, the nose cavity, and around the cheek bones. Then, use a brush to apply brown acrylic paint or a dark-colored wood stain to the entire surface of the skull before quickly wiping (or dabbing) the paint off with a towel; the resulting color should resemble that of aged bone. Finally, "corpsify" the skull by applying contact cement around the jaw and cheekbones to resemble decomposing flesh.
If you find this classic look too boring, why not "spookify" your creation with glowing eyes? An LED eye kit, like this LCHUANG Glowing Light pack, makes it easy to wire the skull and give it red, remote-controlled LED eyes. Conversely, decorate the molded skulls with glitter or brightly colored paint for a friendlier look. Alternatively, punch holes in the sides and tie ribbons to create uncanny masks or string the skulls together for an eerie garland. Once the skulls are ready, create a spooky skeleton Halloween decoration with a laundry basket to make a truly scary scene for trick-or-treaters. Don't throw out the milk jugs you have left over from this craft — reuse them in the garden instead.