Give Your Dated Kitchen Island A Stunning Glow-Up With One Budget-Friendly DIY
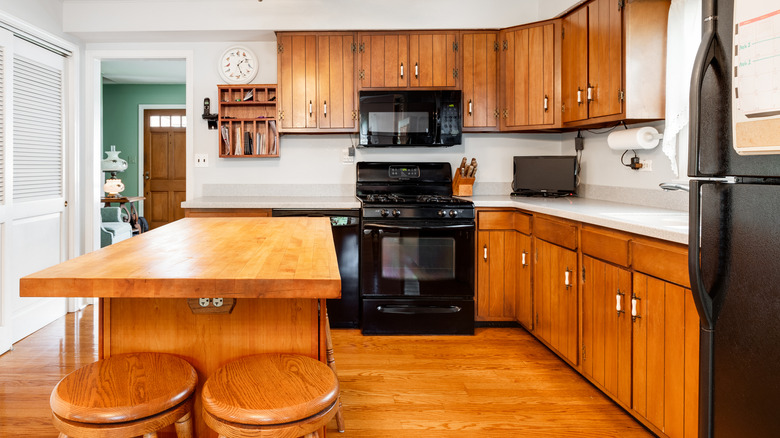
Kitchen islands offer plenty of benefits for homeowners from both an aesthetic and functional perspective. They give you more countertop area to work with when preparing meals, and they come with extra cabinets and shelves for storage. They also serve as a focal piece for the heart of your home that can highlight the beauty of your space's stone surfaces. So, if your kitchen's island is beginning to look dated, it's essential to take action to ensure that the look and feel of your interiors remains appealing, elegant, and welcoming. However, you don't necessarily have to rip out your whole island and start over. Instead, you can try out a surprisingly-doable DIY that frames the sides of your island with pine wood in a picture-frame configuration. To complete the look, install baseboards below the frame, and cover everything with a fresh coat of paint. Choose paint that matches your current cabinets for a more cohesive finish, or select paint that's bold and bright if you want your island to stand out.
In addition to the wood and paint, this project requires a brad nailer, plastic sheeting, painter's tape, and caulk. You'll also want some primer and a palm sander. A few sheets of fine-grit sandpaper will of course work in place of the palm sander, but preparing the wood will take significantly longer. The re-finished cabinets should suit both contemporary and traditional kitchen styles. Completing this DIY is a great way to start affordably upgrading your outdated 2000s kitchen to boost your home value.
How to add a wood border to the sides of your island
First, measure the sides of your kitchen island. This will help you determine how tall your pine boards should be. Two pine boards should run from the top to the bottom of the cabinet along the side edges. Another should fit between these boards along the top edge of the cabinet, unless there are pre-existing countertop supports in the way. A final pine board should fit on the bottom of the picture frame, both above and behind the baseboard. Once you've cut the boards to fit, fasten them to the cabinet with your brad nailer. If you're using a finishing nailer instead of a brad nailer, make sure to mask the holes with wood filler. Next, cut your baseboard and install it along the bottom of the island with more trim nails. For the neatest possible corner cuts, use a compound miter saw set to 45 degrees. You can also follow other genius tips for the perfect miter cut.
@gatheratthebooths Such a small upgrade that makes a big impact! Our 90s oak kitchen island wasn't pretty rough condition and this definitely helped to bring it back to life 💛
With all the boards in place, it's time to start finishing their surfaces. Begin by sanding down the pine with your palm sander, using a fine grit. Next, apply caulk to the corners of the wood and along the edges of the baseboard. Then, use your plastic sheets and tape to cover up the countertop and the floor below your project. Prime everything, wait for it to dry, and then go over all of the same surfaces with a couple coats of paint. If needed, use household staples that make paint touch-ups easier.