Turn Dollar Tree's Arched Picture Frames Into The Cutest Ghost Decor With A Simple DIY
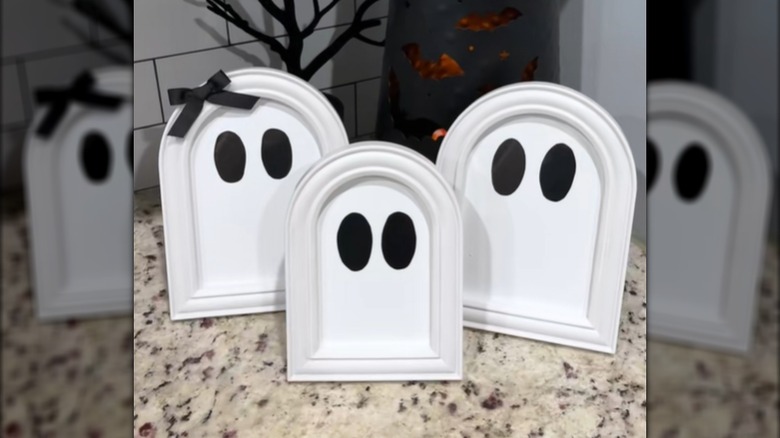
Dollar Tree is the unofficial queen of crafting stores, from items actually made for projects to products intended for other purposes that shine as parts of a DIY. The Special Moments Arch Shaped Photo Frame in white requires shockingly few alterations to become adorable ghost decor for fall. Lined with a sheet of white paper sporting two black ovals for eyes and topped with an optional jaunty bow, one or more little ghostlings are ready for display. Show them off on any wall or parade them on a flat surface after no more than 5 minutes of work each. In fact, it may take longer for your glue gun to heat up than it will to make each ghost.
And how can you resist the same frame in black? The potential to make tabletop tombstones along with the ghosts for a spooky graveyard scene indoors could have you clearing out the entire stock of your local DT. After you've wiped out their supply of arched frames, pick up a roll of thin black or Halloween-themed ribbon. From your crafting hoard, grab a glue gun, a pencil, scissors, white paper (Cardstock is ideal, but white printer paper may do the trick.), and a thick black marker, black paint, or black material. If you have black felt or construction paper or, best of all, adhesive-backed black vinyl, these will work brilliantly to make two eyes. If not, drawn-on eyes may give you the look you want. Vinyl eyes have a nice gloss, making the project look extra-polished, but acrylic paint may provide a similar shine that marker or other material wouldn't.
Call forth the spirits of Dollar Tree frames
Remove the back and the glass from the frame, and trace the outline of the glass onto your paper. Cut it out, and if you've opted for thin paper instead of cardstock, you may want to test it in the frame to see if it lies smoothly between the glass and backing. If it has any visible ripples, swap it out for cardstock. If not, press on! For the eyes, if you're going the drawn-on route, it's not a terrible idea to sketch out two oval shapes on paper before coloring or painting them in. You may also have an oval-shaped object around the house like a deodorant cap that's about the right tracing size for well-proportioned eyes.
For the cutout eye version, freehand cut or sketch out two oval shapes per ghost you're making before snipping. To make sure the eyes sit at the right spot on the ghost's "face", put the paper inside the frame and mark in pencil where you'll be attaching them. Peel-and-stick vinyl eyes go on easily, but glued-on eyes affixed with too much glue could make the paper buckle, especially if it's thin. A few dots on the back of the eyes should suffice, since the frame's glass will hold the material in place, as well.
Cut about 6 inches of ribbon per ghost for an optional bow. Trim off the excess, puff it out for maximum fluffiness, and glue it to the top side of each ghosts' head. Flaunt your adorable and affordable DIY Halloween decor pieces in a spot worthy of their cuteness.