12 Dollar Tree Stacking Pumpkin DIYs You Need For Affordable Fall Decor
We may receive a commission on purchases made from links.
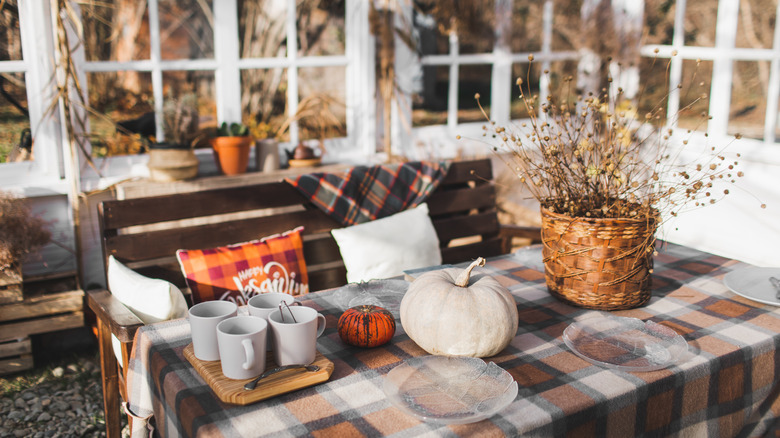
Fall has it all: cozy plaid throw blankets, trips to the pumpkin patch, and, arguably, the cutest decor options of all the seasons. Almost every store, from affordable dollar stores to high-end boutiques, offers up a wide range of fall and Halloween decor that's ready to go. But sometimes, crafting your own fall decor is better. It can be more affordable, and you get to customize the pieces to show off your personality. There are so many adorable Dollar Tree DIYs to get your home ready for fall. The foundation for all of these Dollar Tree ideas is the 24-inch Stacking Pumpkin Set. You can use it as is, but it's often more fun to get creative with different finishes and designs.
The large set comes in three different options: all orange, all white, and a white, yellow, and orange combination. You may also be able to find a smaller (and lower-priced) 12-inch set. Either way, you'll have to head to the store to snag your set — they're not available for purchase online. Many of the projects keep the stacking design but use different finishes, like textured stone spray, paint, and fabric. Other ideas transform the pumpkins into something new; white clay turns them into ghosts or black paint and felt transforms them into a cat. Or, use the pumpkins separately to create fall-themed display trays or vases. Whether you prefer muted and realistic or bold and over-the-top, these simple (and affordable) plastic pumpkins are the start of many creative ideas.
Texturize the pumpkins to make them look like stone
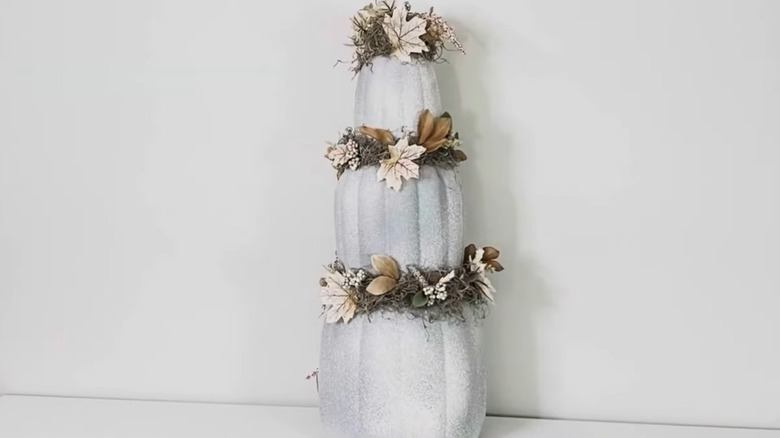
This stacked pumpkin craft looks like a heavy ceramic piece, but it's actually lightweight plastic coated in stone texture spray paint. Start with spray primer in the same color as the stone texture spray. Rust-Oleum Gray Stone Creations Spray creates a neutral look, while Krylon Obsidian Coarse Stone Texture Spray is bold and fits in with the black-and-orange Halloween theme. To add flowers where the pumpkins meet, hot glue a thin strip of a pool noodle or foam and add silk fall foliage and moss to cover the foam.
Decorate them with a fall message
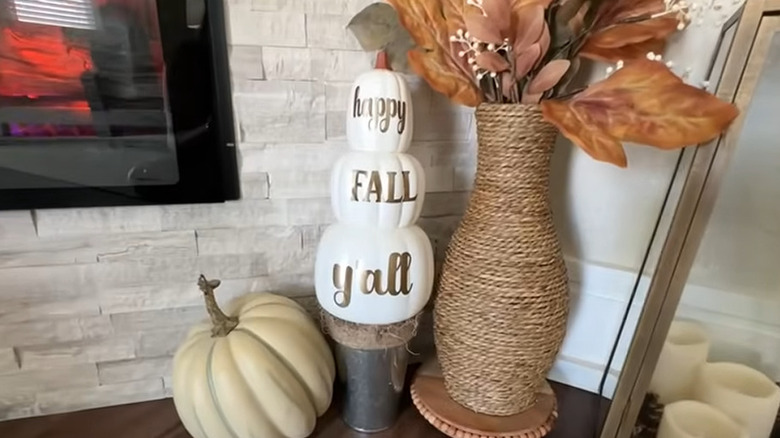
The basic idea of this fall craft is to add a message to the stacked pumpkins. Of course, you can paint the pumpkins first, or leave them as is and add one word of the message on each pumpkin. A classic is "Happy Fall Y'all." When placed on white pumpkins with metallic vinyl, a gold paint pen, or gold metallic paint lettering with stencils, it creates an elegant decor piece that can last from September to November. For a Halloween theme, use the orange or multi-colored pumpkins and add "Trick or Treat" in black.
Cover the pumpkins with fabric
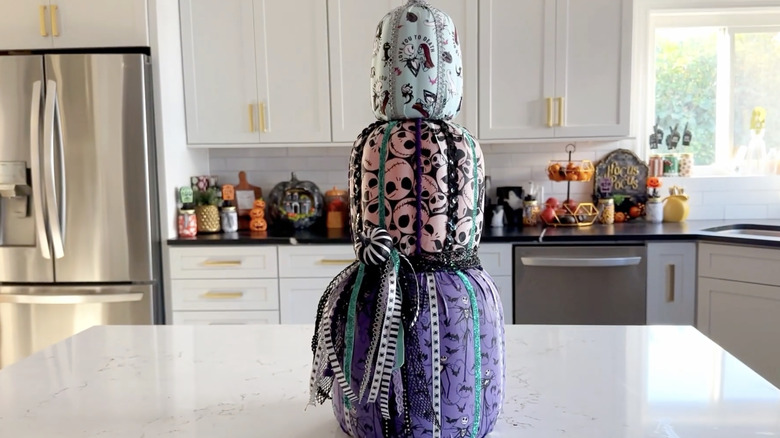
Grab three different (but coordinating) types of fall or Halloween fabric for this stacked pumpkin makeover. Use Mod Podge to attach the fabric to each pumpkin, working in sections and smoothing as you go. You can also cut fabric into strips and lay them from top to bottom — this method can cover the grooves better. Add another layer of Mod Podge to seal the fabric then accent it with ribbons, flowers, and other pieces that fit the fabric theme. You can also add a fall message using cut fabric or paint.
Design spooky Halloween dioramas

If you want creepy-cute Halloween decor ideas instead of general fall, turn the pumpkins into dioramas. To start, cut an oval or rectangular opening on the front of each pumpkin. Cut cardboard circles to cover the openings on the bottom of each pumpkin. Then, have fun adding various Halloween statues, cutouts, and other items that fit the theme and scale of the scene. Battery-powered fairy lights or tea candles add an eerie glow. You can add moss, rope, or ribbon around the cut edges and paint the pumpkins to customize them.
Use two pumpkins to make a black cat
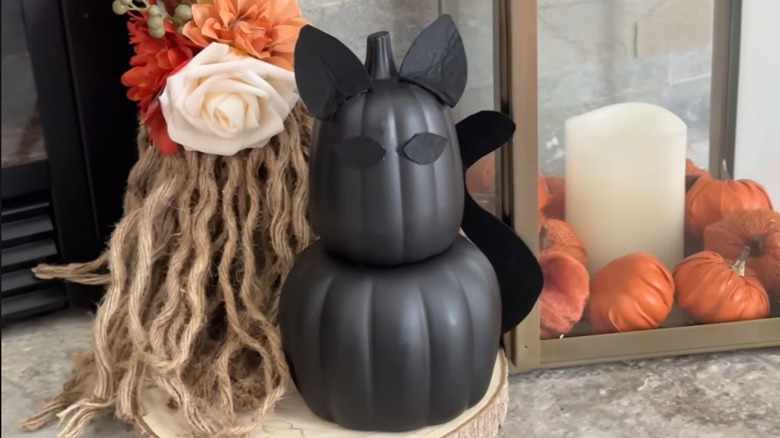
Don't want your pumpkins to look like pumpkins? Try this adorable cat, which fits perfectly into kitchen witch decor. One creator painted two stackable pumpkins black and added black ears, eyes, and a tail cut out of black felt. But you can give your black cat personality by painting on a face and adding a collar. Or, use thick yarn, like this Inndun Black Chenille Yarn, and hot glue it onto the pumpkins to make the cat furry. Then, cut ears and a tail out of black, fur-like fabric.
Cover them with white clay to make ghosts
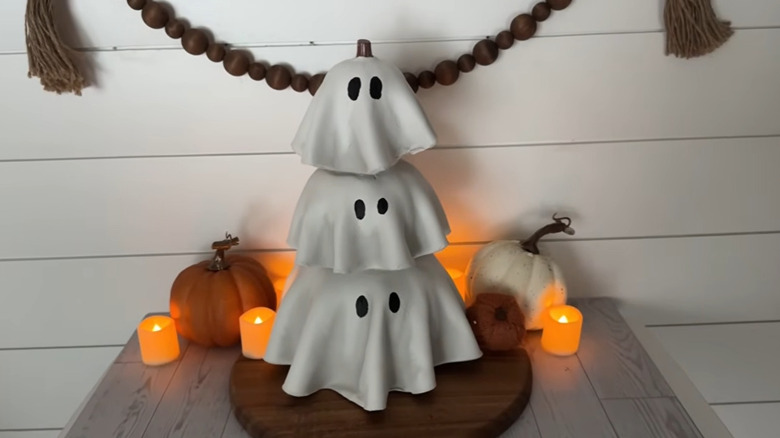
Disguise the stackable pumpkins as ghosts simply by covering them in sheets of clay — the Crayola White Air Dry Clay is an easy option. You'll roll it out into three circles that are large enough to cover the pumpkins, cut out a circle for the opening, drape it over the pumpkin, and create a wavy, ghost-style design around the bottom of each one. You can leave the ghosts white, paint them fun colors, or add a layer of spray glitter for sparkle. Eyes are easy to add with the help of paint or a marker.
Use them individually as pumpkin-shaped vases
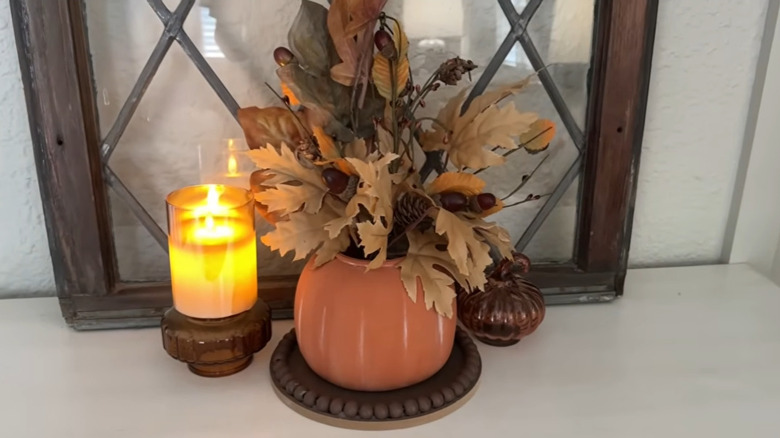
Use Dollar Tree pumpkins individually as cute vases. Paint the pumpkin however you want — brushing the grooves with white paint highlights the pumpkin's shape. You can also tie a ribbon or raffia around the pumpkin. For silk foliage, arrange stems inside the opening. You can also tuck a vase inside — choose a container that fits within the pumpkin without showing. That option lets you display fresh flowers. Arrange the pumpkin on a tray with other fall decor items to create an autumn centerpiece. Or, use it to hold coffee pods on your coffee station.
Add a tray on top to make a fall display
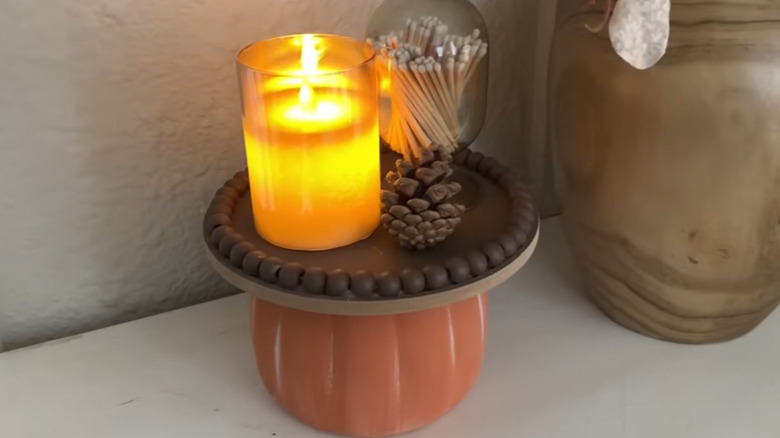
For another single-pumpkin idea, start by painting or decorating the pumpkin to match the style of your room. You'll use it as the base of a display stand. For the top, use a lightweight round wood tray or woodgrain charger plate that's slightly larger than the pumpkin. Royal Imports Wood Slices also work if you want a natural, rugged look. Glue the tray onto the pumpkin. Now, you're ready to build your fall-themed display with candles, pinecones, mini pumpkins, mini signs, figurines, and other decorative items.
Paint your Dollar Tree stackable pumpkins a more muted, realistic fall shade
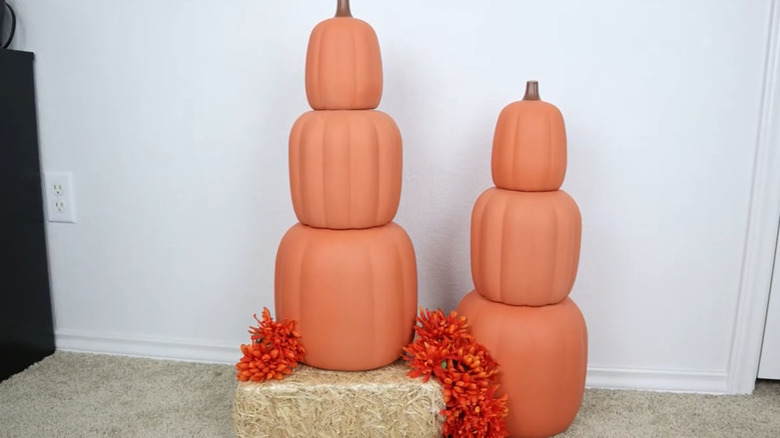
Sometimes simple is best, as is the case here. Choose a matte orange color to give the pumpkins a realistic look (the original condition is plastic-looking and shiny). Then, grab brown for the stem. For a Halloween twist, cut or paint jack-o'-lantern face features on each pumpkin. Or, go neutral by painting the pumpkins cream or beige. If you want to use it as outdoor Halloween decor that will transform your yard, add a protective coating or put it in a covered spot on a porch.
Craft a custom scarecrow

Create an indoor scarecrow with the pumpkin trio. Leave the bottom pumpkin orange or paint it blue to look like jeans. The middle section gets covered with plaid fabric strips, and the top gets a coat of white paint with painted face details. Raffia makes ideal scarecrow hair, which you can hide under a straw hat. Another option is to repurpose a Dollar Tree mop head into the scarecrow's hair. To add arms, cut holes on either side of the middle pumpkin and put a fabric-covered wooden dowel through it with artificial straw at the ends.
Create a black and white theme with spiders and spray paint
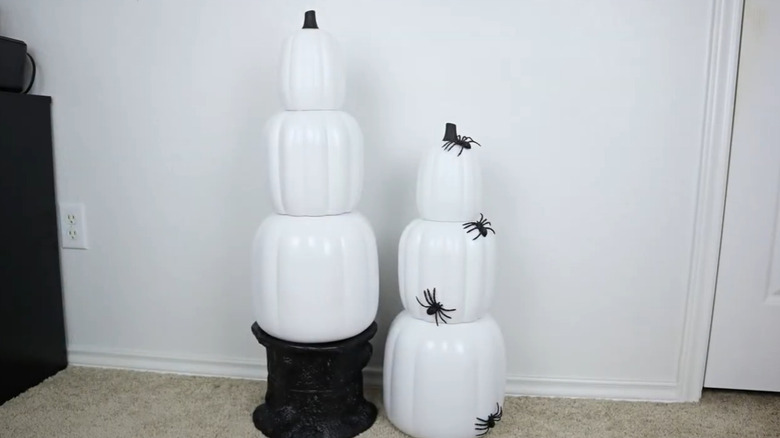
Add a creepy-crawly touch to your decor by painting the pumpkins white (or using a stack of white pumpkins, if you can find them that way). Glue the pumpkins together to keep them steady. Then, hot glue plastic spiders all over the pumpkin stack. Add as many spiders as you want. You can find the little critters in a variety of sizes, and you can also glue on other bugs, like plastic centipedes. For a final touch, stretch artificial spider webs over the pumpkins.
Build a snowman to transition as fall turns to winter
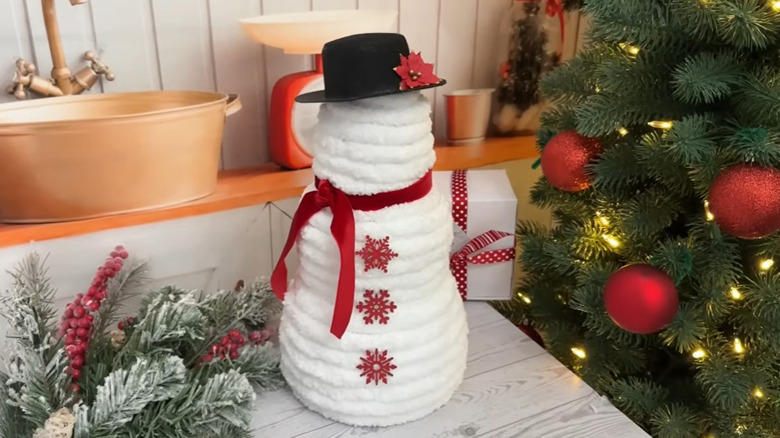
Repurpose a set of white stacking pumpkins into a snowman. You can leave the pumpkins white or cover them with Loops & Threads White Chenille Yarn. You could also use white fur fabric or artificial snow. From there, get creative with buttons, facial features, stick arms, a scarf, and a hat using materials you have on hand. Or attach a sign that says "Let It Snow." Pair your snowman with other winter decor, like beautiful snowflakes you can DIY out of cheap hangers.