The Easy DIY To Replace A Broken Garage Door Spring
We may receive a commission on purchases made from links.
Your garage door has many moving parts, one being a door spring that's important for counterbalancing the weight. The spring makes it easier for you to open and close the door. The problem is that even with the most reliable garage door opener, the spring can break or wear out quickly. Opening and closing the garage door then becomes extremely difficult. With a simple DIY you can replace your broken garage door spring by measuring and purchasing a new one, installing them to the bar, and connecting the safety cable.
Replacing your garage door springs is a good DIY project if you're safety-conscious. It also saves you money without the need for a professional. There are two types of garage door springs: torsion and extension. The extension springs are seen on older garage doors above the tracks with a coiled metal part that's attached to a pulley. Torsion springs are parallel to your door and look more like a big screw. To replace either spring, you'll need a few things along with safety gear. If you're working on a torsion door, you'll need two winding bars. For an extension spring, you'll need to have two C-clamps on hand. You should also have a stepladder and an adjustable wrench.
Before attempting this DIY project, understand that safety is critical. Wear safety glasses and gloves and be very careful when using tools to remove the existing spring on the door as it may be under tension. Next, ensure you get the correct replacement spring for your door based on its length, thickness, winding direction, and inside diameter.
Take these necessary steps when replacing garage door springs
It's a good idea to check your springs so your garage door is ready for winter. When replacing extension door springs, carefully raise the door open. Attach the C-clamps on both sides of the door's upper section to keep it open. Unplug the door opener, unbolt the spring, then unbolt the pulley. Disconnect the safety cable on one side and slide it out of the spring, then remove the spring completely so you can connect the new spring. Put the safety cable in and attach the end to the pulley, then to the door. Repeat these steps for the spring on the other side.
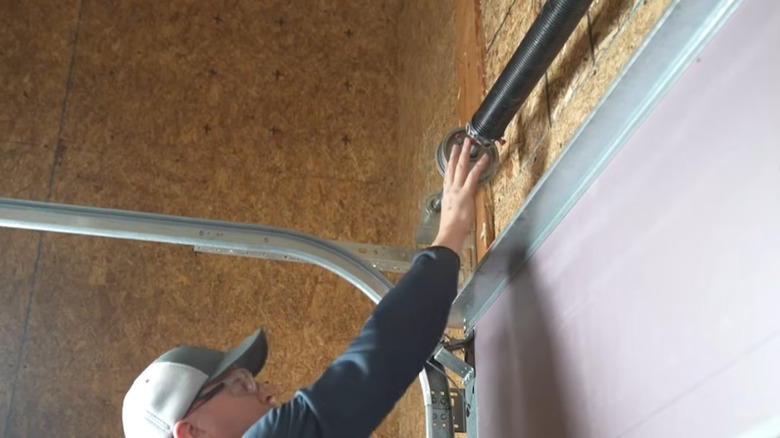
With torsion springs, close the door and disconnect the opener. Insert the winding bars into the spring, turning them once to hold it in place. Carefully loosen the bolts on one side with your wrench while using the winding bars to unwind the spring until there's no pressure. Remove the center bracket bolts, then loosen the bolts and unwind the spring on the other side. Remove the screws from the drum and the cable wire on the end, then pull the bar out so you can slide the springs off. Slide the new springs into place, then put the bar back through the drum and tighten its screws. Reattach the cable to the drum, wind it up, then return to the center. Carefully rewind the springs and insert the screws on the ends. When you lift the door, it should stay in place. Tighten up your springs, then reconnect the door to the opener and test it.