For A Successful Patio Shade Sail Installation, Try These Simple Tips
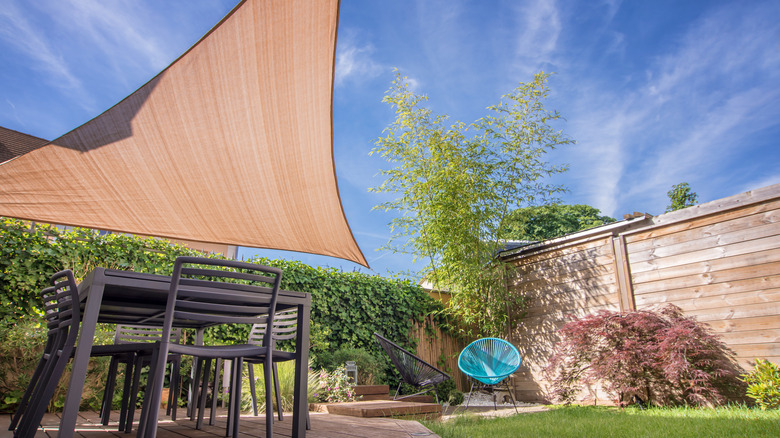
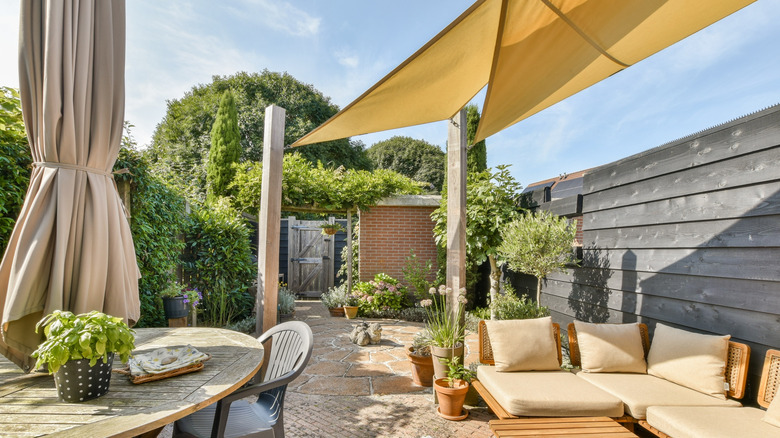
Heading to the backyard with an ice cold beverage or grilling supplies and settling in on the deck or patio sounds like a perfect way to spend a sunny day. But the sun can become bothersome and potentially ruin a good day outdoors when there's no shade to take refuge from the heat or harmful UV rays. That's why having a shade sail is so helpful in making your outdoor experiences as pleasant as possible — it's one of many projects that will add shade and style to your patio. But there are certain steps you have to take and things to consider before setting that sun shade up — the location of the sun, mounting points, and even the size of the shade you want, just to name a few.
Providing quality shade, such as that with a shade sail, can reduce your UV exposure up to 75%, therefore reducing your chances of getting skin cancer or a serious sunburn. Shade is good protection for all of that reliable outdoor furniture you spent so much time choosing, too. They're protected from sun bleaching, rain, and other weather wear. Even tender outdoor plants that are shade lovers can thrive under a sail. There is also the big benefit of energy efficiency — outdoor shade blocks direct sunlight from warming your house and increasing the need for air conditioning (and associated costs). We've put together tips that will help you install a shade sail for comfort and privacy.
Tips before installing a shade sail in your backyard
As you're designing your perfect patio, think about how the sail will fit in before you make any purchases or start setting up your shady paradise. The first thing you need to consider is where the sun is in relation to your preferred location for shade — your sun shade will need to sit between that area and the sun at different times of day, so know orientation points to maximize your benefits. Once you know where your shade sail needs to be, you can determine the size you need — do you want to max out coverage with a rectangular sail or have pockets of shade with some sun poking through with a triangular option?
Another thought to reflect on is your mounting and anchoring points. If there is nothing in the yard to mount your sail to, you'll need to install posts that are securely anchored into the ground. Perhaps you have the opportunity to mount at least one side to the house or an existing structure, so you'll only need one or two posts. Whatever your mounting and anchoring points are going to be, you'll need to work that into the equation and buy the hardware to accommodate your plans. The mounting needs also affect the backyard design — consider where those anchoring points and posts will need to be based on the size of the sail to make sure they don't interfere with your backyard use.
Installation tips for a secure, effective shade sail

If you plan on anchoring at least one corner to the side of your house or another existing structure, you'll need L hooks or hurricane hangers. They will help strengthen the area of your house's fascia or siding, which may not hold the sun shade in place without assistance. These fascia support brackets can be installed about 2 to 3 feet away from the anchoring point to offer the support needed on your structure.
If you need to add posts or poles as anchoring points, you'll need to work with materials that can withstand a tightly strung shade sail putting constant pressure on it. Pressure-treated wood and steel beams are great long-term options, whereas trees are not (attachments can cause damage and trees sway in the wind). Make sure you dig deep enough in the ground and fill the hole with concrete to give your supports the extra sturdiness they need to maintain the sun shade through windy conditions and other possible pitfalls, like heavy snowfall. Once you've obtained the shade sail, proper hardware, and stable supports, you can follow the manufacturer's guidelines to properly install your new patio shade sail.