How To Turn A Dollar Tree Picture Frame Into An Elegant Riser For Home Decor
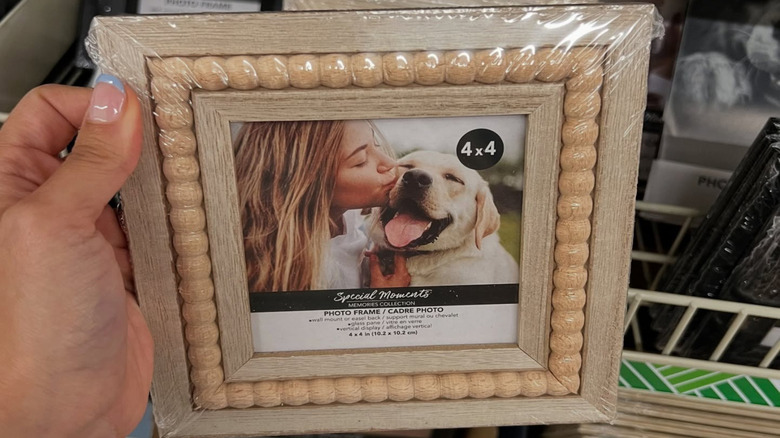
For craftsy types, a Dollar Tree picture frame left un-repurposed is a total waste of creative potential. Take the Special Moments Wooden Beaded Photo Frames. Anyone who's not an active DIY-er would look at these beautiful treasures and just see just the right frame to host their favorite photo of themselves at the beach with their kids. But for the intrepid crafter, that same frame practically morphs before their very eyes into a cute little riser for bottled soap and nail brushes in the bathroom. Okay, it doesn't magically become a little shelf for soaps. You need to do a bit of work to make this unique Dollar Tree frame hack a reality.
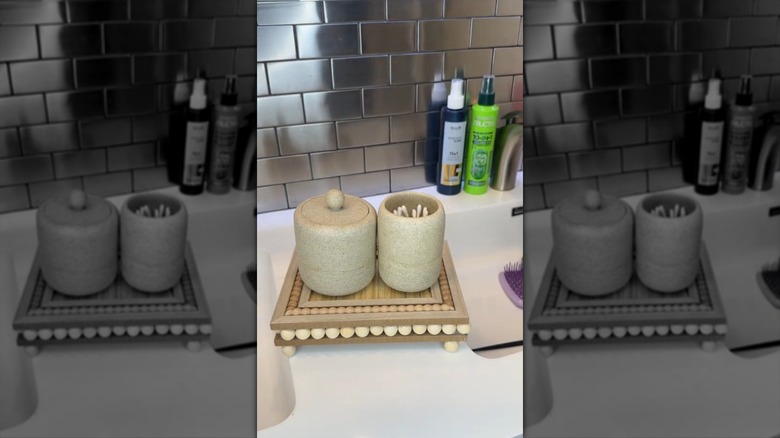
Riser shelves often decorate bathroom countertops these days. Their purpose is to stop soap from sliming up the counter and to keep pools of water from accumulating underneath bars of soap and bottled items alike. Your DIY Dollar Tree riser gives you those benefits while, at the same time, allowing you to personalize your sink area by decorating the counters with something you've made yourself (yes, this works for the kitchen sink, too).
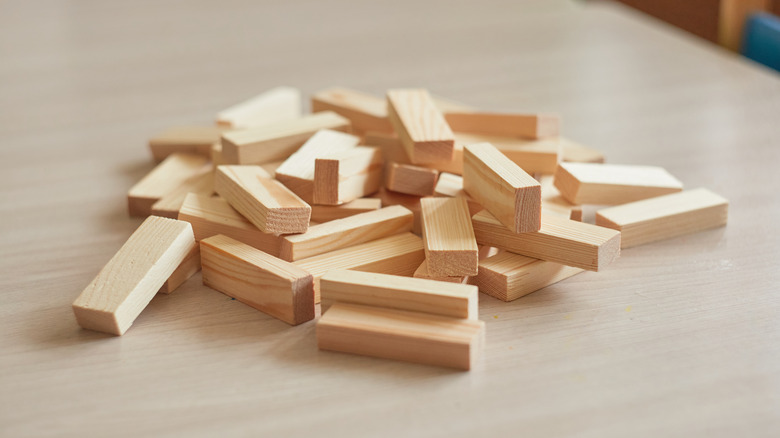
Aside from two of the bead-lined Dollar Tree frames, you'll also need a couple of Crafters Square Wooden Bead Wreaths, from the arts and crafts section, alongside a Classic Games Tumbling Tower Game, from the toy section of your local Dollar Tree. Finally, you'll need a couple of key tools to finish the sink-top riser. A pair of scissors will come in handy when it's time to cut open the packaging on these items. Make sure to grab your hot glue gun, too.
Making the Dollar Tree sink-side soap riser
The first thing to note is that you're going to be using some, but not all, of the parts of the photo frames for this particular project. Carefully remove the protective cellophane from the frames and dismantle the frames themselves, keeping only the front beaded portion and the protective glass pane from one of them. Next, take the frame you've removed the glass from. Line up the blocks from the game inside the area where the frame's glass pane used to be. The blocks are two-toned so you may want to alternate them so that they're arranged in a light/ dark, light/ dark pattern inside the frame, for more visual interest.
Working with patterns like this is great because they really draw the eye to the center of the frame, making it a focal point of the piece. Next, use your glue gun to create a bond around the blocks so that they adhere to the interior of the frame. Then, glue the glass pane inside the other frame so that it stays firmly put. Consider putting the glue on the outside edges of the glass to hide the adhesive.
Next, cut the beaded wreath apart and glue a border of beads around the outside edges of the back of the frame (the one that has the game blocks on it). Add a spot of glue to the beads in each corner of the frame. Lay it on top of the beads so that you can see the glued blocks through the glass pane. Finally, turn the frame over and glue a bead in each corner of it to make some feet for the piece.
Leveling up your wood-and-glass bathroom riser
If you'd like to make this piece look even cooler, simply add some paint or stain to key parts of the wooden riser shelf and watch it pop right off your sink. For example, paint each of the darker game blocks black. They will look a little like a piano keyboard when placed next to the plainly-hued blocks, and the stark visual contrast between the colors will make each of them more prominent than they would be without it. Always keep in mind that contrast is one of the key interior design tricks you can employ to make your space instantly look more interesting and inviting.
Other places you can paint on the riser shelf include the two frames themselves while leaving the beads unpainted. Or, paint the beads and leave the frames natural instead. It's also possible to give the riser a higher profile by using a different item to make its feet. Instead of using beads for this purpose, pick up some Crafters Square Wooden Peg Dolls from the Dollar Tree instead.
Put the glue on the flat bottom of the doll and attach that to the frame. Because of the dolls' design, the legs will resemble a chair or a sofa that has beaded or clawed feet at the bottom of their legs. And, because the wooden dolls are taller than the beads, you can paint them an interesting color to make them stand out even more, too. Who says organizing your bathroom counter has to look boring?