This Candy-Themed IKEA Pillow Gave Us A Sweet Holiday DIY Idea
No one is accusing IKEA of outlandish prices, but if you can whip up an equally adorable dupe of an adorable IKEA product for less, it's worth paying attention. And if it's a ridiculously easy DIY, that's my cue to give it a try. IKEA's green and red plaid VINTERFINT cushion resembling a wrapped cylindrical piece of candy is an utterly craveable winter holiday accessory that I immediately imagined in my "holi-decor". The VINTERFINT isn't terribly expensive at $29.99, but I knew I could make a similar one, even for free, with little more than a rectangle of fabric and polyester stuffing. Plus, it wouldn't take more than an hour to assemble. I have scissors, pins, and a sewing machine on standby for such flashes of inspiration. I just had to search for the right cloth to make a cozy and creative Christmas decoration to sweeten a couch or armchair.
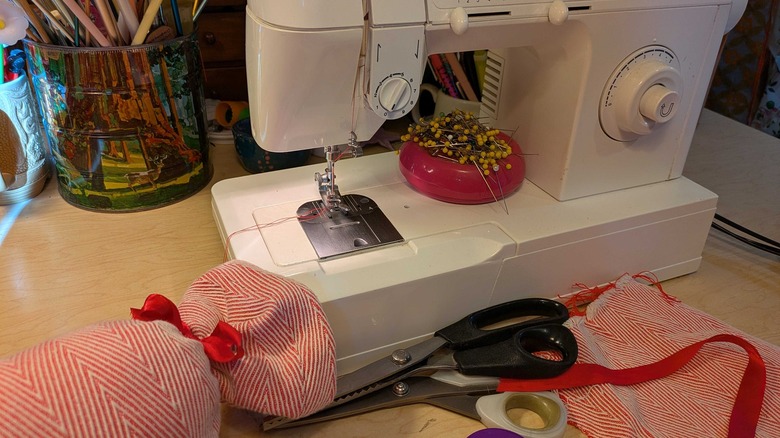
Given my sizable crafting hoard, I felt pretty confident that I could unearth some workable supplies to make my own take on the VINTERFINT candy cushion without spending a buck. I lucked out to find a rectangle of red and white canvas-type material in my crafting stash and a red satin ribbon scrap along with my go-to supply of polyester stuffing. With scissors in hand and sewing machine fitted with matching thread, it was experimentation time.
Cutting and stitching a candy wrapper tube
To recreate the VINTERFINT cushion's dimensions as closely as possible, I figured that a square of fabric 26 inches long and wide would be ideal. The extra inches would allow for finished seams, hems, and lost length from cinching the ends of the "wrapper" with twine. But I felt it was worth giving my 12-inch-by-25-inch fabric scrap a go at becoming a candy cushion.
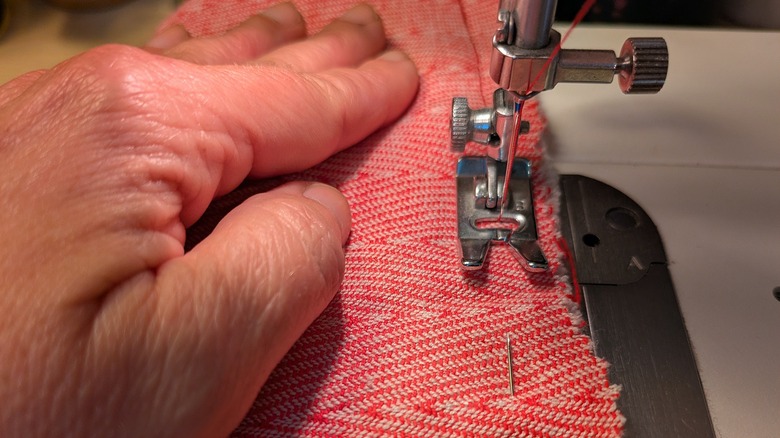
Diving into this fun holiday decor idea, I squared up the edges of my fabric, flipped it over so the underside was showing, then folded the raw ends of two longer sides together. I pinned the edges and stitched along the line of pins, leaving a 1-inch margin between the stitching and the edges. As the needle hummed along, I realized it would've been easier if I'd hemmed the other edges before sewing the fabric into a tube. No matter, I went forward with the DIY, knowing it wouldn't be too terribly difficult to hem the open ends of the tube.
As for the raw edges on each end of the tube, I folded them over twice and pinned them with about a 1-inch hem. I stitched the hems on both ends, and turned the tube right side-out. So far, so good. I would have liked a slightly wider tube, but I was content as-is, given that I was making use of materials I already had.
Stuffing, tying, and troubleshooting my candy cushion
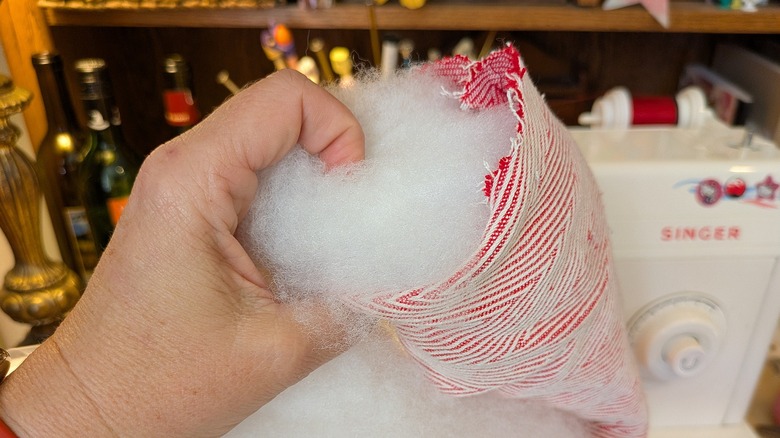
Itching to see how the pillow would look with stuffing, I tied a tight bow with the ribbon around one end of the tube. I left about 4 inches of excess material between the bow and the end to resemble the twisted ends of a candy wrapper.
Feeling that the structure would hold the best shape and look polished with a lot of filling, I stuffed the tube with a generous amount of polyfill so that the body of the cushion would be very firm. I tied off the other end with ribbon, leaving the same amount of excess fabric at this end as I did the other end. I double knotted the bow closures on each end of the cushion and inspected my work. It looked good in general, but the stuffing looked a bit lumpy and uneven, and the ends didn't look very candy wrapper-like. The latter was an easy fix, and I plumped the cinched ends.
I liked the firmness of the pillow and wasn't convinced that removing some filling would be the best way for me to end up with a bumpless cushion body. With a bit of rolling and massaging the cushion, the exterior was noticeably smoother.
Does the finished pillow pass muster?

The first test in determining if my creation passed muster was, "Does it look like what it's supposed to be?" The candy cushion earned an A+ on this task, since my very intelligent, yet not very imaginative, husband ID'd its intended form immediately. The second test was a tougher one: Whether it met my exacting standards for me-made goods.
Despite my pathological frugality, I couldn't help thinking how much nicer the finished product would be if it were closer in size and color to the chunkier IKEA model. My design earned an A- for making do with what I had. I was pretty pleased with the free version, just the same, but lifelong perfectionism had me imagining a version that could trick viewers into thinking it was store-bought.
A bit of fabric like this red tartan plaid flannel would've hit a little closer to the VINTERFINT mark. However, I'd want to shop in person rather than online. Seeing and feeling the fabric for my ideal VINTERFINT copy would assure I'd find cloth with the thickness of denim that looked similar or the same on both sides. My festive handmade pillow still gave a touch of holiday magic to my favorite chair, even if it slightly missed the VINTERFINT mark.