How To Grow Fresh Basil In An Old Bottle For Your Kitchen Herb Garden
We may receive a commission on purchases made from links.
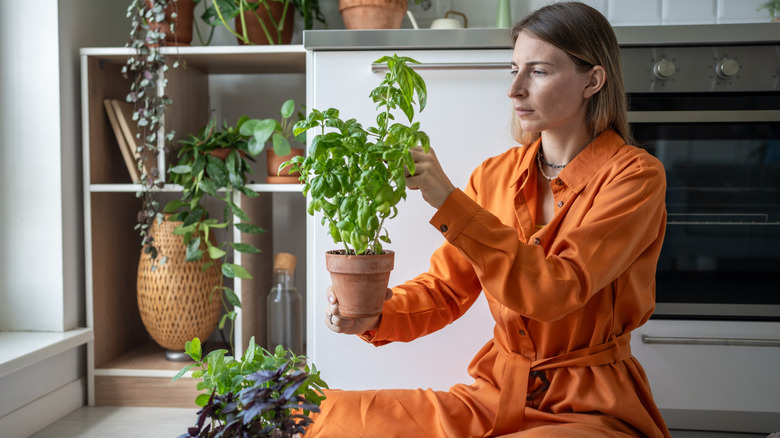
Basil is easily one of the most popular herbs in the U.S. It's tasty and easy to grow, elevating even the most humble pasta dish. You don't need a fancy, fully-fledged kitchen herb garden to enjoy a steady supply of fresh basil. All you need is space on a sunny windowsill and a few cheap supplies, including an old plastic bottle — and some basil plants, of course. The best thing about growing this popular herb in a bottle is the aesthetic versatility. Create a charming, cottagecore kitchen herb garden using vintage or antique glass bottles. If you're on a budget or prefer a more utilitarian vibe, grow your basil in a big plastic soda bottle.
Basil plants grow quickly from seeds or cuttings. It's also one of the herbs you can grow in your kitchen without any soil; it does well when grown hydroponically. Simply select a bottle and decide on your growing medium and propagation method. Glass bottles work best if you want to try your hand at growing basil hydroponically from cuttings. Plastic bottles are most effective for seeds and potting soil — we like Midwest Hearth Seed Starter Natural Potting Soil Mix — because you can easily cut drainage holes out of the bottom. With either method, you'll need a growing spot with lots of sunlight, whether real or artificial. Using grow lights is a helpful tip for growing basil to ensure a bountiful harvest in the winter.
A guide to growing basil hydroponically in glass bottles
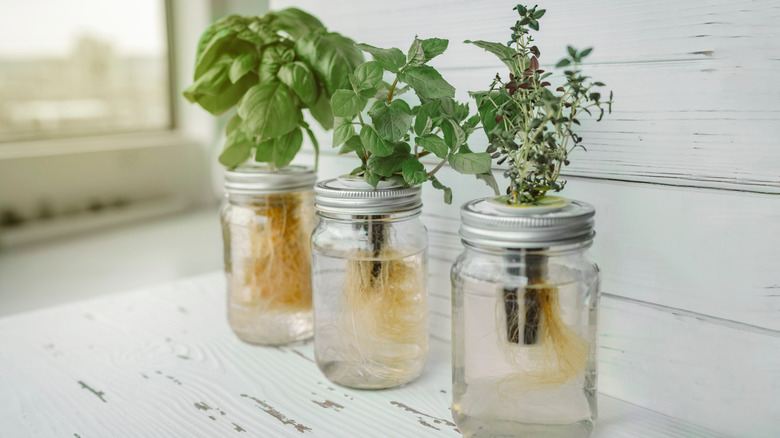
Growing basil hydroponically lets you create a beautiful indoor herb garden using glass bottles. With this method, your basil plant gets the nutrients it needs to grow from amended water. Take a cutting from a healthy basil plant, making your snip just below a set of leaves. The bottle should be just a little taller than your cutting is long. Strip all the leaves from the bottom of the stem — you don't want them sitting in the water, or they will rot. Fill the bottle with several inches of filtered water or tap water that's been sitting uncovered for at least 24 hours to evaporate the chlorine. Insert the cutting into the jar, and put your jars in a sunny window. Keep an eye on the water and change it at least once a week or more often if you notice it's growing algae.
You can also use a soilless growing medium if you want to give your basil plants more support. Fill the bottle partially with clay pebbles, then add your cutting, then more clay pebbles. This will keep your plants from flopping around if the opening on your jar is bigger, such as on a mason jar. Since your plants aren't getting nutrients from soil, you'll need to feed them with fertilizer. Use half-and-half liquid fertilizer and water every few weeks, or follow the directions on the fertilizer package. When you're ready to harvest the basil, you can pluck a sprig.
A guide to growing basil with potting soil in plastic bottles
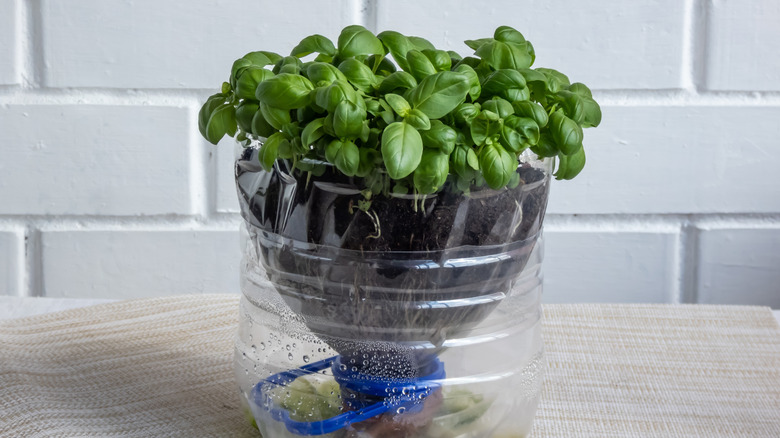
With a 2-liter plastic bottle, you can create a self-watering basil planter. Cut the bottle in half horizontally and place the top half upside down in the bottom half. Put a chunk of sponge in the opening where the bottle lid was. Then fill the top with potting soil. Next, add water to the bottom section and replace the top half. Place your bottle in a warm, sunny area and add more water to the bottom as needed.
Avoid fertilizing your basil too often, as this can affect its taste and smell. You can give it a low dose of fertilizer every few weeks. Basil is sensitive to cold, so don't leave it on the window during the winter. Temperatures there may drop below 50 degrees Fahrenheit, which is the lowest temperature basil will tolerate. Move it somewhere warm and use grow lights instead. Once your plant is well-established, you can start harvesting it. The right way to harvest basil so it keeps growing back strong all season is to cut stems that have at least three to four sets of leaves.