12 Ways To Remove Rust And Corrosion From Tools, Minus The Elbow Grease
Even the most fastidious among us sometimes neglect our home and garden tools. Whether it's the hastily set down trowel that lies forgotten all winter, or the plumber's wrench that never got that needed dry-down, tools can easily fall prey to rust and corrosion. So how can you keep tool rust at bay without shelling out the big bucks for caustic chemicals? And just as importantly, are there DIY solutions that don't involve hours of back-breaking labor spent sanding off those stubborn rust flakes?
Fortunately, the answer to these questions is yes! There are plenty of tried-and-true methods for removing rust and corrosion from tools, many of which predate the expensive commercial products. You probably won't be able to completely avoid the use of elbow grease in the endeavor, but these household products can greatly cut down on how much energy you'll have to exert.
Keep in mind that prevention is just as important as restoration after you've gotten rid of the rust and corrosion. Wash and dry your tools after each use, sanding them gently if needed. Garden tools might need disinfecting with bleach or alcohol. All tools should be treated with the rust-prevention formula of your choice, whether it be mineral oil, linseed oil, or a commercial product geared to your specific needs. These steps are also important after rust treatment. All that careful rust-removal will be in vain if you don't apply some kind of lubricant on them prior to storage.
Soak tools in a bath of equal parts vinegar and water
Keeping in mind that acids are often the go-tos when it comes to rust removal, it's not surprising that vinegar tops the list of hacks for removing rust with household ingredients. This inexpensive ingredient contains acetic acid, prized as a mild acid that is less caustic to both skin and the tools themselves. That makes it effective enough to interact with and dissolve the iron oxide in the rust, but not so caustic that it will damage most materials.
For tools that will fit easily into a bucket or basin, try a vinegar bath to remove the rust. You can use any kind of distilled white vinegar. An overnight vinegar soak lets time do most of the work for you. Use a simple 1-to-1 formula of water and vinegar, making sure that your half-vinegar, half-water liquid covers the tool entirely. After you dry the tool after its soak, scrub it lightly with steel wood. Follow this with a rinse in soapy water, and a coating of mineral oil or linseed oil.
Use a spray-on vinegar wrap treatment for bulkier items
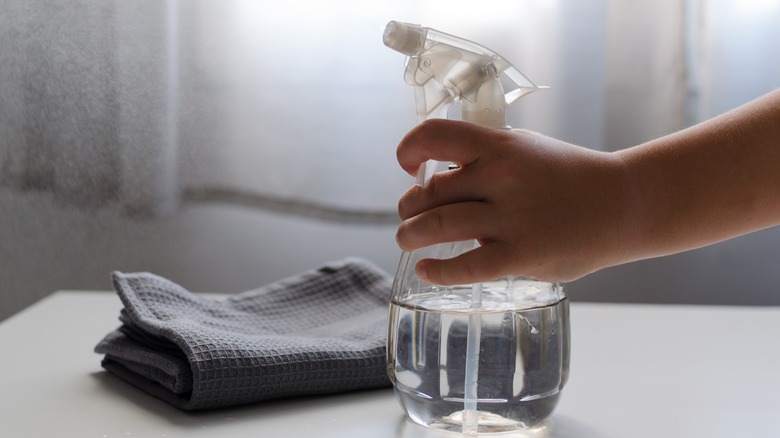
Got a tool that's a bit too large or strangely-shaped for a proper soak? You can still use vinegar's rust-dissolving properties without having to resort to filling your bathtub with the fermented ingredient. Instead of a vinegar-and-water soak, you'll just be using paper towels and plastic wrap to keep the vinegar from evaporating while it's doing its thing to bust up the iron oxide that's eating away at your tool.
Start the vinegar wrap treatment by putting plain white vinegar into a spray bottle. Generously spritz the parts of the tool that need rust-busting. Next, wrap the vinegar-treated tool sections with paper towels, followed by plastic wrap. Tape the wrap if necessary to affix it in place. For long-handled tools like hoes and rakes, you might need to do the vinegar, paper towel and wrap treatment in several sections. Wait between three and 24 hours before unwrapping again, depending on the severity of the rust. After giving the tool an initial drying, scrub it down with a wire brush or steel wood, and lubricate it with protective oil.
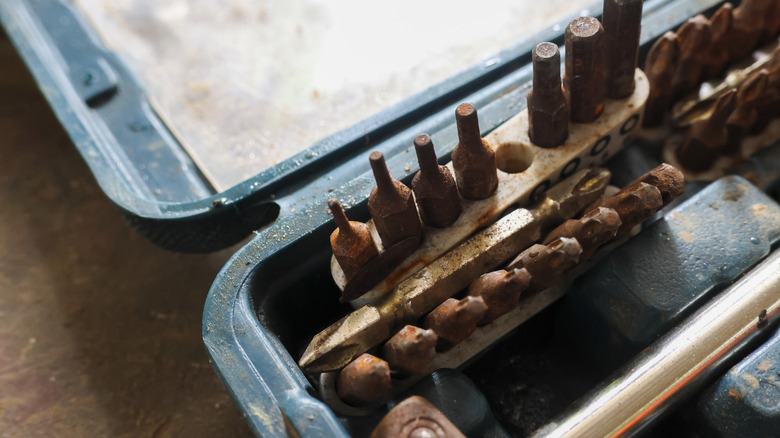
Use your drill's wire brush attachment to easily bust through rust
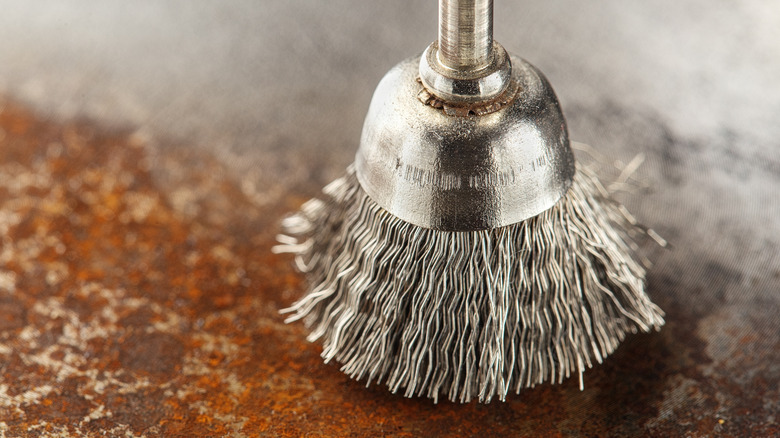
Scrubbing off rust by hand with steel wool or sandpaper is definitely one way to go about removing rust from metal tools. The key problems? It can be difficult to get into the nooks and crannies of ridged and bolted tools using those materials. Even more daunting is the amount of effort needed to get the job done. That's why having a drill with several handy drill attachments can be a godsend. Rather than wearing out your arms cleaning a tool with severe rust, let a drill's motor do the work for you.
Use either a wire wheel or a wire brush attachment on your drill. After setting the attachment in place and donning protective eye wear, move the drill gently over the rusted parts of your tool. Use a light hand and a circular motion — the last thing you want to do is to scrape off the actual metal parts of the tool. If any fine rust particles remain that the drill attachment didn't reach, run some fine sanding paper over them. Finish with a coat of oil.
Combine lemon juice and salt for an unbeatable acid-abrasion combo
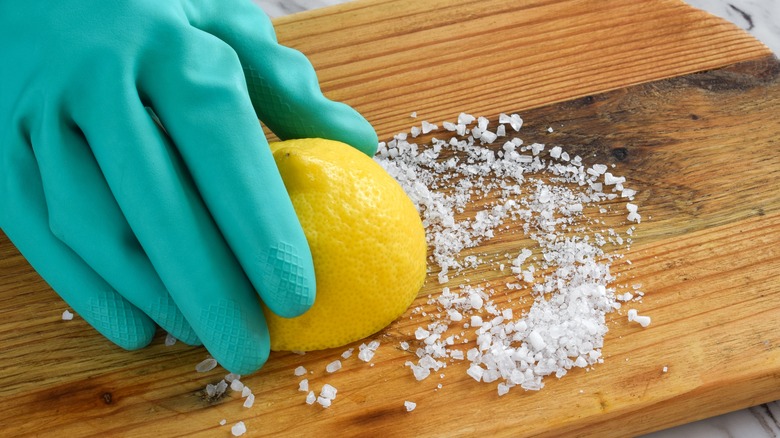
Like vinegar, lemon juice is packed with acid. In the case of lemons, however, it's citric acid. Does the chemistry lesson matter when it comes to rust removal of tools? Well, yes and no. As with vinegar, the acidic content of lemon juice helps dissolve rust. But the citric acid in lemon juice can potentially damage silver. Don't use lemon juice on any antique tools made of solid silver, or it could damage them. Otherwise, consider lemons a valuable ally in cleaning your metal tools!
Lemon juice is an inexpensive and readily-available rust-removing ingredient. The same holds true of salt, which acts as an abrasive companion for rust removal. If you have a large, flat surface to clean, such as a saw, the easiest method is to simply cut a lemon in half, sprinkling table salt over the surface of one of the cut lemon halves. Rub the lemon vigorously over the rusted surface. If your tool is narrower or made of several parts, whisk salt and lemon juice together, then apply it to your tool with steel wool. If needed, leave the lemon juice and salt mixture on the tool for a few hours before drying, then applying protective oil.
Remember that the only thing worse than "rubbing salt into a wound" is adding lemon juice to the equation. It's wise to wear gloves during this chore. That precaution's especially true if you have any cuts or scratches.
Crumple up aluminum foil to rid chrome and steel tools of corrosion
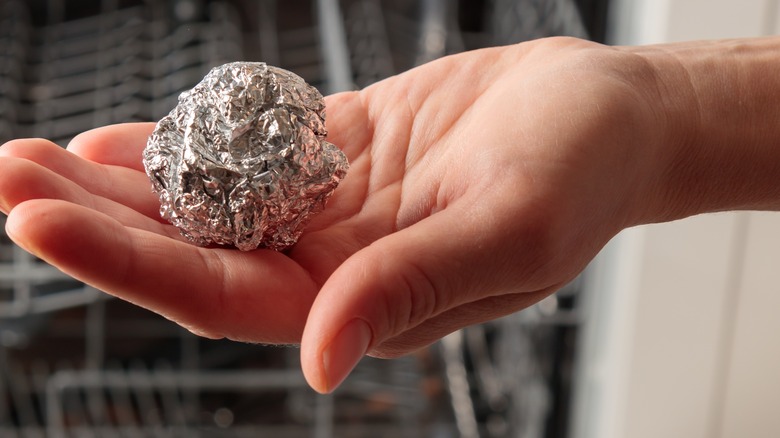
"Curses! Foiled again!" At least, that's what the corrosion and rust lurking on some of your tools might say, when they see you heading toward them with a handful of crumpled aluminum foil. It doesn't get much simpler than this rust-removal hack, especially if you have chrome or stainless steel tools that need fixing. You already know that aluminum foil is endlessly useful. Foil's ability to remove rust from metal is just another reason to always have this household staple on hand. The science behind this breezy hack boils down to the way aluminum interacts with iron oxide, dissolving it.
Tools that are made from chrome, such as wrenches, may respond especially well to the aluminum foil treatment. Tear a generous piece of foil from the roll, and crumple it into a loose ball, with the shiny side facing outward. Rub it over the rusted sections of your tool. Brush away any remaining bits of rust, and oil your tool. If the aluminum foil doesn't completely treat the rust by itself, it can be dipped into a rust-busting liquid, such as vinegar.
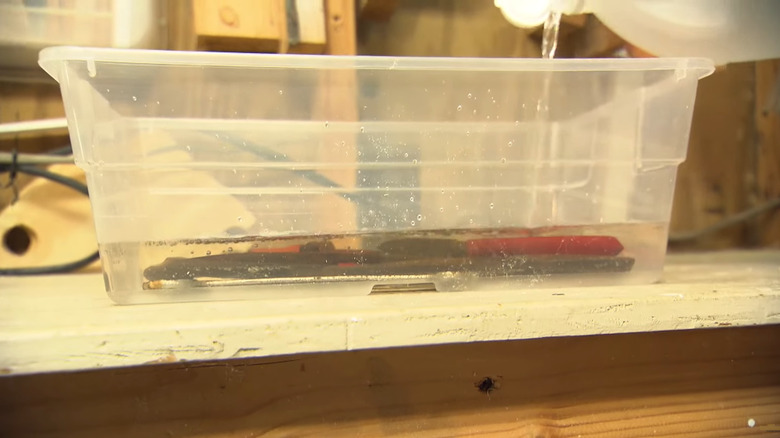
Soak tools in a molasses bath for slow and steady rust removal
Molasses is known as a chelating agent – a scientific way of saying that its molecules bind with metal ions, including rust molecules. That property makes molasses useful for dissolving rust when combined with water. This tip is literally "slow as molasses" because the soak takes longer than many other DIY methods. But when you want to toss a bunch of hand tools into a large bin and forget them for a while, the molasses soak is the ultimate low-effort cleaning hack that's hiding right in your kitchen!
This slow-going method may be perfect if you've recently picked up some rusty tools from an estate sale, or are just getting old tools spruced up during spring cleaning. Use a ratio of about nine parts water to one part molasses. If you have a large item or several tools to do at once, consider getting the inexpensive gallon jugs of molasses from a local feed store or garden center, rather than the supermarket jar you save for baking. Make sure the tools are completely covered by the molasses-water solution, and cover the bin so you don't draw rodents. Leave the bath to do its thing for a couple of weeks. You may smell fermentation and even see some dry foam, but that is just part of the fascinating process! After you've rinsed and dried the tools, oil them up for rust prevention.
Combine soapy steel wood pads with turpentine to make the job easier
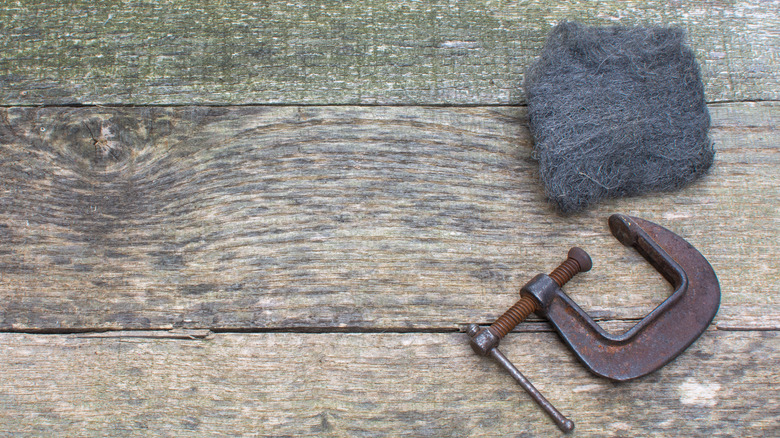
Granted, scraping rust off tools with ordinary steel wool does require a bit of effort. But bringing soap and turpentine into the equation can reduce the amount of time and physical effort needed to get those tools rust-free again. Rather than using plain steel wool, choose the supermarket type normally used for pots and pans. These come pre-loaded with plenty of sudsing action. (Or, just stick a sliver of bar soap inside a regular piece of steel wool.) Combining the soapy steel wool with turpentine, a solvent made from pine trees, cuts the amount of "elbow grease" you need to get the rust off that tool.
To attack the rust, start by wetting the soapy steel wool pad to release the suds. Then, dip the pad in turpentine, and begin scrubbing the tool with a circular motion. Substitute kerosene for turpentine, if desired. Using the soapy steel wool and turpentine method on its own may well get the job done on its own. If the rust is severe, use the hack after you've given your tool an initial treatment, such as a vinegar soak or spray-down. You can also follow the turpentine and steel wool method with the aluminum foil treatment.
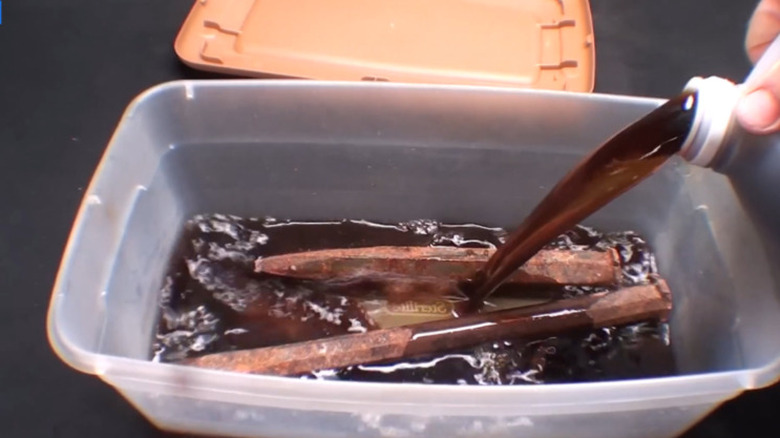
Give your tools a long, slow Coke soak to dissolve rust
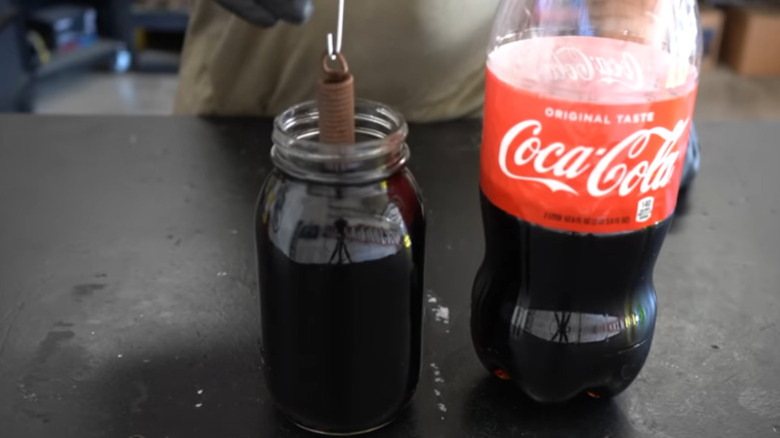
One favorite home remedy you'll hear every old-timer mention is the "Coke soak." The secret ingredient behind this easy trick to remove rust from your garden and home tools? The phosphoric acid content in sodas like Coca-Cola is the secret behind this rust removal hack. Keep in mind, however, that sodas don't contain a high amount of phosphoric acid, which is already considered one of the weaker acids. (A fact that your gums and stomach should be thankful for.) Use the cola-bath method when you don't have other commercial products available and when you have the time to let the process work. On the flip side, the slow liquid soak can get behind rusty bolts and into crevices in a way that bulkier methods such as scrubbing with steel wool can't.
To use the soaking method, find a bin that's big enough to hold the tool or tools you need to de-rust, and gather enough cola to cover them completely. Read the label to make sure the cola contains phosphoric acid.Once the cola's been poured over the tools, leave them to soak for at least 24 hours. Rinse and dry the tools. Brush off any remaining rusty flakes, and apply a protective oil. If your tools are too bulky to fit in a bin, wrap the rusty parts in clean cotton that you've soaked in Coke, and leave it on for up to 24 hours.
Squeeze ketchup over rusty tools to utilize its acidic content
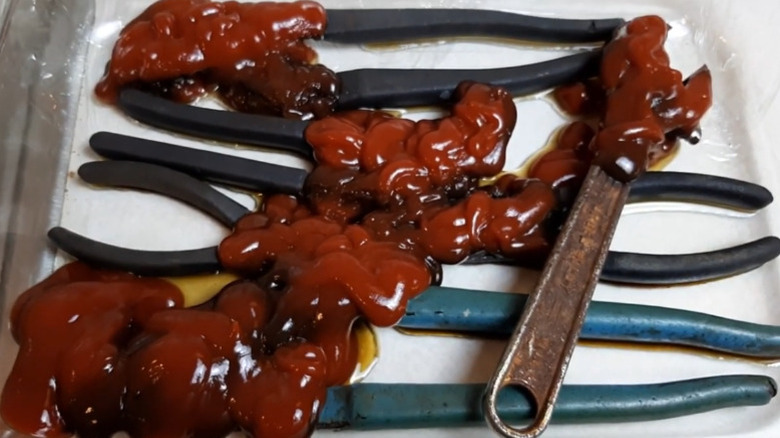
Don't have any of these other household items on hand to tackle rust? No problem! Just reach into your refrigerator for a rust-busting ingredient. The acetic acid content of both the vinegar and the tomatoes in ketchup can help dissolve rust. And even if you do have other acetic acid products in your kitchen such as lemon juice or vinegar, the thicker consistency of ketchup comes in handy when you don't want to submerge the entire tool. One obvious example of this dilemma are tools that boast premium wooden handles, which could get ruined after a prolonged submersion in vinegar or another liquid.
To use ketchup as a rust remover, pour generous amounts of ketchup over the rusty sections of your tool. Although you won't be soaking them, putting the tools in a shallow bin or a cookie sheet can help minimize the mess. Because ketchup can dry quickly, it's helpful to set plastic wrap loosely over the tool or tools to keep it moist. Leave the ketchup to absorb the rust for at least several hours. "The Tool Bandit" YouTube channel recommends not leaving ketchup on metal tools for longer than eight hours, in order to preserve the finish. When you're done, rinse off the ketchup and dry your tool. If needed, brush off remaining rust flakes before coating it with protective oil.
Fizz the rust away by tossing tools in a citric acid bath
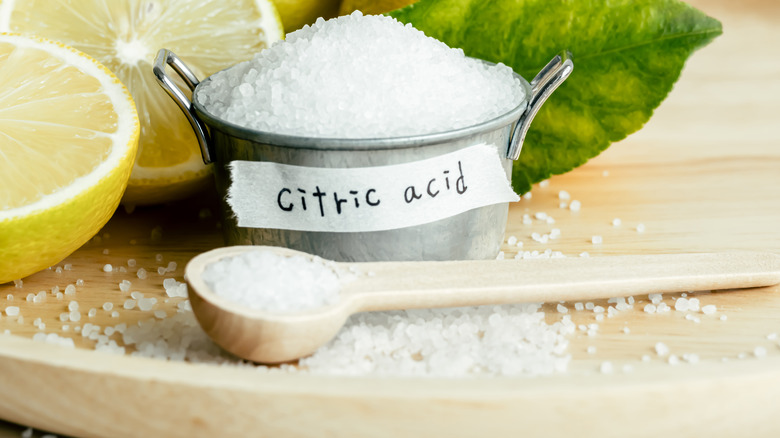
If you already have citric acid on hand for your canning or bath bomb making endeavors, now you can add rust removal to the list of things this handy ingredient can take on! As the name suggests, citric acid is the same type of acid found in citrus fruits, including lemons. It's also the name of the powder that gives bath bombs and digestive tablets their fizzing action. Citric acid powder is readily available at supermarkets that have canning supplies, at hardware stores, and online.
One immediate benefit that citric acid powder has over lemon juice? It's easier to increase the concentration of rust-busting acid to water, without juicing all those extra lemons. If your tools have severe rust issues, that's no small advantage! Use up to ½ cup citric acid powder to 1 gallon hot water, and mix well before adding your tool or tools to your soaking container. You'll need the water to be hot in order to activate the fizzing action of the citric acid. Check the tools after an hour or so. Return them to the tub if more rust still clings. Otherwise, remove the tools, dry them and rub them in protective oil.
A sliced onion tackles rusted stainless steel
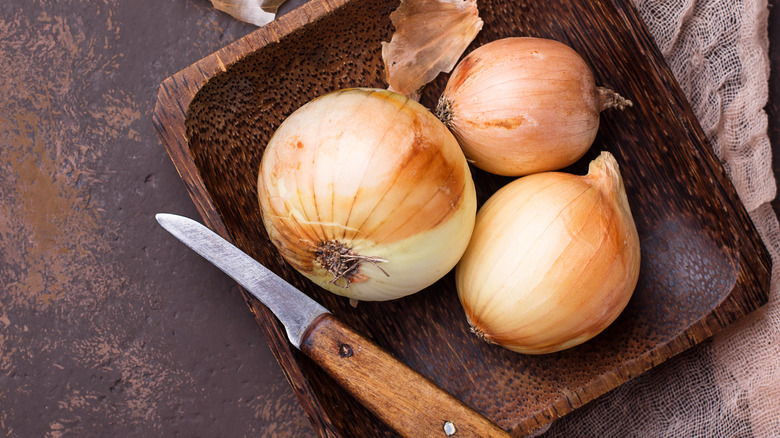
The humble onion does indeed contain many layers — both literally and metaphorically! Among its uses outside of the kitchen? This pungent vegetable can help you fix rusty knives and other tools, particularly if they're made out of stainless steel. When an onion is sliced open and exposed to oxygen, its active ingredients are converted to sulfenic acid. This kind of acid is useful for making rust flake away. Combine the onion slice with either fine emery paper from a hardware store, or with a fine-grain emery board.
This method works best on tools that are partially or fully made of stainless steel, and have light rust. Scrub the tool with your emery board or paper. Next, cut up an onion and rub the rusted pieces with the onion slice. (Obviously, larger tools can be treated with multiple onion slices.) Hold the tool under running water to rid it of its flakes, then dry it thoroughly with a clean cloth. Want to really skip the elbow grease? If your tool happens to be an outdoor knife with light rust, try just chopping up the onion with that knife. That may be enough to remove the rust, although of course you'll also need to rinse and dry the stainless steel knife.
Bring out the WD-40 to spray or soak the rust away
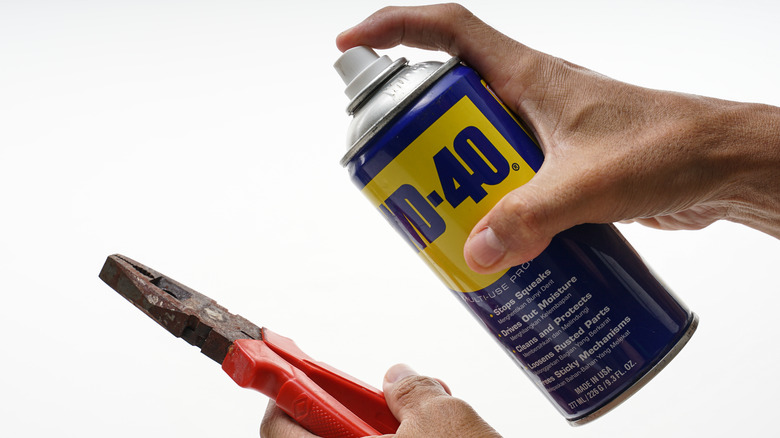
There's a reason that WD-40 is right up there with duct tape as the household helper just about everybody has on hand. And while many people tend to reach for the WD-40 in the tool shed to prevent rust, it's also worth trying as an actual rust-buster. It won't get you completely out of the dreaded chore of scrubbing, but it may save you some physical effort and frustration by pre-removing significant rust.
The manufacturer recommends first trying the Multi-Use Product with which you're probably most familiar. This WD-40 product works best on light to moderate rust. Spray it on, let it set for a few minutes, then scrub the area with steel wool or with a wire wheel drill attachment.
For more stubborn rust, consider using the Rust Remover Soak, which has the benefit of eliminating or reducing the need for scrubbing. Depending on the level or surface area of rust, the tool can be left to soak for a few hours or as long as overnight. The manufacturer notes that it is a non-caustic product that does not produce fumes.