Save Yourself Time & Effort With A Hack For Skim Coating Walls Without A Professional
Traditional skim coating, like many construction jobs, is a craft that requires considerable practice and skill to master. If you watch professionals, they use a combination of trowels and drywall knives to apply a layer of joint compound seamlessly to walls, either to remove texture, smooth out imperfections on and between drywall panels, or repair damaged walls. It's also arguably the cheapest way to cover up a popcorn ceiling. The traditional method is time and cost-effective for professionals but often difficult for DIYers to master. Fortunately, there's an alternative method that gives high-quality results but requires less skill and practice. Using a paint roller to apply the thinned-out joint compound lets you cover your wall quickly, thoroughly, and evenly. Even many professionals use this method because it allows you to efficiently apply multiple skim coats to a wall. With this simple hack, it becomes a lot easier to consider skim coating your walls if you want to create a like-new texture before painting or efficiently repair a lot of damage.
To skim coat using this method, you'll need a drill with a mixer attachment, a large bucket, joint compound, a paint roller with a heavy nap cover to hold more compound, water, a paint roller tray, and a 12-inch drywall taping knife. You can also use a wider knife or an extra-wide skimming blade to speed up the process. Start by mixing up your joint compound. Put it in a bucket, and churn it with the drill mixer attachment. Add water a little at a time as you mix until the joint compound is the consistency of creamy yogurt or pancake batter. Now, you're ready to roll on your skim coat.
How to apply a skim coat with a paint roller

Once you have your joint compound mixed and thinned, pour some into a paint tray (or dip your paint roller directly in the bucket if it will fit). Coat your roller with the joint compound, and apply it to the wall like you would with paint, rolling overlapping lines to cover the entire surface. You'll end up with a thick, even coat of textured joint compound on the wall. When working around fixtures like outlets and light switches, apply a few inches of mud around them with your knife so you don't have to bring your roller too close to them.
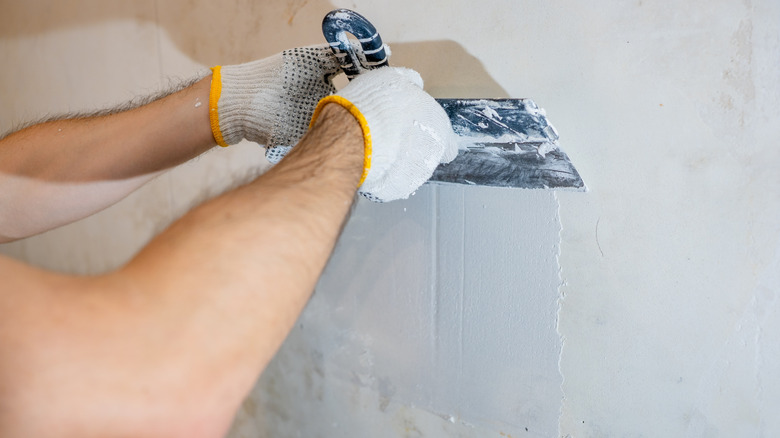
Take your drywall taping knife, and smooth out the joint compound. Start at one end of the wall, applying slight pressure to the knife on the starting side as you move it down the wall. This will push the excess compound out toward the opposite side of the knife and create a smooth transition between each line. Keep going across the wall until you get to the other side. Scrape the compound off the knife after each stroke. When you finish the wall, let it dry for several hours or a full day, if needed. Sand the wall with fine-grit sandpaper.
You'll often need to apply a second or third skim coat. Allow the second coat to dry overnight before sanding it. Sanding a skim coat creates a lot of dust, so cover the floor and anything else in the room with drop cloths before you start. Be sure to clean up the drywall dust and joint compound before you apply primer or paint so the dust doesn't get into the paint. Otherwise, it may add back unwanted texture.