How To Fix Cracked Cabinets Without Using Wood Glue
We may receive a commission on purchases made from links.
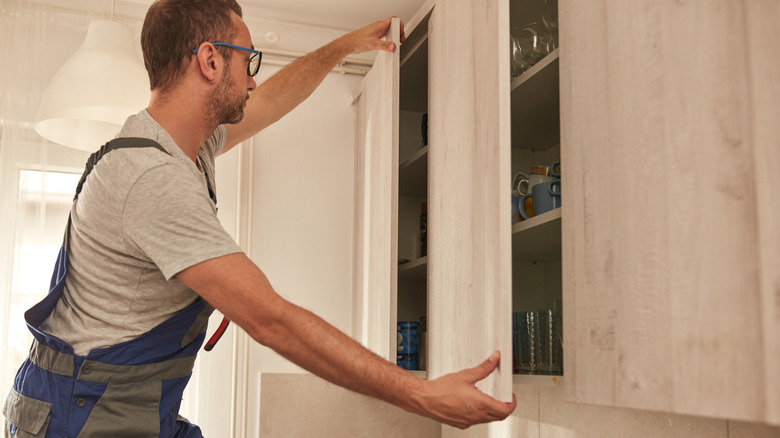
No matter how expensive your wooden cabinet is, it might still crack, especially if you live in a very humid area. This is not the result of poor craftsmanship but simply a consequence of how wood behaves. This natural material tends to expand and contract with seasonal changes and fluctuations in temperature and humidity. As a result, small cracks may appear on your cabinet and worsen over time if left untreated. The most straightforward solution is wood glue, but applying it properly can be complicated and may require a professional. Luckily, there are many different ways to fix the cracks in a wooden cabinet without using wood glue — from hiding them with decorative materials to minor repairs or full replacement.
Your options depend on where your cabinet sits, how you use it, and the depth of the crack. You can hide or fix a crack with peel-and-stick wallpaper, super glue with baking soda, or epoxy resin. You can paint over the crack or even hang curtains. If the crack is superficial, fixing it with wallpaper or paint may be enough. For deeper cracks in the wood, you'll need more than a cosmetic fix. In these cases, you can try to repair the crack with, once again, epoxy or super glue. If that crack is in the cabinet door and the door has already been fixed multiple times, you can replace the cabinet door altogether.
Hide a cabinet crack with peel-and-stick wallpaper
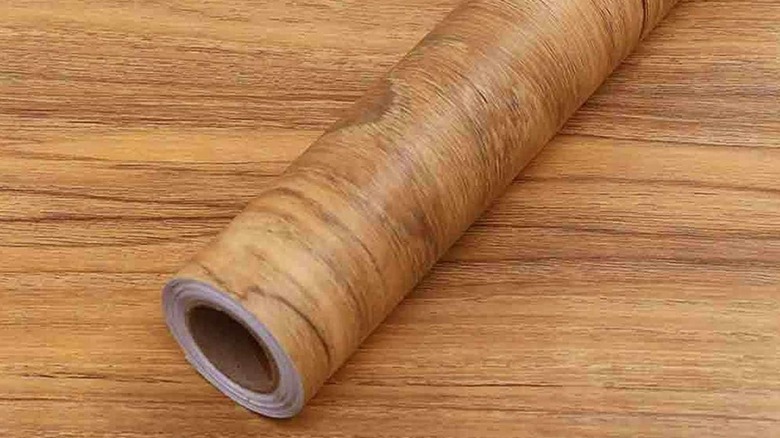
Peel-and-stick wallpaper is a stunning way to update kitchen cabinets without any paint. When it's applied correctly, the patterned surface of the wallpaper conceals flaws and refreshes the look of a cabinet. Rolls are affordable and often renter-friendly — use this product to renovate your entire kitchen, not just a single cracked cabinet. Adhesive wallpaper also comes in various patterns, including realistic wood grain prints.
All you need for this DIY project is a roll of peel-and-stick wallpaper, a pair of sharp scissors, a measuring tape, and a putty knife. Before you stick on the wallpaper, measure the cabinet you're applying it to. Then cut a sheet of wallpaper slightly larger than those dimensions. Clean the cabinet thoroughly to ensure the surface is free of dust and grease. Peel the backing off the wallpaper, revealing the adhesive, and stick it onto the cabinet. Cut away any overhang using the scissors, then use the putty knife to flatten the wallpaper against the cabinet.
@rayaa_8 #nobodysgonnaknow #fyp #foryou #fix #fixerupper #homeimprovement #hack #apartament #theregonnaknow
Using peel-and-stick wallpaper on a cabinet with a huge structural flaw is not recommended. It will simply hide the problem until the cabinet falls apart. You also shouldn't use this method if your cabinet is in a high-moisture area like a bathroom. Humidity can cause the wallpaper to fail on the wooden surface. If you've just painted your cabinets, wait a couple of weeks or more before applying peel-and-stick wallpaper.
Use super glue and baking soda to fill cabinet cracks
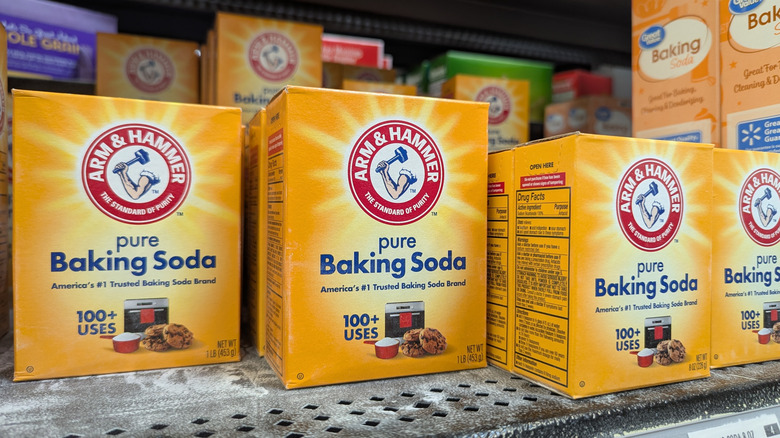
Cracked cabinets number among the things you can fix at home with a simple super glue and baking soda mix. This mixture is surprisingly strong and will fill gaps or fix a small crack in wood. Note, however, that it dries opaque white, which usually doesn't blend in well with natural wood. To get started with this DIY project, you need some super glue, baking soda, and a piece of sandpaper. The first thing you need to do is wipe down the surface of your cabinet with a damp cloth. Once the surface is dry, you can choose between two different methods. Which you choose depends on how deep the crack is.
If you have a shallow crack, you can try filling it up with baking soda and then adding a couple of drops of super glue. Once it's dry, rub the surface with sandpaper to level it. The second method works best for deeper cracks. Fill in the gap with alternating layers of baking soda and super glue. Wait 10 minutes between each layer. Repeat until the gap is completely full and sealed. Clean off any residue stuck on your hands or tools with nail polish remover.
Epoxy resin turns a cabinet crack into an artistic detail
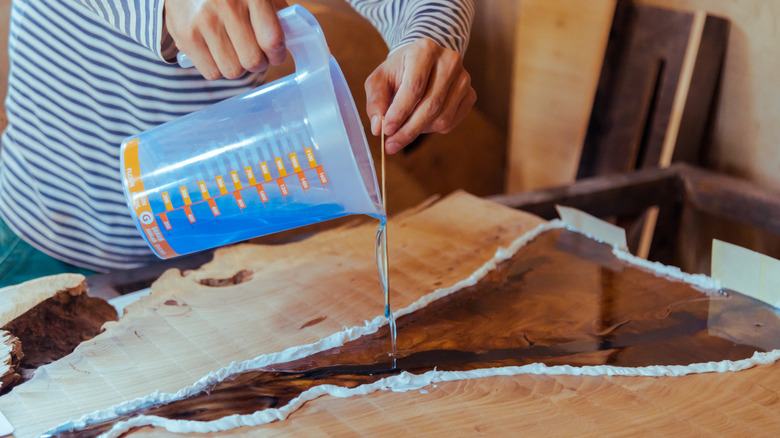
You can also embrace the imperfections in your cracked wooden cabinet by filling it with epoxy resin. The material bonds well with wooden surfaces and offers lots of structural support. For this project, you'll need a high-strength epoxy for deeper cracks or a thin, clear epoxy for smaller cracks. Often, the epoxy resin will come in a set that includes a hardener. Also get a mixing cup, a stirring stick, a spatula, a T-61 half-face respirator or an FFR-100 full-face respirator, gloves, and masking tape. Prepare the wooden surface by brushing it or wiping it down. This step is necessary because oils and dust can prevent epoxy from sticking to wood.
Then use the masking tape to seal the back of the crack to stop the epoxy seeping through. Wearing your gloves and respirator mask, slowly add the epoxy resin and hardener to the mixing cup in the ratio specified by the manufacturer. Pour the mixture into the cabinet crack and use the spatula to spread it evenly across the surface. Let the mixture set, and then scrape away any excess. Remove the tape once the epoxy has hardened. Note that gloves and a respirator are necessary when working with resin. The fumes from the product can cause serious health issues.
Paint over a cracked cabinet door
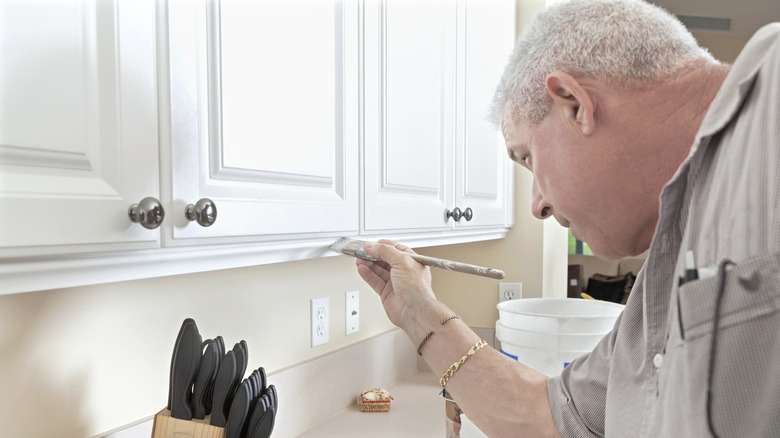
There are many reasons why your painted cabinets might crack: low-quality paint, high humidity, insufficient adhesion, or poor wood priming, among others. No matter the reason, you can repaint kitchen cabinets in just one day — and cover cracks at the same time — using this method. For this easy DIY job, you'll need a scraper, sandpaper, paint primer, paint in your choice of color, and a paintbrush. Start by scraping off the flaking paint with a scraper or a wire brush. Then sand the area to remove as much of the old paint as possible and create a smooth surface.
You should then apply paint primer. Don't skip this stage. Primer is necessary because it helps the paint stick to the wood and reduces further issues with cracking in the future. Then paint over the crack layer by layer. Avoid painting thick layers, as those can easily flake and fall off once they're dry. If you want your newly painted cabinet to look fresh longer, consider adjusting the humidity levels in your home to reduce stress on the wood. Run a humidifier during hot or dry days and a dehumidifier during humid or rainy days (when there's excess moisture in the air).
Replace a cracked cabinet door with a no-sew curtain
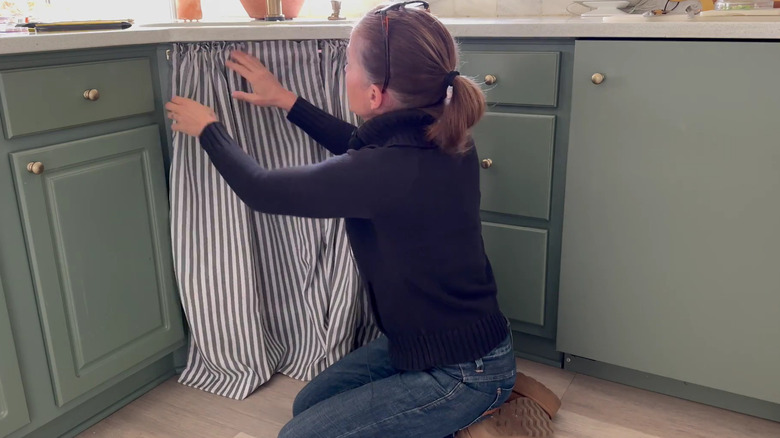
If you have a beat-up cabinet door that has seen better days, you might be tempted to repaint it. Unfortunately, if the cracked door is in a high-traffic room (like the kitchen) or damp place (like the bathroom), the new door won't last long. An out-of-the-box solution is to use a no-sew curtain instead. This is a budget-friendly method to fix your cracked cabinet door, and it adds a vintage, cozy vibe to any living space. The best part about having a curtain for a cabinet door? Whenever it gets beat up, you can simply wash it or replace it.
You don't need any sewing skills for this project — or even a sewing machine for that matter. All you need is a piece of cloth that matches the dimensions of the cabinet door you're replacing. You can repurpose an old curtain or buy a ready-made one. You'll also need a curtain rod, a self-adhesive curtain rod mount, and curtain rings with clips. Once you have all the materials you need, unscrew your cabinet door and clip the curtain rings to the fabric. Connect the self-adhesive rod mount to the curtain rod from one side, thread on the curtain rings, and add the second rod mount. Stick the curtain brackets into the top of the cabinet opening, and you're done.