Extra Steps That Are Worth The Effort To Make IKEA Furniture Look Built In

IKEA shoppers know what they're getting when buying furniture: It's inexpensive, ready to assemble, and pretty reliable quality for the price. Yet, after a few adjustments that are neither extremely complicated nor expensive, virtually any IKEA cabinet or shelf — or other budget self-assembly furnishing — can be mistaken for a high-end investment. A few screws, some caulk, and a lick of paint may be all you need. If your walls are free from baseboards, flat-backed furnishings will sit flush against your walls with just a push. But hiding the seam between the furnishing and the wall is key to making it look custom-built.
Screw the back of the cabinet to the wall to hold it in place. Many IKEA furnishings are made of particle board, so take a bit of care with which screws you use and how you create the holes. Self-drilling wood screws work nicely; source ones with diameters less than 20% the thickness of the board you're drilling through. Treat the gaps between the wall and the piece to a seam of caulk. A top choice by carpenters is DAP Dynaflex 230 due to its flexibility and adaptability.
Tie the newly attached piece to the room with a good covering of paint in a tone that complements the room. The trick to painting IKEA furniture and other laminated furniture is to coat it with a good primer first. You can paint the DAP caulking for an even more seamless look. However, if you have baseboards or are combining more than one furnishing, you'll have a longer — yet still manageable — to-do list.
Workarounds for tricky baseboards and trim
What are the tweaks needed if you do have baseboards to work around? Before affixing your pieces to the wall, you'll need to do a bit of cutting and pasting — quite literally. The steps are a little tricky, but with the right care, they'll help you personalize basic IKEA furniture into something truly special.
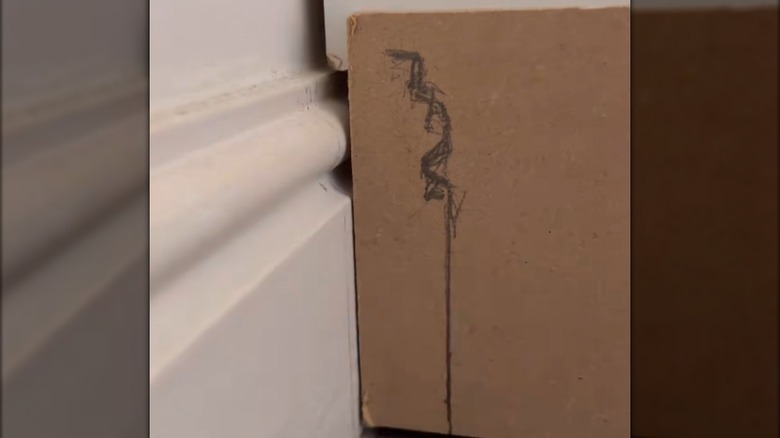
Measure the height and thickness of the baseboards, and mark and cut those dimensions at the bottom of the back side of your furnishing. To make MDF trim to cover these spots, measure the piece's depth plus any remaining gap between the piece and the wall. Cut two pieces of MDF at that length that are about half an inch wider than the baseboard is tall. Use a scribe tool to trace the contour of the baseboard onto the MDF pieces, and cut along the lines with a jigsaw. Using an additional piece or pieces of MDF to wrap the trim around the front of the cabinet will give its face a more finished look. Cut mitered edges on the two pieces where they'll touch, and glue the pieces along the bottom edges, carefully matching the miters.
If you are working around a wall plug, it may not be wise to keep it live. There is a risk of overheating outlets, which could lead to fires. Unless you're experienced with this kind of work, you may want to leave this task to a licensed electrician. For light switches, moving and incorporating them into the build might also be the best option.
Advanced steps to fake an IKEA built-in
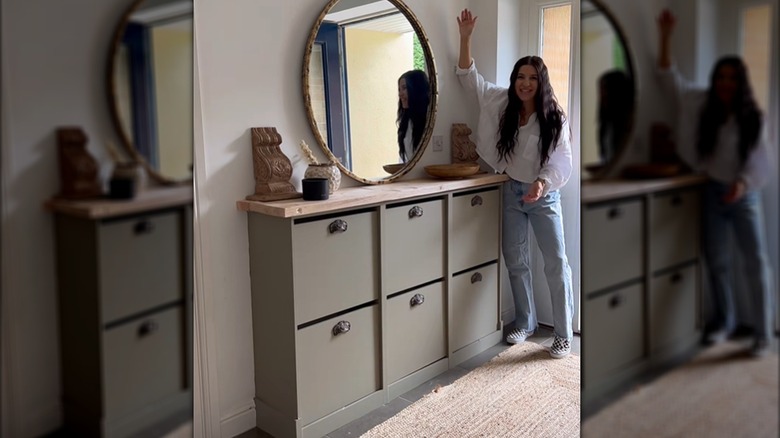
Even with all of these methods of classing up a piece of IKEA furniture, most built-ins take up a good portion of a wall, if not a whole one. Never fear — you can combine several shelves or cabinets to transform your room with a custom-designed built-in for a much lower price tag.
Along with the basic steps, you can hide seams between any individual pieces with trim. These steps work well with shorter furnishings, and creating a unifying countertop isn't too challenging. Stained wood affixed with adhesive and nails through the underside of the cabinets' tops looks homey and rustic, or a stone top can turn the piece into an extension of kitchen work space. When combining taller pieces like bookshelves and armoires, lining the top edges with trim is a nice finishing touch.
To combine two or more separate pieces into one unit, glue the sides of the separate cabinets with construction adhesive and clamp them together to dry. Once the glue has cured, attach the unit to the wall. Measure and cut pieces of MDF to span any areas where the cabinets touch, along with any open horizontal spaces at the base of each furnishing. Glue all of the pieces in place, and caulk along any gaps or seams. Let it dry for about 24 hours before sanding it smooth for painting. If you're not painting an added countertop, save trouble and attach it after tinting time is done.