13 Simple Tips And Tricks To Grow Thriving Rosemary Plants Indoors
We may receive a commission on purchases made from links.
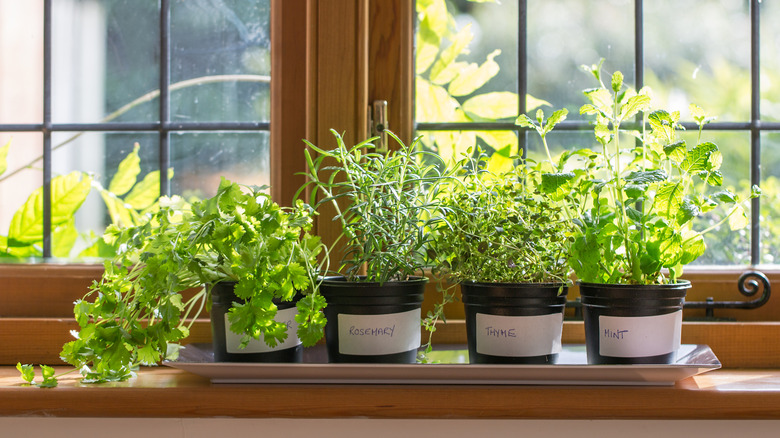
To us, rosemary (Salvia rosmarinusor Rosemarinus officialis) is the ultimate kitchen herb that brings Mediterranean flavor to your cooking year-round. That said, growing rosemary indoors successfully takes some nuance. It requires understanding the unique needs of this sun-loving, drought-tolerant evergreen shrub. We've seen so many indoor gardeners struggle with leggy growth, root rot, or plants that simply give up after a few months because they treat rosemary like a typical houseplant. These common mistakes turn a resilient herb into a high-maintenance diva, when all it really wants is to mimic its native rocky hillside habitat.
The good news is that, with a few small pivots in your care routine, you can create the perfect indoor environment for rosemary to thrive and produce aromatic sprigs for roasting potatoes, seasoning chicken, and steeping in olive oil. We've collected 13 of our favorite practical tips for growing rosemary indoors, including requirements for light, watering, soil, humidity, and pruning. We not only explain why it works, but break down exactly how to implement it for bushy, healthy plants that last for years.
Start with cuttings instead of seeds
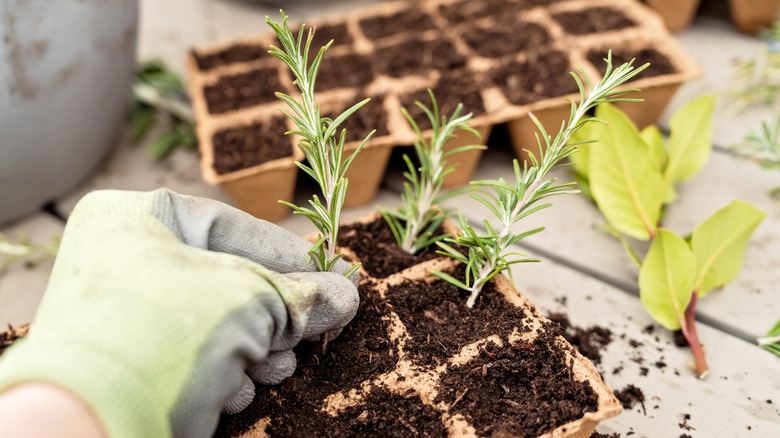
Sadly, rosemary seeds take forever to germinate — often 14 to 21 days when kept at 60 degrees Fahrenheit. If you're lucky and patient enough to get them to grow, you then find that the resulting plants can take up to three years to become a harvestable size. Even then, your seedlings could lack the desirable traits that you've fallen in love with at the nursery. Starting from seed may sound like a fun project, but you find out the hard way that it turns a quick kitchen herb project into a multi-year waiting game with no guaranteed results.
Instead, stick to propagating rosemary plants from stem cuttings. Cuttings give you mature, true-to-type plants in just four to eight weeks. All you have to do is take 4- to 6-inch tip cuttings from healthy, flower-free shoots in late spring or early summer, strip the lower leaves, dip the cut end in rooting hormone if you've got it, and root them in a well-draining mix. After that, keep your planted cuttings in bright, indirect light and consistently moist until roots form. Once rooted, pot them up and treat as established plants. You'll be harvesting sprigs months sooner than you would've with any seed-grown rosemary.
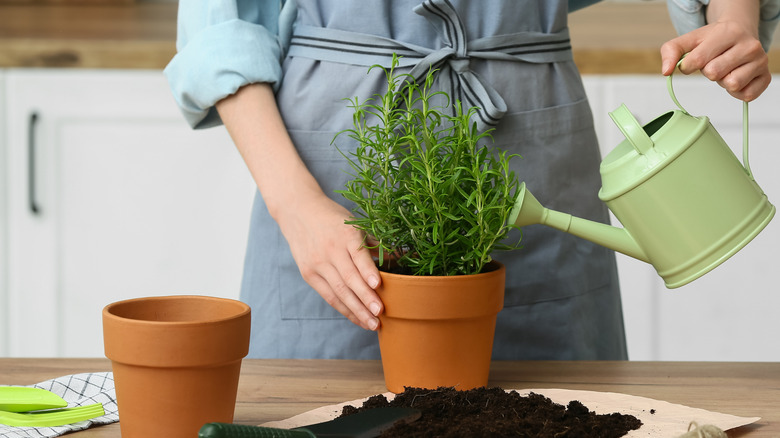
Don't bother transplanting in-ground rosemary into a pot
Rosemary grown directly in garden soil develops extensive root systems that hate being disturbed, so digging it up for indoor pots almost always leads to transplant shock or plant death. Its large, woody roots get damaged during extraction, and the plant struggles to reestablish in container soil, often dropping needles and failing to thrive. Rosemary that's grown in the ground simply doesn't make the transition well and turns a healthy outdoor shrub into a leggy, sad houseplant before it quickly dies off.
Instead, treat rosemary as a container plant from the start. Grow it in pots on your deck, patio, or porch all summer, where roots stay undisturbed, then simply move the pot indoors before frost hits in fall. This keeps the root ball intact and minimizes stress, letting your rosemary transition smoothly from outdoor to indoor conditions. Always use pots with excellent drainage since rosemary hates wet feet. You can even leave container plants outside until temperatures cool and the first frost drops.
Grow rosemary on a windowsill with bright light (or use a grow light)

Rosemary needs at least six hours of direct sunlight daily to stay happy, making your south- or west-facing windowsills the best spot for indoor growth. The key is consistency: High levels of light prevent the leggy, spindly growth that happens when rosemary gets stretched and weak from searching for sunshine. If natural light is lacking in your home, you may want to supplement it with a full spectrum grow light, such as the Lordem grow light, which has a stake so you can plant it right into the pot.
The cool air around the window paired with bright light are what rosemary loves indoors, so don't tuck it away in a warm corner away from windows. If you're using grow lights, put them close enough that the plant gets intense illumination without overheating (typically about 1 foot). The brighter your setup, the healthier and more productive your indoor rosemary is for harvesting year-round.
Give windowsill-living rosemary a turn every now and then
Plants tend to naturally lean toward their main light source. Your rosemary may grow lopsided without a regular rotation, with dense foliage on the window side and sad-looking stems on the back. Regular turning ensures every part of the plant gets equal sun exposure for the compact, bushy shape both you and your rosemary prefer to have.
Every time you water your potted rosemary, just give it little quarter turn. If you wait too long and notice your plant is taking on a bit of a Jekyll-and-Hyde look, that's okay — just rotate the pot so the scraggly side gets hit with the full sun for a while, then pick up the weekly turn once things look back to normal. It's a simple plant chore that really goes a long way into transforming lanky, awkward plants into productive, kitchen-ready herbs that look great from every angle.
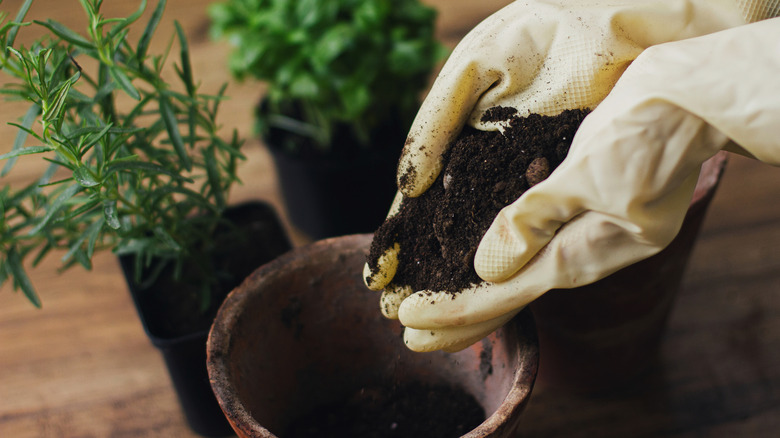
Use a well-draining soil potting mix
Rosemary hates wet feet, and a plain potting soil mix turns into a soggy mess that rots the roots and kills your plant fast. Poor drainage is one of the biggest indoor killers since rosemary comes from rocky, dry Mediterranean hillsides that never stay soggy. Left in a soggy soil for too long, your rosemary can develop root rot, leading to a quick death even if you're watering right.
Look for a cactus or succulent potting mix since they're typically full of chunky soil fixings, or make your own by mixing two parts potting soil with one part perlite (or coarse sand) for perfect drainage. You can also use lava rocks, pumice, Lechuza-PON, or coconut husks — whatever you've got that improves drainage is probably okay, and really helps your rosemary thrive. Also, always use pots with drainage holes, and never let water sit in saucers — you can drown your rosemary no matter how good your soil mix is.
Let the soil dry between waterings, but never let it completely dry out
Indoor rosemary plants tend to dry out quickly in a heated home, which can cause brown leaf tips and die-back that make you panic and overwater. Sadly, your best intentions may backfire: Overwatering causes more damage than underwatering since soggy soil kills rosemary faster than thirst. The tricky part is finding the sweet spot where soil is moist enough to keep roots alive, but dry enough to prevent root rot.
Before you break out the watering can, check the soil's moisture level by sticking your finger 2 inches into the soil. If the top inch is dry but deeper soil still feels slightly moist, hold off and check again in a day or two. Water thoroughly when the top inch feels completely dry, letting water drain fully from drainage holes, then let it sit until dried out again. This cycle mimics the rainfall pattern of Mediterranean climates where rosemary naturally thrives, so should make your plant happy.
Keep the humidity a little low and the air well-circulated
Rosemary comes from dry Mediterranean hillsides, so it hates the wet, humid air that many indoor herbs crave. It can even end up developing powdery mildew if humidity stays too high. It's because poor air circulation traps moisture around the foliage and creates the perfect conditions for fungal diseases that turn healthy needles white and sickly. Low humidity with good airflow keeps rosemary disease-free and looking sharp indoors, where central heating already dries the air naturally.
You can run a small fan in the room to both mimic its native windy hillside conditions and also prevent foliar diseases from taking hold. When temperatures are warm enough outside, crack a window slightly for fresh air movement without chilling the plant. Avoid misting rosemary or grouping it with high-humidity tropicals since it prefers the drier conditions around windowsills and well-ventilated spaces.
Fertilize it once every two weeks -- and make sure it's diluted well
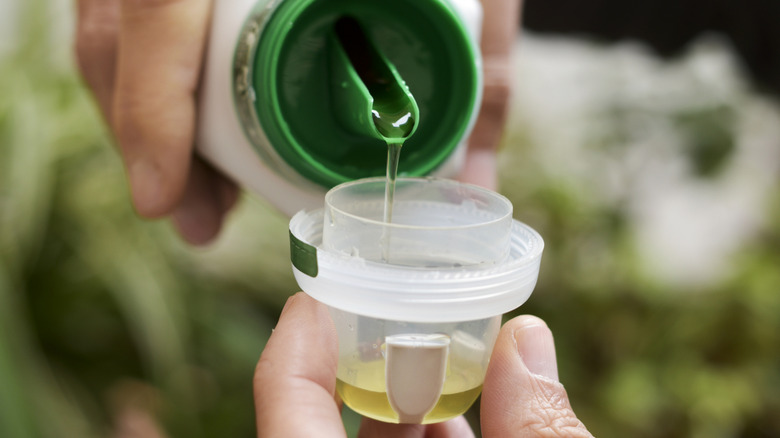
Rosemary doesn't need heavy feeding. In fact, over-fertilizing turns your kitchen herb into a big, bland, leafy plant instead of the compact, fragrant shrub it should be. So, stick to a light feeding schedule to keep your rosemary productive without sacrificing taste or scent.
The best way to fertilize indoor herbs is by using a diluted water-soluble fertilizer every two weeks, following the label directions. You can also go even lighter with half-strength to avoid buildup. We tend to use Jack's Classic 20-20-20 all-purpose fertilizer, but any well-balanced fertilizer will do. That said, skip any pungent organic fish or manure fertilizers indoors since the smell lingers. During winter, when growth slows, cut back to once a month (or feel free to pause entirely) until spring growth picks up again.
Pinch off any flower buds if you plan to use your rosemary for cooking

Pinching off flower buds is one of the easiest ways to keep indoor rosemary strong and fragrant. Once rosemary starts to flower, it shifts energy from making flavorful oils in the leaves to supporting blooms and seed production, which can dull the taste. Keeping it in that pre-bloom, actively growing phase is ideal if your main goal is cooking.
Every time you see little flower buds forming at the tips, just nip them off with your fingers or a clean pair of scissors. While you're at it, lightly trim back the tips to encourage branching, which helps your plant grow bushier and gives you more harvestable stems over time. Think of it as regular grooming: Frequent, light trims, plus removing flower buds, keeps your rosemary compact, productive, and packed with flavor.
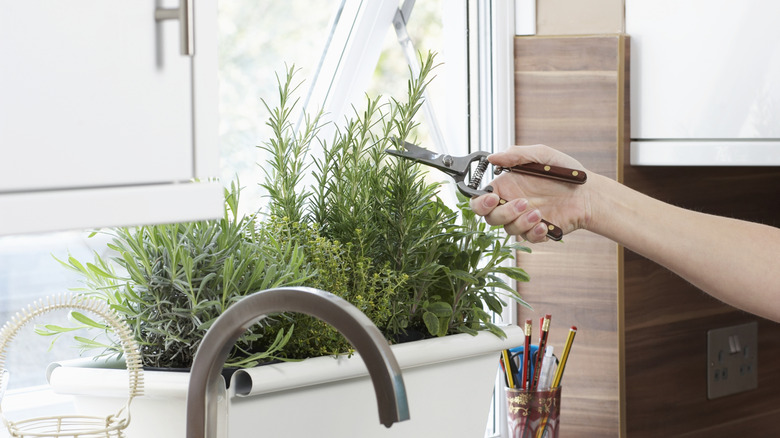
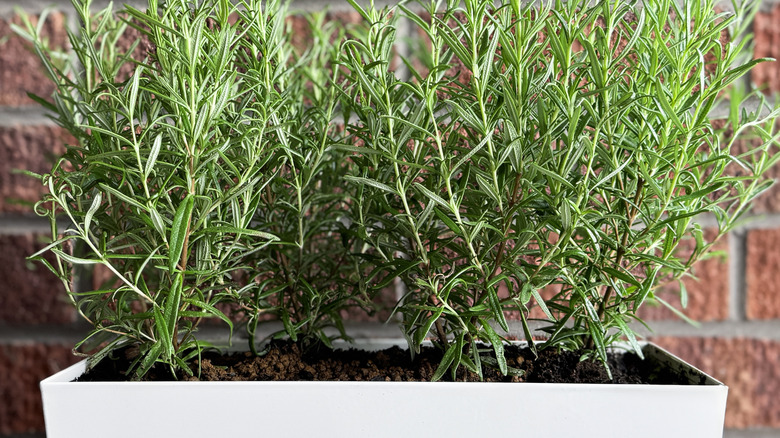
Keep it well-pruned so it stays bushy instead of leggy
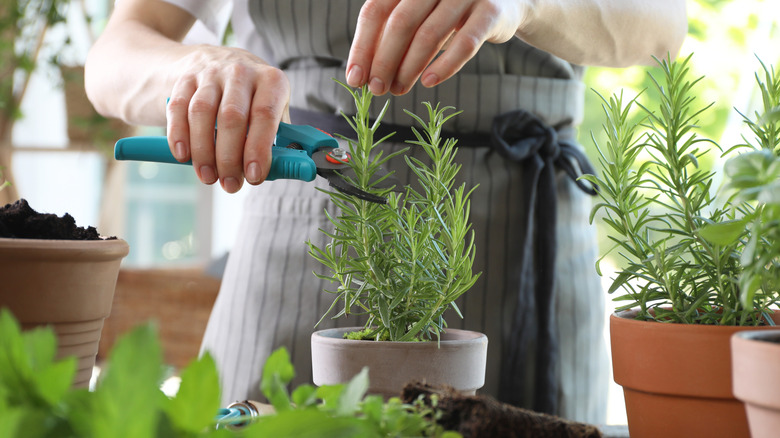
Whether you're growing it for cooking or just as an ornamental plant, you need to give your rosemary a haircut every now and then. Rosemary naturally wants to grow into a tall, woody shrub; it tends to get leggy if you let it do its thing without pruning, with sparse foliage and long, bare stems that look awkward indoors. Regular trimming encourages the dense, compact habit that makes rosemary perfect for kitchen counters and windowsills. Left unpruned, even healthy rosemary turns into a lanky stick instead of the bushy herb you want for harvesting.
When plants are small, give them a regular tip pinch to shape and control their growth habit. For older plants that have already blossomed, just give them a light prune back to your desired size after its blooms fade, cutting just above a leaf node to encourage branching. This keeps rosemary looking tidy, productive, and ready for snipping whenever you need fresh sprigs.
Never prune more than 20% of the plant at a time -- and watch where you prune
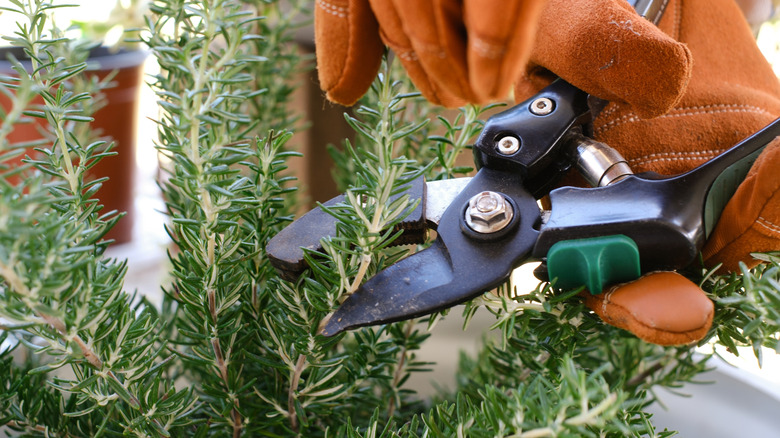
Rosemary plants usually bounce back beautifully from pruning, but taking too much at once can do more damage than it can handle. A severe pruning (20% of the plant or more) stresses it out and slows recovery since it needs healthy foliage to photosynthesize and grow new stems. Too-far-pruned rosemary becomes weak and vulnerable to pests or environmental stress indoors. Over-pruning also risks killing branches that can't regrow from bare wood.
By all means, harvest small amounts anytime you need sprigs. Just remember that the best way to prune a rosemary plant is to never remove more than 20% of the growth at once, and always cut just above a leaf node or pair of needles. Avoid cutting into woody, brown stems — unless you're deliberately shaping the plant since these parts don't sprout new growth. This gentle approach keeps your rosemary healthy, balanced, and ready for the next trim without setback.
Make sure room temperature stays between 55 and 70 degrees Fahrenheit
Rosemary thrives in the mild Mediterranean climate it's native to, so indoor temperatures that swing too hot or too cold can stress the plant and cause needle drop or weak growth. Daytime temperatures between 65 and 70 degrees Fahrenheit, with nights dropping to 55 to 60 degrees Fahrenheit, mimic rosemary's natural conditions and keep it happy indoors. Too much heat above 70 degrees Fahrenheit speeds up water loss and encourages leggy growth, while temperatures consistently below 55 degrees Fahrenheit slow its metabolism to a crawl.
The best thing to do is just put your rosemary near windows, where it gets cooler nighttime air. However, stay away from direct heat vents or radiators that blast hot, dry air. During winter, the natural drop in room temperature near windows often provides the perfect nighttime chill rosemary craves, so it's a win-win. If your home runs too warm, using a small fan can help circulate cooler air around the plant without drying it out completely.
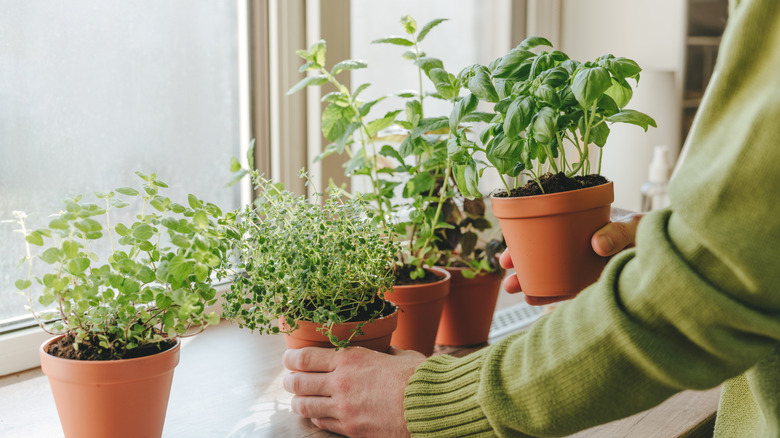
Repot once roots pop out of the drainage holes
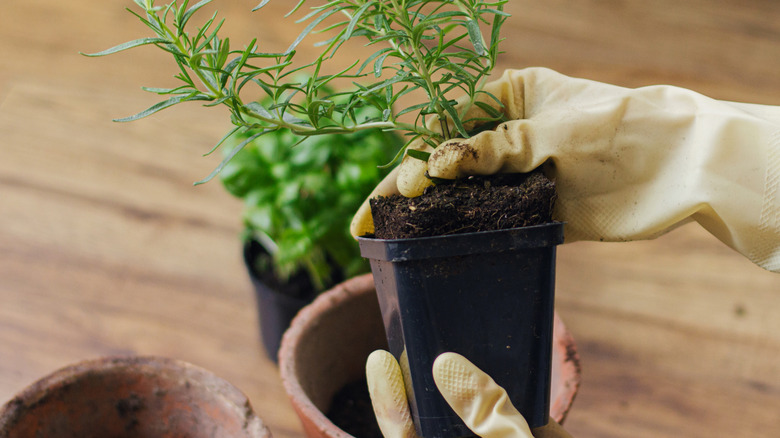
Rosemary grows vigorously indoors and quickly fills its pot. When roots start poking through the drainage holes, that's the signal it's time for a bigger home. Repotting at this stage gives its roots fresh soil to expand into, and prevents root-bound stress to your plant (which can cause stunted growth and poor nutrient uptake). Early spring is the best time since rosemary can settle into the new pot during active growth season. However, perennial rosemary can handle repotting multiple times as needed.
Still, we should note that if you're growing rosemary for its pretty blue flowers rather than cooking, letting it get slightly pot-bound actually encourages blooming. But if it's ready for a bigger home, use a pot only one or two sizes larger than its current pot, and make sure it has excellent drainage to avoid soggy soil issues. Gently loosen the roots if they've curled into a tight circle before putting them into the new pot, add fresh, well-draining soil mix, and water sparingly until new growth shows that your plant is established in its new pot.