13 Tips For Turning One Aloe Vera Plant Into An Endless Amount For Decades
We may receive a commission on purchases made from links.
I love aloe. As both master gardener and master herbalist, I grow and use aloe vera for all sorts. A single, healthy aloe "mother" can produce pups for many years. But for that, you have to give the mother everything she needs. The right size and type of pot, proper soil, plenty of light, and consistent, but not excessive, watering. Good basic care, as well as smart harvesting and propagation to keep the mother plant happy, healthy, and free from stress and disease is the easiest way to get yourself an endless supply of aloe pups.
Aloe vera is pretty easy to grow and care for, but it grows slowly. It's also incredibly easy to make mistakes that the plant takes years to recover from. And, obviously, during the stressed and recovery period, pup production will stop or slow. So you need to focus on getting the basics right and having the patience for the mother plant to reward you with pups. Because I use aloe frequently, I propagate pups so I have a plentiful supply of mature plants . Once they've established themselves, aloe plants also make fantastic (and free) gifts.
Choose a strong, healthy mother plant and don't be tempted to rescue the sad-looking ones
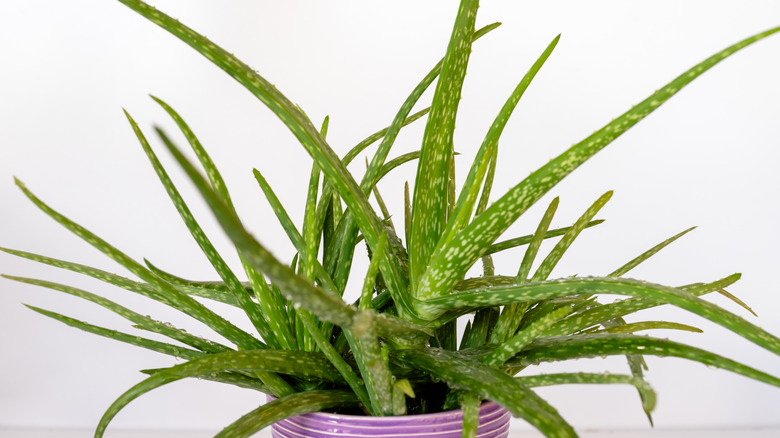
I have to admit, I like the challenge of bringing a sad, neglected plant back to life. Stores often throw them in the trash or give them to you free or super-cheap. But if you're looking to build yourself a nice little aloe vera pup farm, you need a strong, healthy starter plant. To put out pups, the mother plant must be in such good condition that she has an excess of energy and nutrient reserves. So choose the healthiest plant you can. And it's okay if it costs you a little more. After all, if you look after this plant, she'll give you free plants for decades.
You want to see leaves that are thick, turgid, upright, and evenly colored. Avoid anything with random soft, squishy spots or patches of discoloring. Check leaf bases, too. You don't want a plant with blackened tissue or translucent patches at the base, as this implies disease or stress from inappropriate watering. Next, look at the rosette in the center of the plant. It should be fairly tight and it must be stable in the pot. Avoid plants where the rosette wobbles or is loose or lopsided, as this tells you there's something wrong with the roots. Next, lift the pot and sniff the soil. Yes, that sounds super weird, but with aloe, if there's crown or root rot, or it's been regularly overwatered, the soil will have a "sour" smell. And you don't want that. Lastly, check that the plant isn't "leggy." If the leaves are tall and excessively skinny, the plant has probably been "forced" by being kept in low light.
Go for the right pot to trigger steady pup production
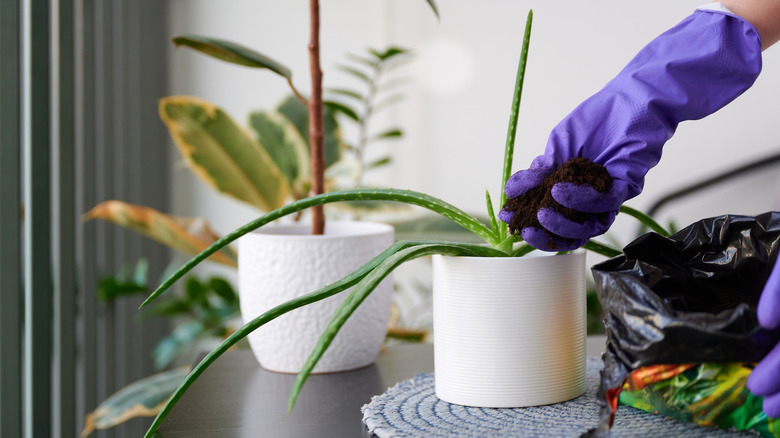
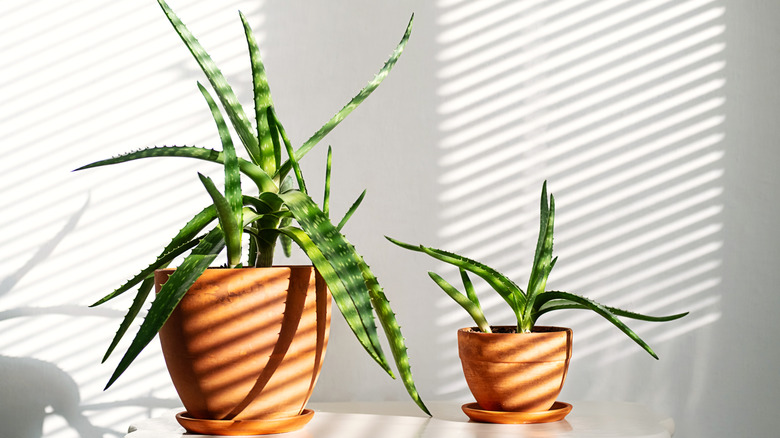
Now, let me start by saying there's a fine line here. Excessive root binding can be detrimental to your plant's health. However, a slightly smaller pot that creates light root bound conditions can trigger the parent to offset pups. Let me be clear: When I say lightly rootbound, I do not mean that you keep your aloe in a pot so tight the roots are practically pushing out the sides. Remember, you need a healthy, stress-free mother plant if you want pups. So just don't upsize too much. You only want a pot slightly wider than the root mass. This gives enough room for the mother plant to grow without stress and for pups to form without their roots getting cramped or drowning in soil that's too wet.
Big pots seem like they should be perfect for a healthy plant and the pups. However, pots that are too roomy tend to stay wetter for longer, because there's not enough plant in there to take up the available water. With aloe, if the roots stay wet, the plant's metabolism slows, it becomes stressed, and root rot can set in very quickly. The material matters, too. Most people leave the plant in the plastic pot that it came in from the store and usually put it inside a more decorative outer container. Plastic can work in the right conditions, but I prefer terracotta. This material "breathes" and speeds up how fast excess moisture evaporates, helping to maintain root and soil health. Plastic can work, but only if your potting mix is extra gritty and you pay very careful attention to how much water you provide.
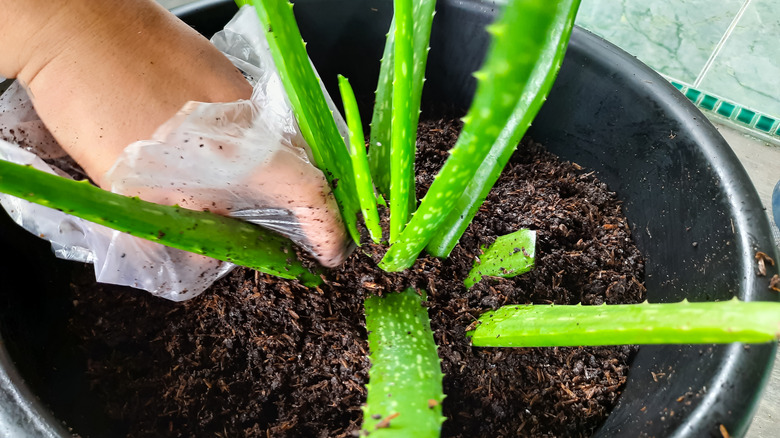
Use fast-draining cactus soil, not ordinary potting mix, to keep your pup farm running smoothly
As you may have seen me write before, soil is the foundation of plant health. It's true whether you're growing edible crops, ornamental flowers, your lawn, or house plants. Aloe comes from areas with thin, fast-draining soil, so it is perfectly adapted to thrive in those conditions. Therefore, you need to mimic them. Regular potting soil won't work here, because it retains too much moisture, which drastically increases the risk of rot. Plus, of course, it's too rich in nutrients for aloes, which are used to leaner soils. Excess nutrient availability can cause stress and delay pup production.
You can get a commercial cactus or succulent mix (I prefer an organic blend like Back to the Roots Organic Succulent & Cacti Mix) that will have just the right amount of nutrition and the fast-draining structure your aloe needs. You can also make your own mix pretty easily, but if your ratios are off, you could easily upset the mother plant who will simply refuse to produce pups until you rectify the issue. I make my own blend, which is one part coconut coir, one part potting soil, one part pumice, and one part perlite or vermiculite. Most succulent keepers tend to end up with their own special recipe, but I find this works just right for me. I also add some worm castings, such as Brut Organic Worm Castings, as a top dressing a couple of times a year, during the growing season, for gentle nutrition.
Give bright, consistent light to power pup production
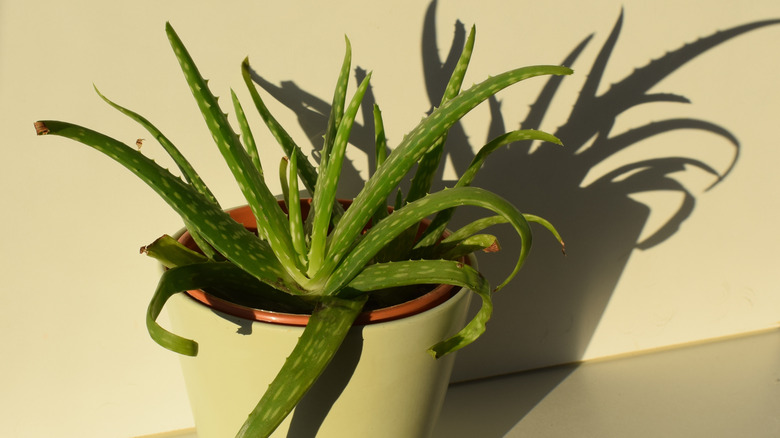
Aloe is one of the best indoor plants, and likes lots of bright, consistent light. To develop plenty of energy reserves, make sure the mother plant gets at least six hours of very bright indirect light every day. If you don't have a sunny spot in your home where the aloe can consistently get this much light, you can always supplement with an LED grow light, like the Yentbokj Grow Lights instead. Aloes can tolerate some full, direct sun, but too much may cause the leaves to turn red and growth to stall as the plant gets stressed. Conversely, too little light and you still get stressed plants, but you get stretched, weak plants. Either way, you'll get few to no pups.
You also want to avoid sudden changes of sunlight. If you're moving your aloe from indirect to very bright direct sun, do it gradually so the plant can acclimate, much the same way you harden off seedlings when you move them from the greenhouse to the garden. If your aloe leaves are starting to look tall and thin and aren't as thick and turgid as they should be, you need to increase daylight exposure.
Keep temperatures steady to avoid stress that stops pup growth
Aloe does not like being cold. Mild chilling can slow or stall growth, and significant or prolonged chilling can cause injury and potentially kill your aloe. And it will definitely cause pup production to drop off. Normal household warmth is fine, but don't place the aloe in the direct line of a draft. The same goes for window sills. In very cold climates, windowsills can also experience pretty dramatic temperature swings that can cause shilling injury, too, when temperatures drop overnight.
I keep my aloes in indirect sunlight set back from windowsills. Leaving them too exposed to the cold is one of the main mistakes people make with their aloes. I have two in the kitchen where they stay nice and warm on the back of the countertop. Another two live in my office, one in my bedroom, and the biggest one sits in the dining room on the sideboard, where it's well away from the chilly windowsill, but still gets plenty of bright indirect light.
Water with a soak-and-dry cycle to avoid water stress
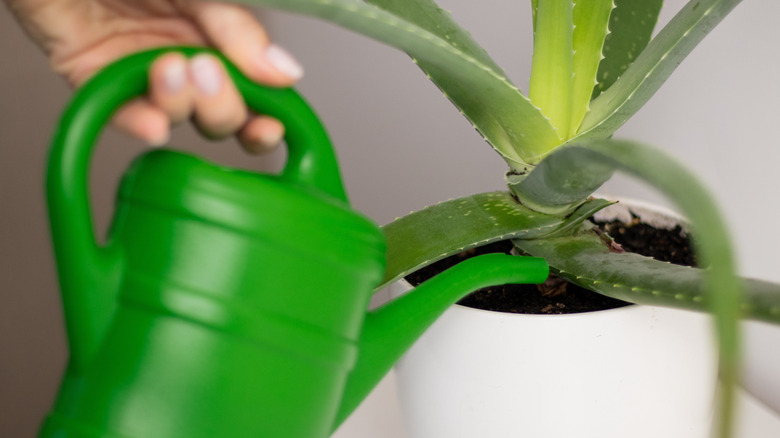
Strong, oxygenated roots are super-important for pup production. Overwatering is the fastest way to weaken them and invite rot, and one of the main aloe issues to watch for. If you've got a good potting mix, then it should only retain light moisture for a week or two. Never leave your aloe in a saucer of water. If you do, the water still in the soil can't drain away and will accumulate around the roots, replacing oxygen and suffocating the plant. If pups are present, they'll succumb to suffocation and rot first, as they're immature and more vulnerable.
I've found the best method of watering aloe is to use a soak-and-dry cycle. The exact timing will depend on your plant and climate, but as a general rule, my plants go between one and two weeks during the growing season, and three to four weeks during late fall and winter. But the idea is very simple. You give your aloe a thorough, deep soak until water starts running from the pot. This hydrates the potting mix fully and gives the roots immediate access to as much moisture as they need. Then you just leave your plants alone to dry out. The top inch or so should be completely dry before you give another soak. This method reduces the chance of rot and gives the plant a consistent and stable watering rhythm. Consistency and the right watering method reduces stress and promotes good overall health, which, in turn, encourages the plant to offset more pups.
Spot rot early so pup production doesn't stop
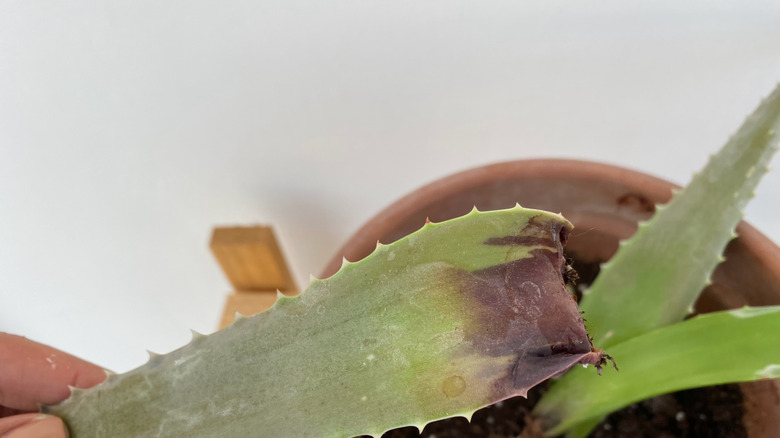
Rot most often happens when aloe is too wet, whether that's because you're watering too often or you're using regular or peat-based potting soil, leaving the plant in standing water, or water pooling in the rosette. Whether it's the rosette or the roots suffering from rot, your plant can quickly die off. If you spot it early, you may be able to save the plant, but it'll take a long time to recover and be healthy enough to produce pups. Look for softening, yellowing tissue, mush at the base, and a wobbling or lopsided plant that was previously tall and stable. If you spot these signs, your plant needs help and is spending all of its available energy trying to repair itself. It cannot offset pups in this condition.
If it were my plant, I'd gently lift it out of the current soil, clean off the roots as best I can, and repot it in more appropriate aloe-friendly soil. I'd see if I could identify the cause so I don't make the same mistake again, and I'd increase light and airflow. I'd also clear away any mush and remove very badly damaged leaves so the plant doesn't waste energy trying to repair unsalvageable tissue.
Feed lightly so the mother has energy for pups without soft, weak growth
Aloe doesn't need heavy feeding. Yes, of course it needs some nutrition, but it doesn't do well in over-fertilized or too-rich soil. As I mentioned earlier, perhaps once or twice per year, I apply a top-dressing of worm castings, as they are the kind of gentle all-round nutrition aloes thrive with. You can also use a very weak fish emulsion (it's stinky though). And you can buy good quality organic succulent feed, too.
Only fertilize in spring or summer to boost the mother to give her the best chance of putting off pups that get established before winter dormancy. Light feeding replenishes the limited nutrition available in the container and boosts vigor. This lets the mother plant continue to grow and thrive, and gives her enough strength to produce pups. Don't feed too often or with a regular houseplant fertilizer, as overfeeding causes weak, water-heavy growth that's more susceptible to rot.
Harvest leaves without draining the energy needed for pups
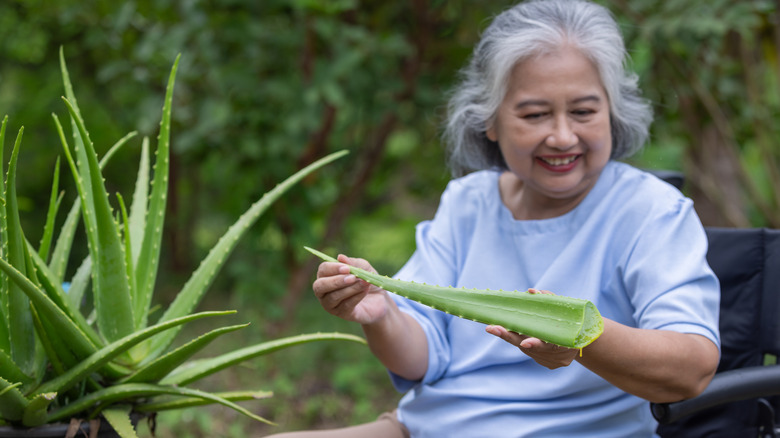
Don't over-harvest your aloe plants, especially a mother plant that you want to produce pups. The leaves store water, energy, and nutrients that the plant uses for regrowth and offsetting. So, harvest only what you need, and only from plants that have enough leaves to spare one. Otherwise, you won't get the same pup production.
I only harvest mature outer leaves, never touching the rosette. Make sure you leave the vast majority of leaves on the plant. Avoiding over-harvesting is the reason I have multiple plants. That way, I don't deplete or damage any single plant, and can continue to harvest pups.
Let pups get big enough to thrive before you move them

I agree that every time you see a pup pop up, it's exciting. And you want to grab it right away and give it its own lovely little pot to thrive in. But, don't. Pups don't have much stored water or energy and don't really have any solid root systems. Just wait and be patient.
Only move pups when they are robust and showing signs of early rooting. They'll get stronger, their little leaves will thicken up, and they'll be steady in the soil. At this point, you can lift them and transplant in their own small pot to let them properly establish themselves. If you've got loads of pups all at once, be choosy. Leave them as long as possible, then pick out the largest, strongest ones to save. If you can, let the little ones stay with the mother until they are strong enough to make it on their own. You can propagate some smaller aloe pups with no roots, but accept that you'll probably have some losses. And that's okay.
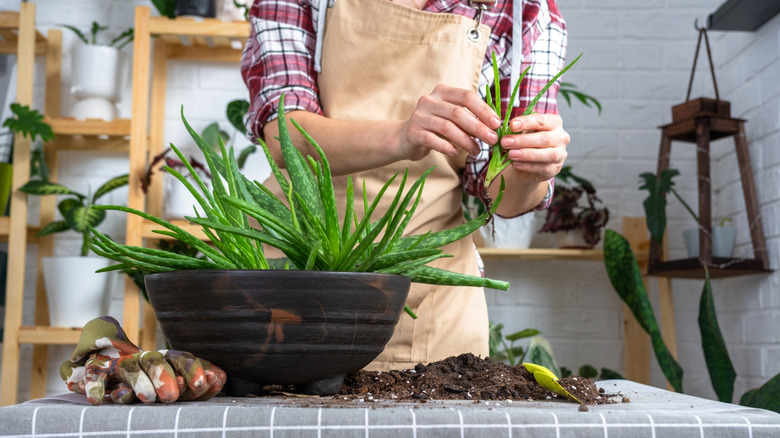
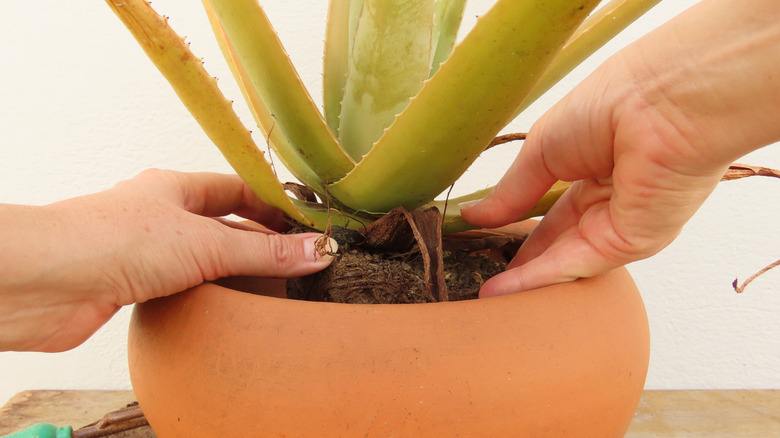
Separate pups from mother carefully to avoid damaging the parent plant
Yes, you want the pups to survive, but you also want the parent plant to keep thriving so she produces more pups faster. So take care when you're transplanting the pups. The less damage you do to the parent plant, the quicker she'll bounce back and have the strength and resilience to give you new pups and, of course, to keep feeding any smaller existing pups that aren't big enough to support themselves yet.
It's easy to be a bit too ham-fisted. Take your time. Let the soil dry out a bit, close to the point at which you'd normally water. This helps to limit the chance of root damage. Slide the plant out of its container. Gently start to separate the pup. Look for the natural separation points and split the plants at that juncture with a sharp knife or scissors, so you do minimal damage to the pup and don't tear healthy mother roots. Let the pup sit in a dry, sunny spot for a couple of days to let the cut heal over. Then pop it into its new pot, water, and leave it alone to recover and establish itself.
Use small pots for pups to prevent rot

As I mentioned earlier with the mother plant, smaller pots are the best choice for aloes. And for pups in particular. They have minimal roots, so unnecessarily roomy pots will cause rot, because the soil stays wetter than it should.
Choose small, preferably terracotta, pots just a little bigger than the pup's root mass, and use the same free-draining potting mix the mother is thriving in. A pup's young roots are at greater risk of rot because they're immature and have no tolerance or resilience to adverse conditions, and they've only recently been separated from the parent plant. After the initial watering, let them dry out completely, don't be tempted to feed them with more than a light top dressing of worm castings, and only expose them to bright, but indirect, light. This protects the top growth and the roots, giving them the best chance to get established.
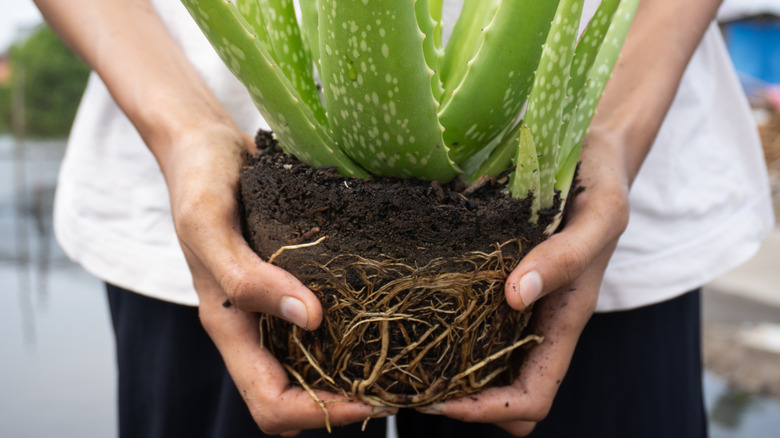
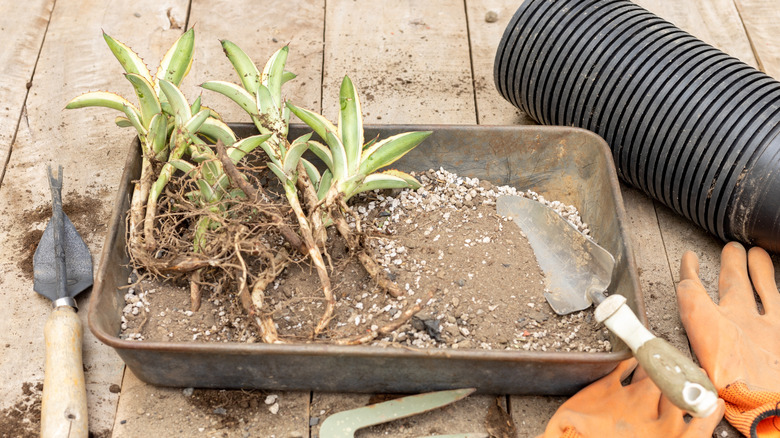
Refresh soil to reset the mother every few years for peak pup production
My oldest aloe vera is over 20 years old at this point, and she's still an amazing producer of leaves and pups. But she needs a little TLC every now and then. Or, rather, the soil in which she lives does. Even though I add worm castings regularly to replenish nutrients and add organic matter, the potting mix still degrades over time. Drainage declines, the mix breaks down, salts build up, and nutrients take a hit. Plus, she outgrows her pot.
So, every few years (the exact time will depend on your potting mix, planting conditions, watering, and feeding habits), when the plant is looking a little worse for wear, it's time to refresh the mix. You'll notice that even though you're doing all the right things, the plant is struggling a little and pup production has slowed. You might also notice that the pot doesn't drain as freely as it once did. Gently remove the plant from the existing container. Check to make sure there's no sign of root rot, and take a look at the growth habit of the roots. If they're getting close to being rootbound, now is a good time to go up a pot size, but only a little, remember. Repotting is pretty easy. Brush off or gently wash off as much of the existing potting mix as you can, then repot in a fresh mix of the same ratio. Give the plant a good soak, then let it rest to recover from the shock of the new environment.