14 Ways To Revive Dying Plants & Sad Garden Beds
When plant health starts to decline, your favorite plants can only communicate their issues through subtle clues. Some of these warning signs can be difficult to interpret, since many symptoms overlap across different causes. To narrow things down, start by noting anything that's changed in the garden, how quickly the symptoms appeared, and how severe they've become. Look for patterns, like other neighboring plants struggling with the same issues or damage to similar parts of several species. Research common issues associated with your specific plant species, and consider whether there have been any recent environmental changes.
Once you've taken note of the changes and patterns, the next step is to narrow down what's causing your plants to decline and address the issue. In many cases, a small adjustment is enough to help plants recover, but sometimes the issue isn't as obvious as you'd think. If you're still unsure, the following tips can help you determine what's wrong with your garden and how to bring it back to life.
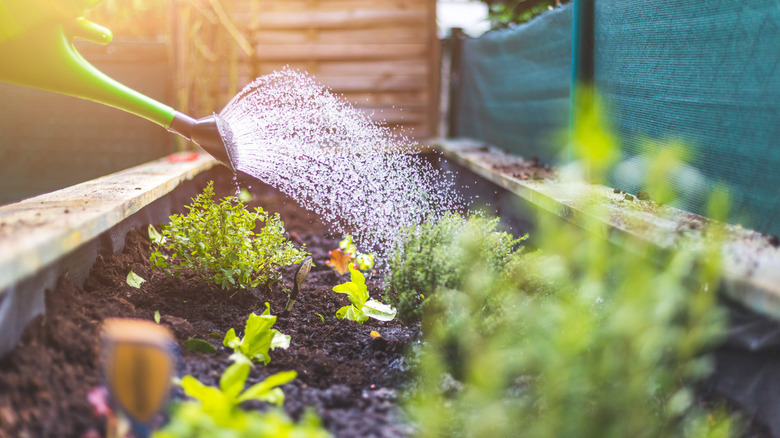
Correct overwatering by improving drainage and adjusting your watering schedule
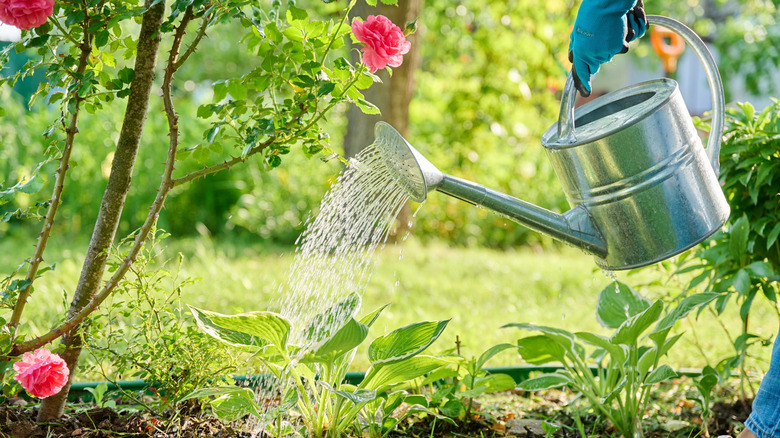
If your crops or flowers aren't looking their best after you've recently watered them, resist the urge to reach for the garden hose. When you water too frequently, the plant's roots will sit in saturated soil, where oxygen availability is limited. This results in stunted growth, damaged roots, yellowing leaves, and a foul odor emanating from the soil if rot is present.
If you suspect your plants are struggling due to waterlogging, check to see if the roots are mushy, smell rancid, or show other signs of rot. Stop watering for the time being to give your crops a chance to bounce back. In some cases, a fungicide may be necessary to fight the disease. Moving forward, only water when the top 2 inches of soil are dry. You don't want to follow too strict a watering schedule, as the time of year and temperature can affect how much moisture remains in the soil. Additionally, if your area has had a lot of heavy rains, you don't want to follow it up with an extra soaking.
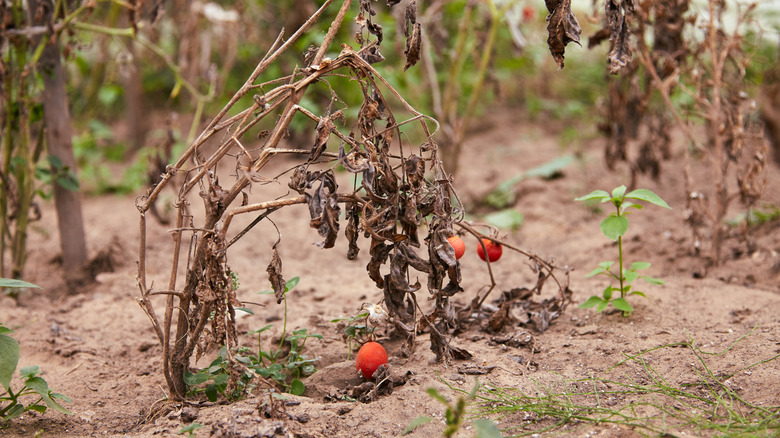
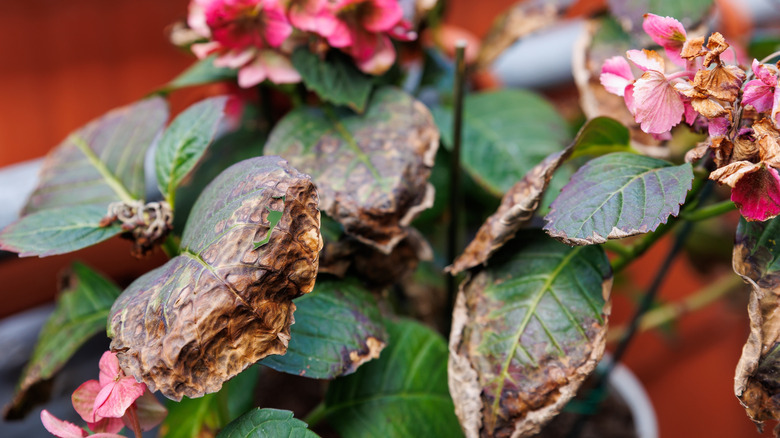
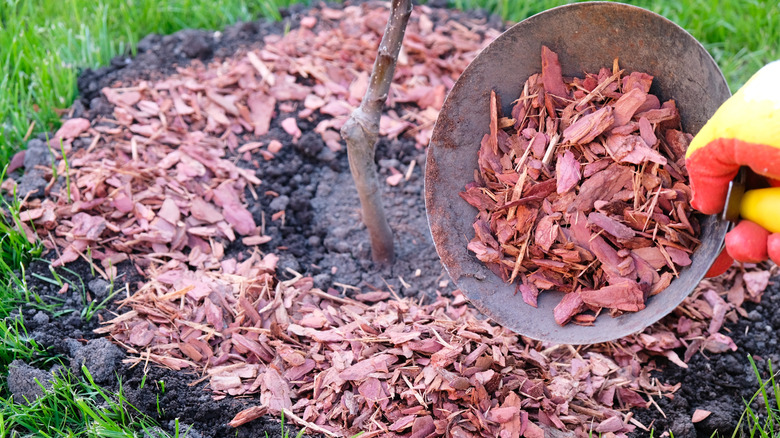
Revive drought-stressed plants with deep watering and a layer of mulch
Because you can't watch water drain through like you can container plants, it can be easy to misjudge how deeply you're watering in garden beds. If only the top few inches of soil are saturated, it can seem like the ground is wet, even if the roots underneath are completely dry. When plants experience drought stress, they may begin to wilt, develop yellowing foliage, or drop leaves altogether.
Once you notice signs of drought stress and the soil is dry, make sure to give your plants a deep watering as soon as possible. In many cases, underwatering is more often a matter of depth than frequency. Most plants require about an inch of water (0.6 gallons per square foot), though it depends on the species. Older trees and low-water plants will need less frequent watering than newly planted trees or shrubs and many crops or perennial beds, so adjust your watering schedule based on each plant's specific needs. If you haven't already, add a 3-inch layer of mulch around the base of your plants to help conserve more moisture.
Control pests using integrated pest management
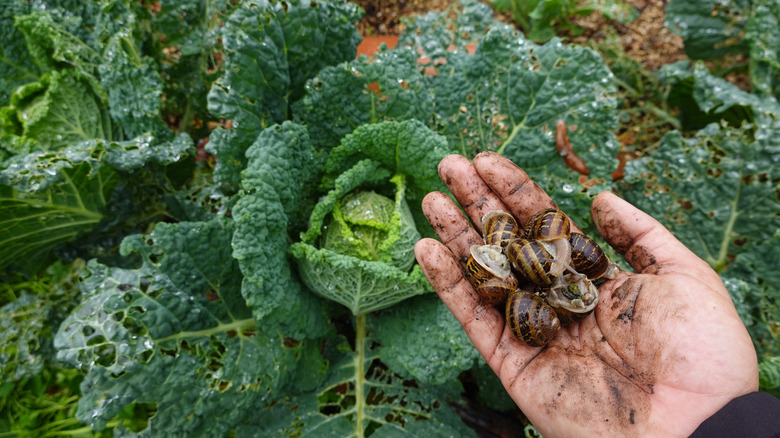
If you see little chew marks or bugs ravaging your plants, it's a natural reaction to grab a broad-spectrum pesticide in an attempt to wipe them out. While this can work to eliminate the insects you don't want in the garden, it's unfortunately just as likely to kill beneficial ones as well. Not only does this put pollinators in danger, but it can also remove natural predators that help keep pest populations under control. Without these beneficial insects, pest populations can rebound more quickly, creating a cycle of repeated damage.
The purpose of integrated pest management is to create an environment that allows beneficial insects to thrive while making conditions less appealing to pests. First and foremost, keeping plants healthy is key to making them less susceptible to pests and diseases in the first place. If there are pests, first identify what they are so you can target them specifically. Larger insect pests like caterpillars or beetles can usually be managed by hand, especially when infestations are caught early. Beneficial insects like lady beetles, parasitoid wasps, and lacewings eat and help control smaller insects like aphids, mealybugs, whiteflies, mites, and scale. So, limit pesticide use and plant their favorite flowers to attract good insects into your yard.
Manage plant diseases by removing infected parts and improving air circulation
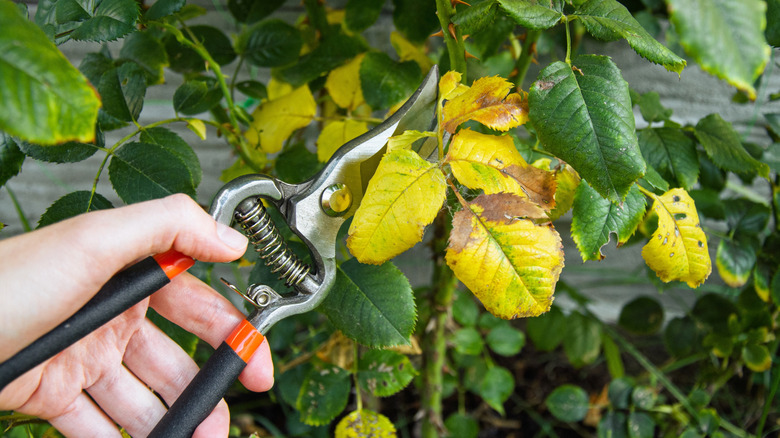
There are two plant disease categories: biotic and abiotic. Biotic diseases are caused by living organisms such as fungi and can spread between plants, while abiotic diseases result from environmental stressors like extreme heat or frost. Fungal pathogens account for the majority of plant diseases, and you'll know you're dealing with a fungal issue if you notice rust-colored spots (leaf rust), a cottony-like moldy growth (sclerotinia), or a whitish powdery covering (powdery mildew). Other signs and symptoms of disease can include leaf spots, sudden wilting, discolored veins, or stunted growth, though it can vary depending on the plant and underlying cause.
Before you take any new plants home, take a minute to look them over for any signs of disease. Once planted, make a habit of routinely checking the leaves and stems for abnormalities so you can tackle any issues right away. Remove any infected leaves or stems to prevent the disease from spreading, especially if it's biotic. Many fungal issues are caused by overcrowding or overhead watering, so prevent future problems by thinning crowded plants to improve airflow and sun exposure. When it comes to watering, avoid spraying plants from above and opt for drip irrigation when possible to keep excess moisture off the foliage.
Correct nutrient deficiencies with soil testing and fertilization
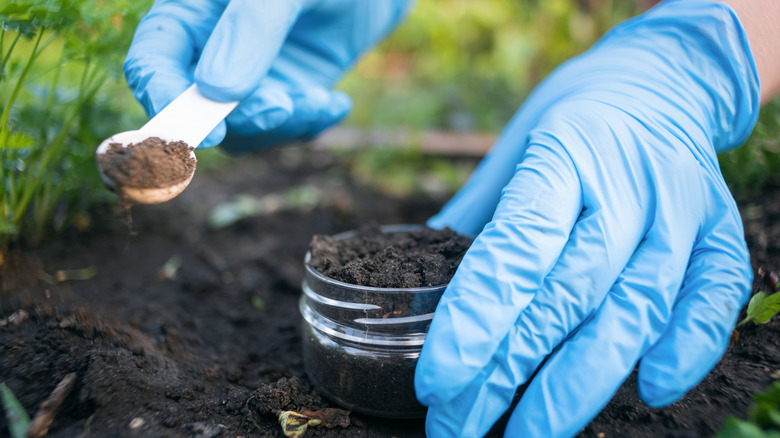
Just like with humans, nutrients are key components of plant health. Plants lacking nitrogen (N) may have spindly growth, pale leaves, and overall stunted growth. If your plant is low on phosphorus (P), the leaf color may have a yellow or purplish tint along with brown leaf edges. It's also common for phosphorus-deficient plants to have reduced flowering or fruiting. Magnesium (Mg) deficiency typically causes yellowing between the leaf veins, though these areas can have a tinge of reddish-brown. Eventually, the leaves will turn completely brown and fall off.
Soil is quite literally the foundation in which plants grow, so it's crucial to make sure it's healthy. You don't want to overfertilize to combat poor soil, however, as it can quickly become more damaging than beneficial. Because the nutrient deficiency symptoms can be similar to other plant issues, testing the soil is the easiest way to rule out nutrient deficiencies. Then, you'll have a better idea of what your soil is missing and can amend it properly. Generally, you should work organic matter into the soil each spring to supply nutrients, improve the soil structure, and increase its ability to hold onto the nutrients.
Adjust the sunlight exposure to prevent scorch or spindly growth
Each plant has its own unique leaf structures that absorb sunlight differently. While many crops and other plants require at least eight hours of light each day to get the energy they need, others have adapted to thrive in low-light conditions. Plants that don't get enough light won't be able to produce enough energy through photosynthesis, causing weak growth and poor flowering or fruiting. If there's too much sun, plants can experience leaf scorch and stress, causing browning, wilting, or leaf drop.
If your plants are in an area where they're receiving too much or too little sun, you'll want to adjust the amount of light they're subjected to so they can bounce back. To help plants suffering from too much light, provide some protection during the hottest part of the day. You can add a taller plant nearby that will cast shade during the afternoon, or DIY a sun shade for your garden using materials like a shade cloth and PVC pipes. For plants that aren't getting enough light, prune or tie back nearby branches and move any structures that may be blocking sunlight. Otherwise, the best course of action may be to relocate the plant to a sunnier site.
Break up compacted soil to improve water flow and root health
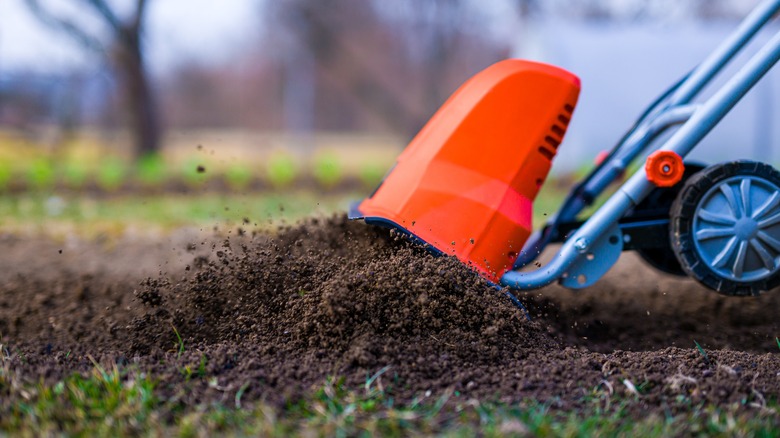
Part of what makes soil healthy isn't the soil itself, but the space between the particles. Soil compaction occurs when soil particles are tightly pressed together, creating several problems for plants. Water will sit in between the gaps rather than draining through, which limits the oxygen the roots need to survive. On top of that, the roots will struggle to spread and absorb water and nutrients. If your soil is too compact, you may notice water pooling on the surface or plant deficiencies, like stunted growth or discolored leaves, due to the lack of absorbed nutrients.
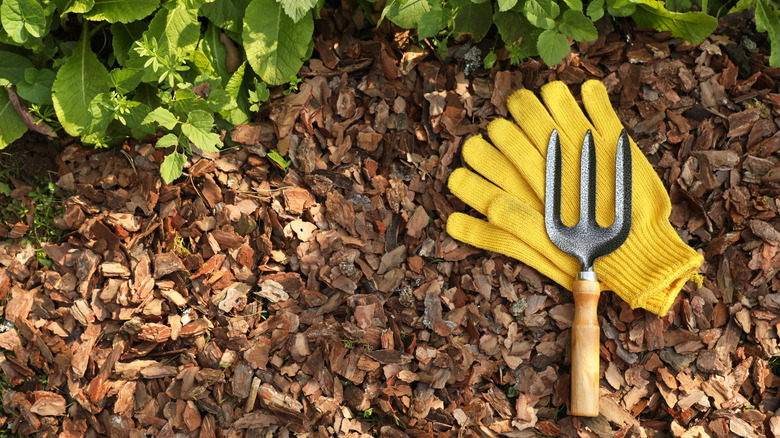
Amending the soil with organic matter, like compost, is the best remedy for most home gardens. Decomposing organic matter feeds organisms that live in the soil. Over time, they loosen compacted soil and create the pore spaces that allow water and air to move more freely. In smaller beds or areas, you can use a garden fork to break up the soil. All you need to do is stick the tines into the dirt and gently move the fork back and forth to add more air pockets.
Repot or transplant root-bound or crowded plants
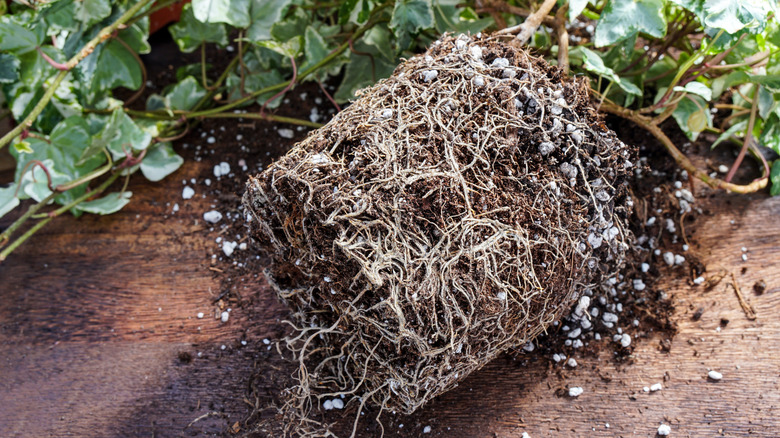
If your plants are too closely spaced together, there likely won't be enough resources in the soil for all of them. Overcrowded plants are also at a higher risk of disease. Similarly, potted plants that have become rootbound will have already exhausted all available resources, leaving them with little left to absorb. Over time, the health of overcrowded or rootbound plants will decline, often resulting in stunted growth.
Divide clump-forming perennials once they produce fewer blooms or the growth stops in the center. Generally, summer- and fall-blooming flowers should be divided in the spring, and spring-blooming plants are best divided in the fall. It's also possible you spaced your plants too closely together when planting. This is an often-overlooked garden mistake that makes your beds look bad and makes it challenging for all of your crops to thrive. When planting, always account for the mature size of the plant to make sure each species has plenty of room to grow. For potted plants, check the roots every spring to determine if it's time to upgrade to a bigger container. Once the roots start circling around the bottom of the pot or growing out of the drainage holes, this is your cue to replenish them with fresh soil in a slightly larger container.
Remove weeds that compete with your plants for water and nutrients
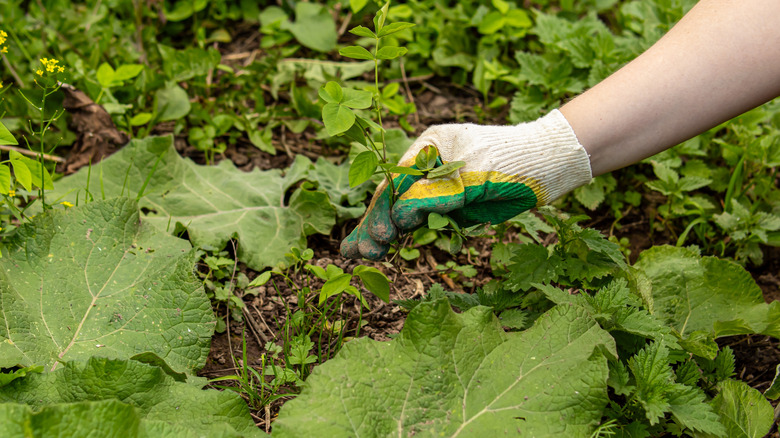
Weeds aren't just unsightly; they can also make it hard for neighboring desirable plants to thrive. There are only so many nutrients and water available in the soil, so your crops or flowers will be competing with the pesky weeds for those resources. Even worse, as they grow, they can become so large that they shade out and restrict sunlight, making it even more challenging for your plants to grow.
For your plants to thrive, getting rid of weeds in your garden should be a top priority. Ideally, you don't want to rely on pesticides unless necessary. Not only can they affect neighboring plants, but they're also toxic for the environment, pollinators, and other animals. Pull any small weedy plants that pop up immediately to prevent them from taking over. If you're dealing with several at once, opt for more natural weed killer alternatives. For example, you can mix equal parts salt, white or apple cider vinegar, and dish soap into a spray bottle. Make sure to only target the unwanted growth, as it'll kill any plant it touches on contact.
Check and correct soil pH for plants struggling to absorb nutrients
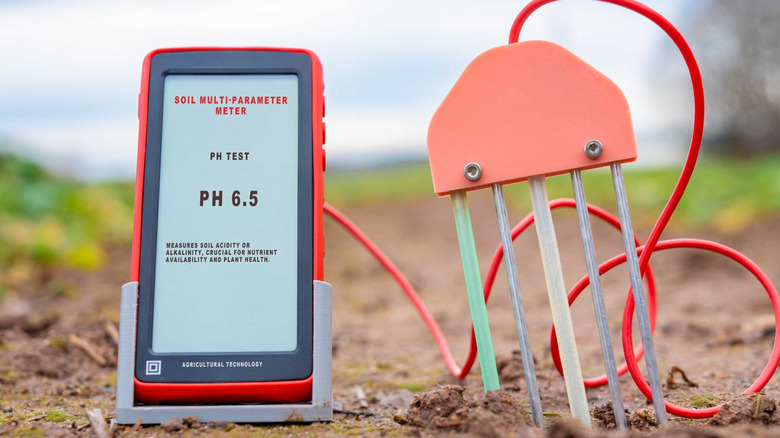
Soil pH is basically a measure of how acidic or alkaline your soil is, with a pH of 7 being neutral, above 7 being alkaline, and below 7 being acidic. It's important to know your soil's pH, as it controls how easily plants can access the nutrients. So, even if your soil is nutrient-rich, plants can only access resources if the soil is within the correct pH range. If your plants are exhibiting signs of nutrient deficiencies, like stunted growth or reduced yields, this may indicate that the soil is too acidic or alkaline.
If you've been on top of amending your soil with nutrient-rich organic material and fertilizing, but still have struggling plants, test your soil's pH by collecting samples of your soil and sending them to a lab for testing. Most crops prefer slightly acidic to neutral soil, but some plants, like blueberries, prefer acidic soil. Once you know the proper range, you can apply amendments designed to adjust soil pH. Lime works well to raise the soil's pH, while sulfur is often used to lower it.
Correct improper planting depth to prevent root stress
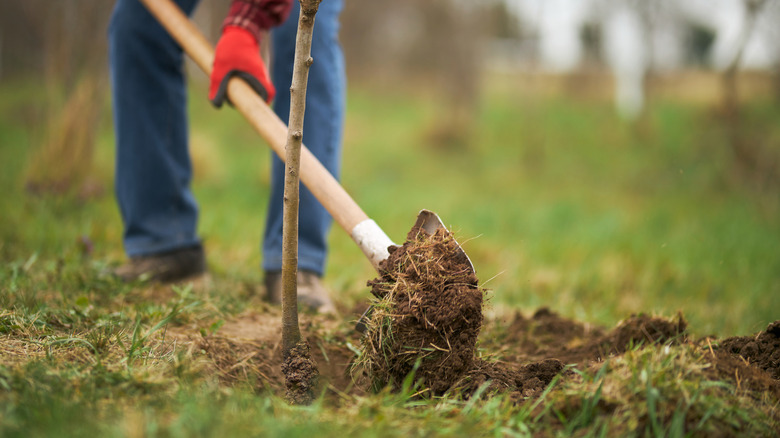
One often overlooked aspect of plant health is its planting depth. Trees have roots that typically grow horizontally and extend outward as they search for nutrients. If they're planted too shallow, these roots can extend over the soil line into the mulch, which lacks nutrients. On the other hand, if the tree is too deep into the ground, the roots won't be close enough to the surface to get the necessary oxygen. It's not just trees that can be affected by improper planting, either. Shrubs, crops, and other types of plants can be at risk of crown rot if planted too deeply. It's also possible for soil to settle over time, exposing roots in your garden bed.
If the lower trunk of your tree looks like it's going directly into the ground rather than slightly tapering out, it's likely planted too deeply. To remedy this, remove some of the soil near the base of the tree so that the roots are closer to the soil line. It's best to do this in the spring after the threat of frost has passed. For trees that were planted too shallow, remove the top layer of mulch around the soil line. Cover any visible roots with the same soil as the planting area, and reapply the mulch. Similarly, you can add a light layer of soil over any exposed roots in your garden beds.
Flush out excess salt buildup to help plants recover
Salt is one of the sneakiest plant killers, and there are a couple of ways it could end up in your soil. One common cause is sea spray, especially for gardeners living in coastal areas. Some types of water and fertilizers may also contain sodium, which can accumulate in the soil over time. In colder regions, salts may also leach into the soil from deicing products used on nearby roads, sidewalks, or driveways. When roots are exposed to high sodium levels, plants struggle to absorb water and nutrients from the soil. Over time, your plant may start to wilt, have yellowing foliage, brown leaf tips, or stunted growth. Sometimes, excess salts can build up and appear as whitish crystals on the surface of the soil.
Use water to flush out excess salt by watering the area longer than you typically would. This will push the salt deeper into the soil, where it is less likely to come in contact with the plant's roots. In the future, don't use salt-based fertilizers or softened water, which is high in sodium. Instead, opt for rainwater, filtered water, or other types of water that tend to be lower in salt content. Avoid using sodium-based deicers in winter, and consider moving salt-sensitive plants away from walkways or other areas prone to salt runoff.
Fix mulch mistakes that restrict water flow and lead to stem rot
There are several ways to use mulch in your yard and garden, and it can be incredibly beneficial when used properly. However, even mulch can become too much of a good thing when overapplied. Applying too thick a mulch layer can cut off oxygen to the roots, essentially suffocating them. Additionally, when mulch is heaped against tree trunks or shrubs, excess moisture can build up on the bark and lead to decay.
Check the mulch around unhealthy plants if you suspect you went overboard. If the layer is thicker than 3 inches, remove some of the excess to improve the soil's oxygen flow. Next, pull back any mulch that is piled onto the base of any trees or shrubs in your yard. Make sure there's at least 3 inches of space between the mulch and the trunk to prevent rot.
Examine the microclimates in your yard and place plants where they thrive
Microclimates are smaller areas with different temperatures, light levels, wind exposure, and moisture than other nearby spaces. There are many backyard features that can create these mini climates, such as buildings, fences, pavement, slopes, trees, and bodies of water. For example, low-lying spots may have a cooler microclimate since cold air tends to settle in these areas. Plants growing near a pond may experience more humidity, while those growing in a sunny open field are exposed to drier conditions.
Map out the different microclimates that may be present in your yard, and use it to find the best spaces for your plants. Plant trees strategically in areas where shade and cooler air would benefit the surrounding plants. You can also use structures to reduce wind exposure and help regulate the temperature around sensitive plants. In some cases, relocating plants to other areas with different microclimates can be beneficial. If a water-loving species is struggling to grow in a dry, open area, try moving it to the bottom of slopes where water is more likely to pool up.