DIY A Unique Shoe Rack With The Help Of Old Skateboards
We may receive a commission on purchases made from links.
Nothing dampens the experience of stepping into your home after a long day like a chaotic mess of shoes greeting you at the door. Piles of footwear can get out of hand fast, especially if there are multiple people in your household and no system to keep everything neat and organized. Luckily, there is an abundance of clever hacks and DIY projects dedicated to helping you tame your entryway shoe clutter. If you consider yourself crafty, it may be time to try your hand at a DIY shoe rack to help keep the mess in order.
There's a current trend online that demonstrates all the ways you can repurpose old sports equipment in your home, with DIY enthusiasts transforming old skateboards into eye-catching storage solutions. Skateboards are the perfect material for making shoe racks. They're an ideal size, you won't have to worry about scuffing or damaging the shelves with the bottom of your shoes, and the skate deck's grip tape provides traction that will help keep shoes neatly in place. The skateboard shoe rack is a great DIY for college dorms, kid's rooms, or apartments with vintage or edgy interior design themes. If you're looking for an eccentric way to declutter your entryway and keep your shoes organized and out of the way, the skateboard shoe rack could be a fun addition to your room's furniture scheme. For this project, you'll need multiple skateboard decks, a pencil, a power drill, washers, nuts, a ruler, and four threaded rods, such as the Everbilt ⅜-Inch 3-Foot Zinc-Plated Threaded Rod at Home Depot for $5.80 a piece. The length of the rods should match the height you'd like your shoe rack to be.
Preparing your materials for the skateboard shoe rack DIY
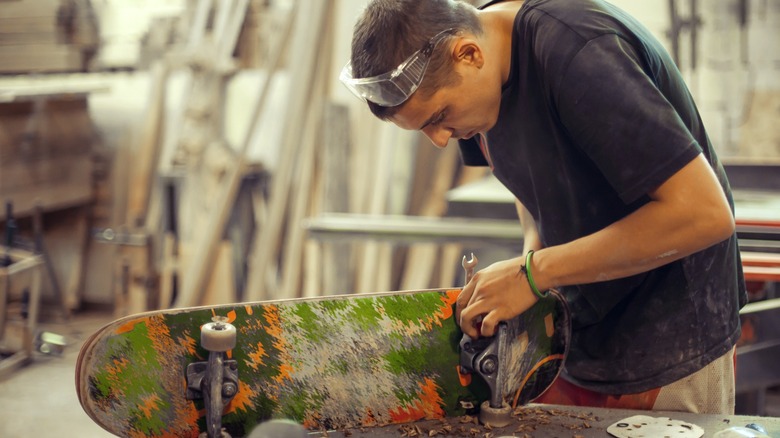
If your skateboard still has hardware on it or you decide to remove the grip tape, you'll need a T-tool, a razor blade, Orange Power or Goo Gone to remove the sticky residue, steel wool, and an electric sander or sandpaper to buff the surface. Removing the grip tape is not necessary but can be a good idea if it's worn out or you plan to paint the boards later on. If you decide to remove the grip tape, do this step first. Heat the grip tape with a hair dryer or, for quicker results, a heat gun to soften the adhesive and make it easier to take off. Use a razor blade to loosen the grip tape, and carefully peel it away from the deck. Remove any sticky residue with Goo Gone, a razor, and steel wool to scrub off any spots the tape left. Use your sanding tool to buff out the skateboard.
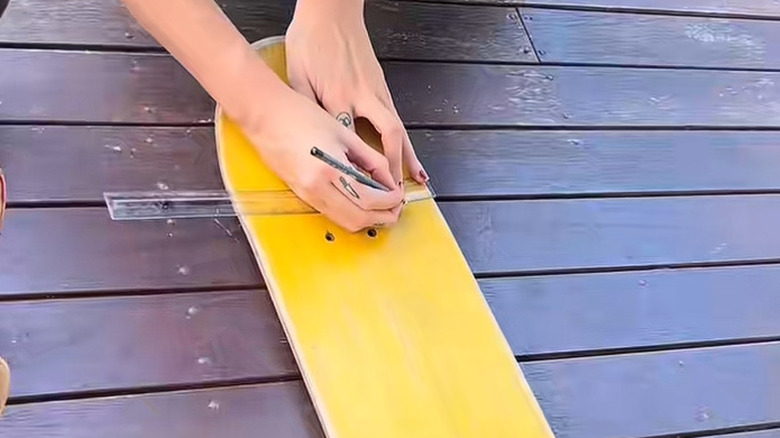
Next, measure and mark four spots to drill on each board, using a ruler to make sure your markings are evenly spaced and consistent with all the other boards. Determine where the four shelf supports will run through the boards, and mark the placement for two holes on either side of the truck holes on both ends of the deck. Once you've prepared your materials, you're ready to start assembling your shoe rack.
Assembling and styling your skateboard shoe rack
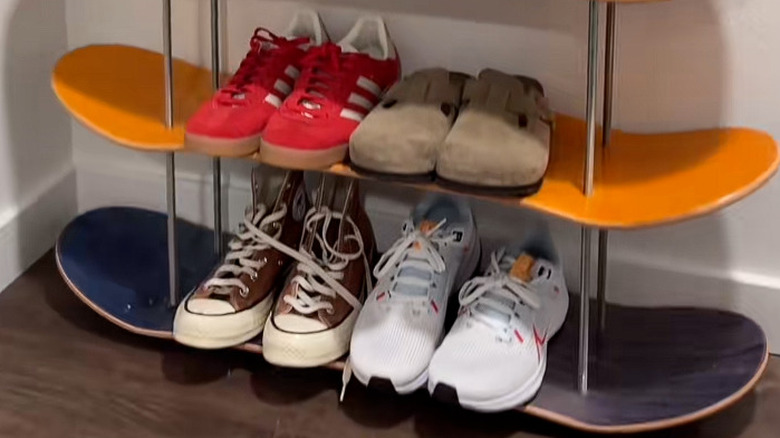
With the holes marked, drill all the way through the skateboard deck at each point, using a bit size that matches the width of your threaded rod. Repeat with each board. Next, thread some nuts onto one end of each threaded rod, capping them off, and slide the rods through each of the four drilled holes on your skateboard until you've formed the base of the shelf.
Repeat this process with the other boards, putting nuts and washers underneath and on top of each shelf to hold them in place. Space the boards far enough to make plenty of room for shoes in between them. If you have to raise or level any of the shelves, simply adjust the nuts supporting them up or down as needed. Finally, screw caps on the very top after positioning the final board on top.
There are many ways to customize this DIY to make it best suited for your space, both aesthetically and functionally. For a taller shelf, you can find longer threaded rods and layer more boards on top of each other for maximum storage and a piece that makes a statement. If you want a more subtle storage solution, use shorter rods and two or three boards as shelves. If you want to give your room a pop of color, paint each board after removing the grip tape adhesive or choose skateboard decks that have interesting designs you wouldn't mind showcasing in your space. You can also leave the grip tape on for a touch of grungy and old-school, nostalgic charm. Play around with the possibilities, and you'll discover that repurposing retired skateboard decks is one of the best upcycled shelving ideas to make your home more unique.