Say Goodbye To The Trash Can Scuffing Up Your Wall With A Smart Solution
We may receive a commission on purchases made from links.
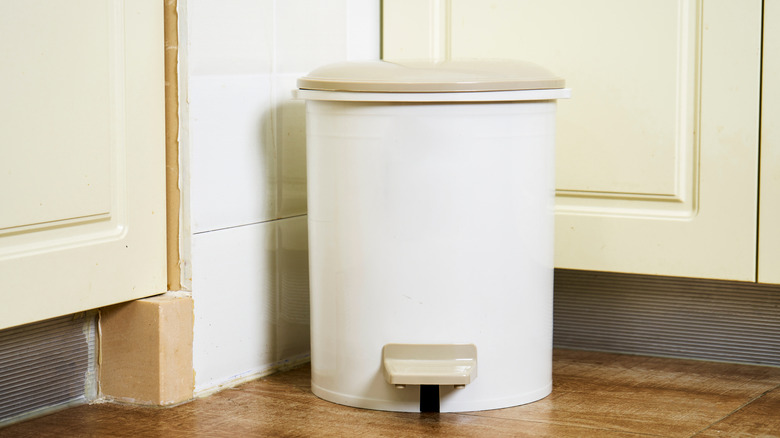
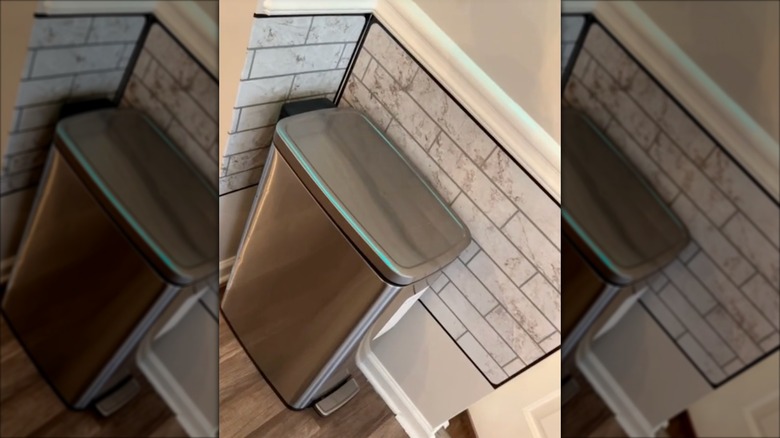
It happens to all of us: One moment, you're innocently pulling the trash can away from the wall so you can clean the bathroom floor or kitchen tile underneath it. The next, you're staring in horror at the scuff marks and dents lining the wall where your trash can lives. No, there's nothing wrong with your trash can, and no, you don't have to get rid of them completely and carry all your garbage straight to the outside bins. Instead, try a simple, protective DIY and line the walls around your trash cans with self-adhesive tile.
Why do trash cans scuff the walls? One reason: movement. When you lift the lid on the garbage can, replace the trash bag, or even just jostle the can as you walk by, it rubs against the wall. The constant rubbing motion of the plastic or metal takes a toll on the drywall, leaving ugly scratches behind. Sure, you could remove the lid altogether, but that could attract flies or pests, not to mention encourage your pets to do a little dumpster diving after bedtime. And yes, you could move the trash can away from the wall, but if you're short on space, you're giving up precious real estate in your home. But with self-adhesive tile, you can create a barrier between the wall and your trash can that prevents any scrapes. Plus, there are tons of different types of peel-and-stick tiles, meaning you can find the perfect pick for your space without breaking your budget.
How to install self-adhesive tiles behind your trash can
When you're ready to breathe new life into your kitchen with peel-and-stick tiles (a.k.a., hide those scuff marks), start by cleaning the wall. Use a multi-purpose cleaner to wipe away any dust and smudges. If the marks won't budge, try using a Mr. Clean Magic Eraser cleaning pad to get them off. Once the wall is clean and dry, it's time to prep your tiles.
Tile sheets typically come with two types or edges: smooth, such as LONGKING Peel and Stick Backsplash Tiles, or staggered, like Art3d Heavy-Duty Peel and Stick Backsplash. The even edges are generally faster to install — just line them up with the guideline (more on this in a moment), then press down. If your tile sheets have staggered edges, you may need to trim them to properly fit the area. Simply hold the tile sheet up to the wall and mark where to cut. Then lay the sheet down on a cutting board or wood block and trim with a utility knife. If you need to shorten a sheet, cut from the bottom to keep the grout lines intact.
Once you're ready to install, draw a guideline at the top of the installation area. This makes it easier to keep the tile sheets level while you're sticking them on. Pull the backing off the top edge of one sheet and position it along the guideline. Then slowly remove the rest of the backing, using your hand to flatten the tile against the wall. Install the remaining tiles along the guideline first, then start working your way down for a stylish, scuff-free space.