Use Dollar Tree Items To DIY Cute Light-Up Frame Decor That You Can Design For Every Season

We may receive a commission on purchases made from links.
Whether in midwinter, the dog days of summer, or anytime in between, a cute lighting element is always welcome in the home. A DIY one made from Dollar Tree bargains is even better. And being able to customize it to your taste or to the seasons is the clincher. The Tree's Special Moments Arch Photo Frames star in lots of TikTok projects, thanks to all the unique ways to use Dollar Tree frames for storage and decor beyond displaying photos.
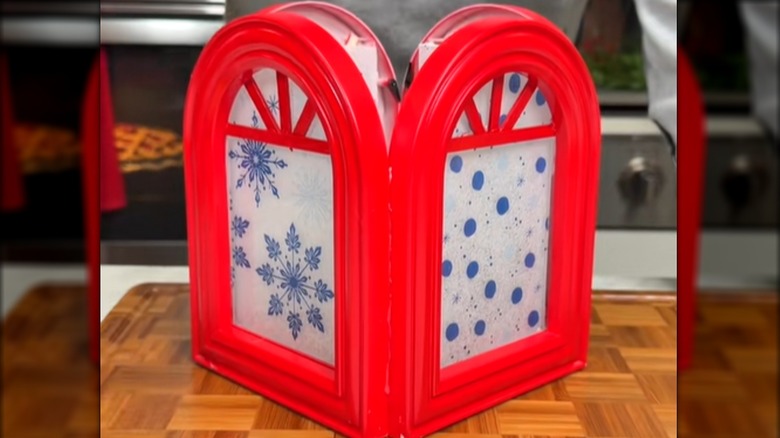
One crafty TikToker teamed up four of these frames and seasonal tissue paper to concoct a surprisingly charming lantern. Held together with the right glues and topped with a bit of paint and added accents, a battery-operated light shines through the glass and translucent paper for a truly appealing glow. The original design in the TikTok, with blue snowflake tissue paper and a perfect Santa red, makes adorable holiday decor on a Dollar Tree budget. But any tissue paper or decorative napkin will work as an overlay on the frame's glass, so you can easily make new lanterns fit for different holidays and seasons. The creator also detailed each of the frames to make the arched tops look like fan lights on windows. You could follow suit by using painted wooden coffee stirrers cut to size and glued in place, or just leave the arches as they are.
To put together your own version of this Dollar Tree DIY lantern, gather up an LED candle or puck light, some Mod Podge, a paint brush, scissors, spray paint in your choice of color, sandpaper, and a glue gun. For gluing details, get a reliable hot glue, and use a plastic-friendly glue like Loctite Plastic Bonder to hold the four frames together.
Prepare frame windows for the lantern
Remove the glass and backing from the frames, rough up their outward-facing edges with sandpaper, and wipe away the dust. For the optional fan light, grab 12 wooden stirrers (you'll probably only need two or three per frame, but a couple extras are a smart plan). Give each of these pieces a thorough coat of spray paint.
One at a time, paint one side of the glass pieces with Mod Podge. Smooth a section of tissue paper or napkin over the surface, with the printed side touching the glass. If you're using 2-ply napkins, remove the non-printed layer first, starting in one corner and carefully separating the layers around the edges. Position the paper so that the creased areas are not on the glass, if possible. Smooth it into place. Cover the back of the paper with Mod Podge as well, and snip away the excess paper from the glass's edges.
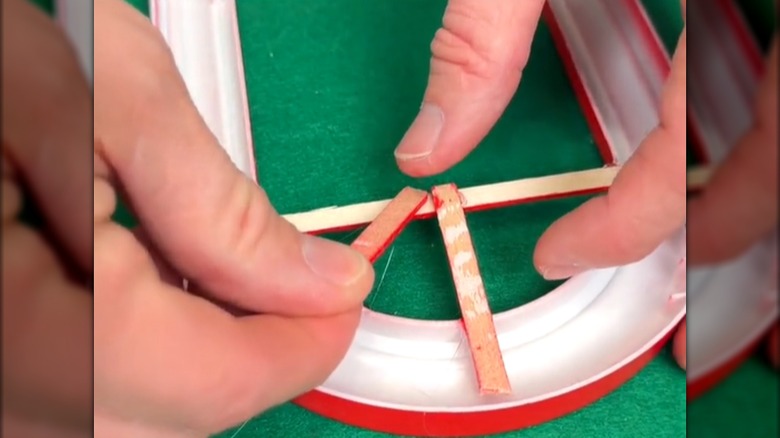
To make the fanlight detail, cut eight pieces from coffee stirrers matching the width of each frame's opening. Flip the frames over, and glue one strip horizontally onto the back of each frame's opening, right below where the arches begin to curve. Glue the other along the lower edge of the opening so it is hidden when you view the frame from the front. Trim four more pieces that match the distance between the top center of the arches and the middle of the upper stirrer piece, and glue them in place. Then, cut eight pieces — two per frame — to divide the two halves of the arch diagonally into halves again. Glue them down. Make lines of glue along both of the horizontal coffee stirrer pieces on each frame, and press the non-papered side of the glass in place.
Assembling and completing your DIY frame lantern
You'll be attaching the frames to each other with the four arches facing up and the sides of the frames touching to form an open-topped box. Since you'll be gluing very thin edges of the frames together to create the square lantern shape, unplug the glue gun, because this stuff may not do the trick. The frames are made of polypropylene, which is notoriously hard to glue.
Trace the back edge of each frame with epoxy, and glue two frames together at a right angle. Repeat with the other two frames, and combine both sections into a square shape. The edge you'll be gluing is extremely thin, so give it the best chance of holding by letting the glue dry and cure for the amount of time suggested on the glue's packaging. One aesthetic issue you may face is with the finished lantern's open top and visible interior that can make it look incomplete from certain angles. The arches make it challenging to add a topper to the structure, but an easy solution is to place your creation on a high shelf or fireplace mantel so that the light shining through the glass gets more attention than the open top.
More than a one-off project, this DIY is one you're able to repeat throughout the year. Get new holiday and seasonal napkins from Dollar Tree as they arrive in stores to make different window designs. Then, update the frames with new spray paints, like black and orange for Halloween or pretty pastels to herald the spring. Just as you can use a Dollar Tree jar to make chic light-up decor for any season, this fun creation is a low-cost way to have your home's decor set the perfect mood.