Reuse A Thrifted Glass Platter To DIY Adorable Custom Home Decor You'll Love

We may receive a commission on purchases made from links.
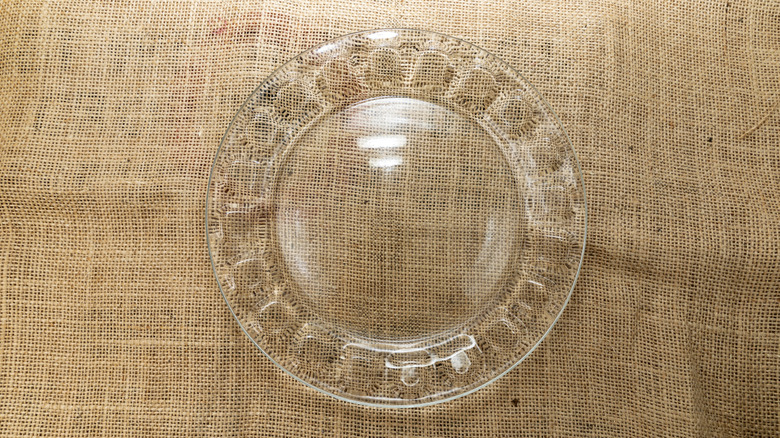
Home style trends in 2026 are leaning toward mismatched furniture and accessories, along with a mix of both vintage and new elements for a more authentic, lived-in look. This gives you the perfect excuse to visit the thrift store more often this year. Next time, grab a vintage glass platter to repurpose into custom home decor. While it's common to use platters to serve deviled eggs and the like, a more engaging use is to make it a part of a mismatched gallery for your walls, or a fanciful shelf display sitting among other thrifted pieces.
If you don't already have a platter to reuse, here are some things to consider. Creating a perfect gallery wall starts with interesting pieces. Many of the platters you'll find at thrift stores and auctions have embellishments, like fluted or embossed edges. These create a frame around the piece, making for a more polished-looking finished product. Second, if you find a couple of platters that appear to be a set, buy them if you're leaning toward matching decor pieces. Finally, the platters should have a surface area that's big enough for you to decorate with an image or quote.
Dressing up your thrift-store find starts with some primer, a paint brush, fine-grit sandpaper, and chalk paint. Use your decor as a guide. Or, if you're trying to make a trendy wall art display, go with a color like blue for the paint. You'll also need some Mod Podge Craft Glue and sponge brushes. Finally, you'll need something to make images with, like a printer and paper, a Cricut for vinyl cutouts, or a stenciling set.
Turning your thrifted platter into art
When this piece is finished, you'll have a small plaque that'll sport an inspirational saying or image in the center of the platter (where food would normally go). Taking it from platter to decor starts with the application of primer and paint, which creates the surface on which the image will go. The platter will likely have glaze, which is like a coat of glass that's been fused to the platter. Some chalk paints will stick to glaze without primer. Others require primer or gesso before you apply the paint. Painting the platter before you apply the decorative image evens out the surface, visually speaking. It also gets rid of any painted embellishments, which leaves you with a blank surface on which to paint. It's like having a piece of paper made of ceramic to paint on.
You'll get the best results from your painting efforts if you always move your brush in the same direction — i.e. only horizontally or only vertically. Check the paint between coats to see if any bubbles or bumpy blemishes form. If they do, sand them down to make the surface smooth. Otherwise, those bubbles will show through on the finished image. Finally, keep in mind that you can coat the final product with some spray-on glaze. This is worth mentioning if you don't like the texture of the chalk paint. Once you apply the image, covering it with the spray-on glaze seals the image in and smooths out the surface of the chalk paint
How to apply the image to the painted platter
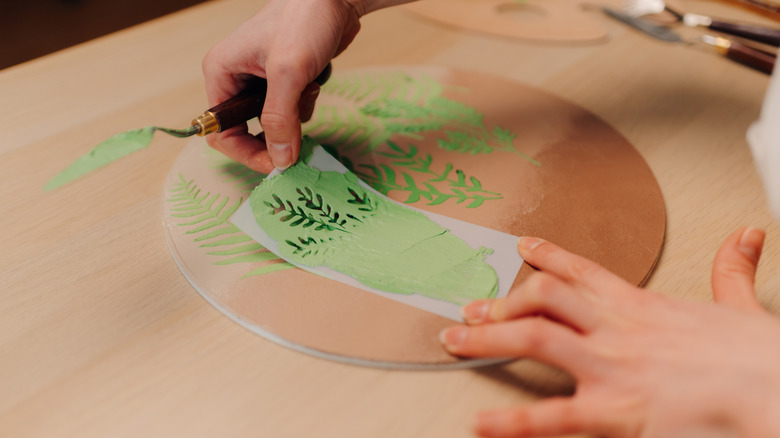
Prepare the image for the piece, which is what takes it from platter to decor. You have a couple of options for this. Print an image you like onto printer paper in reverse, which you'll use as a transfer, or prepare a design on your Cricut. You can also paint a design or quote on the platter, using a guide like these HZMM Inspirational Word Stencils, and then seal the stencil with spray-on glaze.
If you're printing an image, make a reverse image (a mirror print) with your printer. Cover the image with a coat of Mod Podge glue and lay it on the painted platter (apply the Mod Podge directly to the image). Lay it down on the platter and rub out any creases. Let it dry for 24 hours. Next, use a wet cloth to dampen the image on the plate and rub off the surface gently, working your way from the middle outward. The paper will come off, revealing the image underneath.
Finally, for DIY wall art that looks high-end, paint highlights onto the image with some acrylic paints and a small brush. This type of touching up could include adding flecks of green paint on a tree to make the leaves stand out or painting streaks of yellow-white to a dog's fur for a pet portrait. Put the finished platter on a stand, like this HENABLE Black Iron Plate Stand, to display it on a shelf or table. Or, add a hook to the back of the platter and hang it on the wall to add visual interest to your wall gallery.