Keep Drawers Organized With A Shoe Box DIY
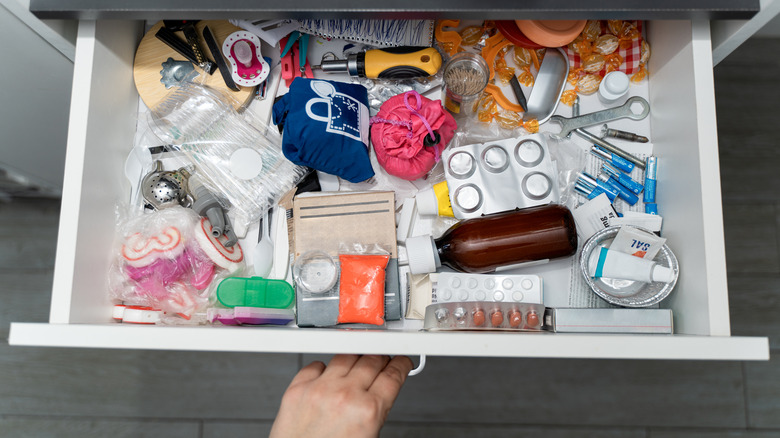
Do you spend what feels like forever sorting through scissors, tape, notebooks, and old takeout menus just to find a pen in your kitchen junk drawer? Or maybe you're hit with instant overwhelm when you open your child's dresser drawer and have to sift through socks, onesies, and pajamas in search of a clean T-shirt after the 387th time they've spilled juice on themselves. Imagine if there was a way to declutter your drawers and keep everything straight without spending a ton of money on fancy organizers. Well, you don't have to fantasize about it any longer, because we have a DIY that uses something almost everyone has at least one of around the house: a simple shoe box.
Instead of just throwing everything into a drawer and hoping for the best, you can use shoe boxes to create sections and dividers that organize your things and bring order to the chaos. It's the ultimate DIY drawer divider that will make organizing your home a breeze. The best part is that this DIY will work for any drawer, from your office desk to crafting spaces or any bedroom dresser. You can customize it to fit your specific needs, like smaller boxes for baby socks in the nursery and larger ones for makeup brushes in the bathroom. You can even decorate them to match the room decor or just to bring a bit of your personality into the space. Repurposing items like shoe boxes is a great way to keep things out of the landfill while simultaneously keeping your home organized.
How to make drawer organizers out of shoe boxes
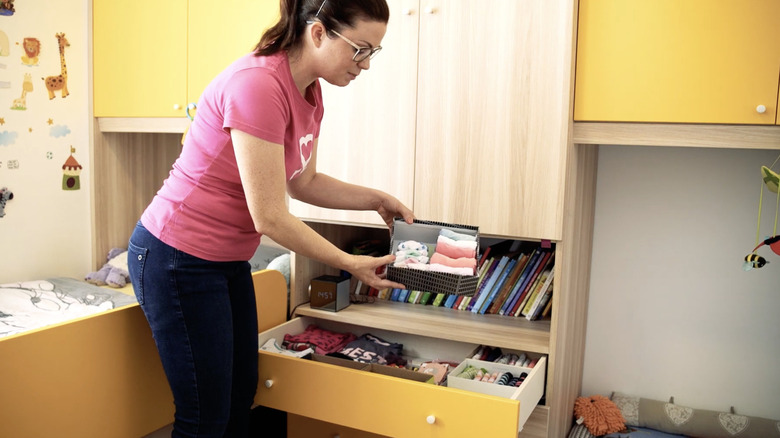
Whether you want to declutter your junk drawer or make your bedroom more organized than ever, this DIY will do the trick. Grab some shoe boxes, along with scissors and optional contact paper, and get to work. Begin by cleaning out the drawer and setting everything out so you can see what you have. Now is a great time to give the drawer a good wipe down. Sort your items by categories that make sense to you — pens and markers; paperclips and thumbtacks; or socks, underwear, and camisole tank tops if you're in the bedroom. Then experiment with what size boxes work best for each grouping of items and how they fit together in the space. You can cut the box height down to size if it's too tall for the drawer.
Once you have the boxes picked out and adjusted their size if needed, you can decorate them. This step can really elevate the boxes but is completely optional. Contact paper is a fun choice because you can pick from many different colors and designs, and it's readily available at local craft stores. Just cut it to size, and apply it directly to the box. For family rooms, you can get the kids involved and have them decorate with stickers and markers. If you're feeling really fancy, you can add a layer of felt material to the inside of the box to protect delicate items. After your boxes have been decorated, place them in the drawer, and put all your items away in their appropriate sections.