DIY A Dollar Tree Trifle Bowl Into A Stunning Light That Doubles As Storage
We may receive a commission on purchases made from links.
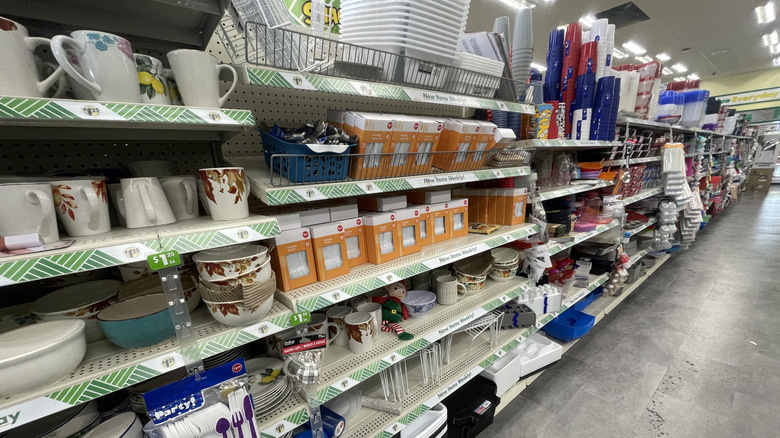
If you're throwing a party with lots of food, Dollar Tree is ready to help you do that without breaking the bank. Their plastic serving vessels are super affordable and sometimes quite cute — so cute, in fact, that they could play a more permanent decorative role. Glance at a Caterer's Corner Trifle Container, and your creative gears will immediately turn with ways to use this attractive piece. These containers are made of rigid, transparent plastic that work well as storage, part of a lighting element, or both at the same time. A tricked-out trifle container and push light makes a striking lamp-storage combo to illuminate your space. Attached to an upturned bowl, topped with a sculptural lid, and treated to glued-on textural detailing and paint, the final results give no hints of its Dollar Tree origins.
Make your own with a trifle bowl, one Clear Plastic Bowl, a puck light, and a round mirror large enough to serve as a lid for the trifle bowl. The Tree's Hexagon Mirror is large enough to extend over the bowl's edges and harmonizes with the trifle bowl's angular pedestal. Purchase plastic-friendly spray paint in a color of your choice, ¼-inch dowels like these HOPELF 50-Piece Bamboo Dowel Rods, flat-backed crafting pearls, gold leaf flakes, a clear sealant spray, and a 20-pack of plastic forks and/or spoons. You'll also need strong hot glue and a gun, sand paper, a rag, an all-purpose cleaning product, a pair of tweezers, and miter shears. If you don't already have a pair of miter shears, this is an affordable tool that belongs in every DIYer's back pocket.
Painting and detailing the containers
Before you prep your pieces for detailing and painting, did you fall in love with one of the tints of the trifle containers and don't want to cover it? They come in delectable candy colors like turquoise, cobalt blue, pink, red, purple, as well as clear. They match a good number of other Dollar Tree serving containers, opening up a dizzying amount of possibilities for multi-piece projects. You could skip the dowel and pearl detailing altogether. Coating the interior of both the containers with a translucent finish like Rust-Oleum Frosted Glass Spray will highlight the plastic's original colors while letting the puck light glow through their sides. (Do note that the painted version only allows light through when the mirror lid is off.)
Whichever route you go, assure the paint or frost spray will stick to the plastic by first sanding the bowls and the mirror frame. If you want to paint the mirror itself, a slight rough-up is also a good idea. Follow up by wiping the surfaces with a rag and all-purpose cleaner. If you're adding the dowel detailing, you won't need to paint the sides of the trifle dish. Cut your dowels in half with the miter shears, and begin gluing the dowels to the trifle bowl's sides vertically, one next to the other, until you've covered the entire perimeter. Cap both ends of all of the dowels with flat-backed pearls, using tweezers and glue. Spray paint the exterior of both bowls and the mirror. Once the paint is dry, flip the plain bowl upside down, and glue the trifle bowl's base to the plain bowl's base.
Final steps on the trifle bowl storage-lamp
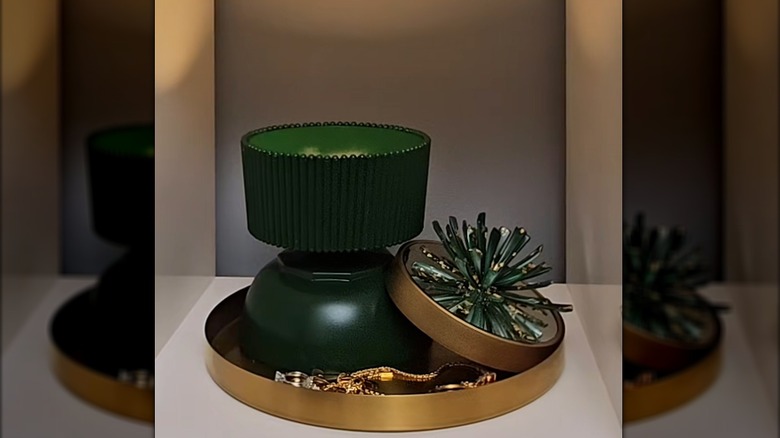
A mid-century style starburst crowns the lid of this lamp/storage piece. Painted the same color as the bowls and sprinkled with gold flakes, it's a show stopper. However, you can opt to leave this purely decorative element off, as well. Spread a piece of parchment paper on your work surface, both to protect it and to anchor your starburst creation. Cut 3 to 4 inches of handle from 16 to 20 plastic forks or spoons, make a puddle of glue about 1 inch wide on the parchment paper, and place the cut ends of eight handles, right side-up, in the glue so that they form an equally-spaced eight-point starburst. Add a bit more glue, and sink the ends of four to six more handles into it; set them at about a 45-degree angle in the spaces between the first eight handles. Top the center with a bit more glue, and poke in two or three more handles at a slight angle. You can add to or decrease this number according to how well it comes together.
Give the starburst a good spritz of paint, and sprinkle the wet paint with gold flakes. Once it's dry, add a layer of spray sealant to keep the flakes in place. Very carefully peel the parchment paper from the glue center, and glue it atop the face-up mirror. Keep in mind that this addition is only ornamental and won't hold up to use as an actual handle. Place a lit puck light inside the upgraded trifle bowl, and light up any room in your home.