Take Martha Stewart's Advice: 14 Tips For A Cleaner Kitchen

We may receive a commission on purchases made from links.
When it comes to keeping a space tidy, Martha Stewart has found the secret sauce. Like her cooking, gardening, and other lifestyle wisdom, her cleaning know-how has been finely honed over her years hosting her talk show, helming her lifestyle empire, and generally just serving as a revered domestic goddess. And nowhere is her knowledge more vital than in the kitchen. As Stewart remarked on Facebook, "The kitchen is not only the heart of the home, it's also the workhorse." This hardworking space usually requires the most scrubbing and scouring out of any in the home, and over the years, Stewart has shared lots of ways to cut down on elbow grease while getting things really gleaming.
Below, we've compiled all the best kitchen cleaning advice from our favorite home and garden maven. When it comes to removing smudges, stains, and general grime from stainless steel, copper pots, and drinking glasses, Stewart's found the perfect recipes. Heed her advice and you, too, can cook up an immaculate kitchen.
Windex can polish up stainless steel
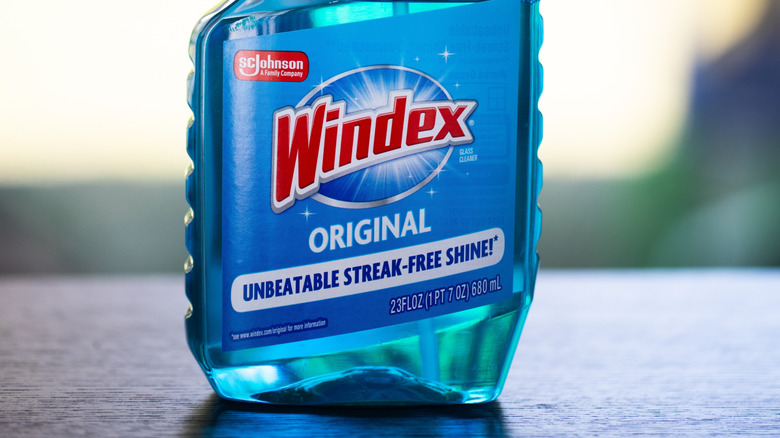
While keeping stainless steel spotless can sound like a hard task, Stewart swears by this budget-friendly drugstore find. To deal with fingerprints, smudges, food splatter, or water stains, "I use Windex," Stewart said during an appearance on the "Today Show" in 2021, "that's my secret for a really nice, shiny stainless surface."
Her brilliant trick for cleaning her multitude of stainless steel appliances involves spraying the popular glass and surface cleaner onto a soft rag. "Don't use anything abrasive on stainless steel," she noted. A microfiber cloth will help trap and lift any dirt and grime. And spraying onto the cloth, rather than directly onto the surface, prevents any excess moisture from pooling or dripping.
Acetone can remove rings and other marks from marble countertops
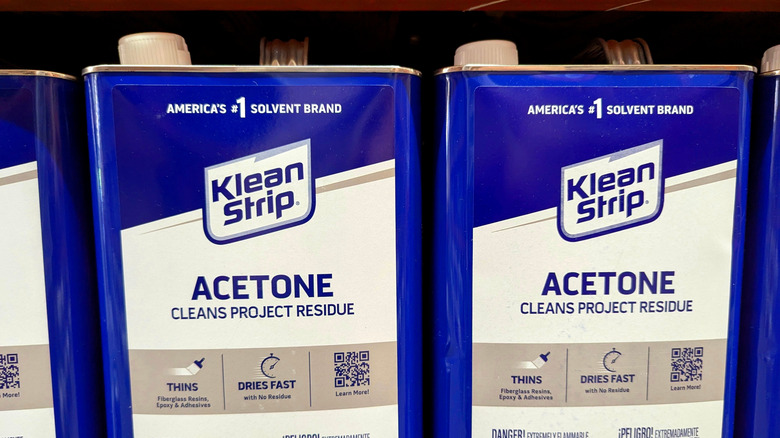
When it comes to porous marble, plenty of things can leave their mark. Though Stewart's countertops, naturally, get cleaned quite frequently, "after time they do get marks and rings typically caused by acidic substances that react with the calcium carbonate in the marble," Stewart explained in a recent blog post. Speaking to Mark Galazzo, the owner at Precision Stone, Marble & Granite near her New York home, he "suggested a quick process for cleaning the marble, removing any marks, and lightly sealing the surface," she detailed, "using acetone, waterproof 400 grit sandpaper, Stonetech Revitalizer, Cleaner and Protector, and Stonetech BulletProof Sealer."
After wiping the counters thoroughly with acetone, wet the surface with water, and use a 400-grit sandpaper to remove etching marks. "Doing it on a wet surface prevents any scratching," Stewart noted. "The sandpaper is waterproof, so it is very effective on this counter." As a finisher, she sprays on Stonetech Revitalizer, Cleaner & Protector and seals the surface with the Stonetech BulletProof Sealer.
From there, to properly seal granite countertops so they stay looking like new for longer, use a microfiber cloth to really work it in with gentle, circular movements. Take care not to use too much as it could leave surfaces sticky — it's better to apply multiple thin layers than to lay it on too thick. And you'll want to follow up with a second, dry microfiber cloth to wipe away any excess. Most importantly, follow the instructions to let your counters cure completely — typically at least 24 hours.
Use lemon and salt to clean your cutting boards
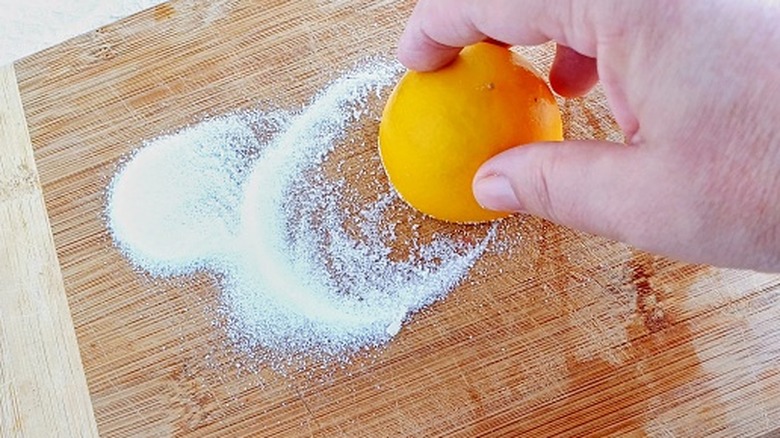
Yes, of course, Stewart has a hack for keeping her cutting board an, er, cut above. If yours has seen a lot of action, chances are it's endured its fair share of stains. And if that leaves a bit of a sour taste in your mouth, she has a solution. "If you have a dirty old cutting board, don't throw it away," she stressed on Today. Instead, she continued, "Use some salt and some lemon and just rub it down first, see if that works at taking off any stains." The acidity in the lemon helps break down the stain, allowing it to be scrubbed away. And the grit of the salt adds a bit of lifting power.
But if that's not enough to squeeze away any unsightly spots, Stewart has another genius trick to bring an old cutting board back to life. "Use a little bit of sandpaper, a little bit of mineral oil, and you'll have a new surface on that old cutting board," she advised. The sandpaper will wear away the stain and after you wipe away the wood dust, let the mineral oil soak in.
A straightened paperclip can help clean a stovetop
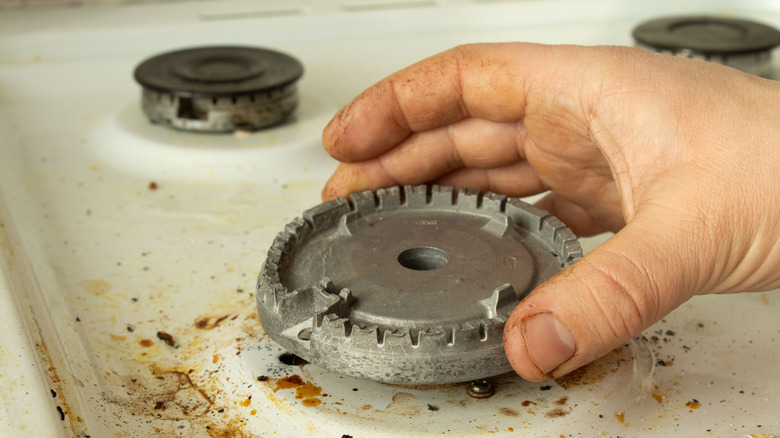
Keeping the stove clean doesn't have to be a hot-button issue. Since Stewart's range gets plenty of use, in addition to regular wipe downs, she loves to indulge in a thorough deep clean. Her process involves scrubbing the grates clean, and then digging in with one creative hack. To attack the rest of the stovetop, "the areas under the grates as well as the fuel ports can be cleaned," Stewart noted in a 2018 post on her blog. "Using a straightened paper clip, just poke each of the fuel port holes to clear any blockages."
As for how often you should be cleaning a gas stove top, once a month is a sound strategy. Giving it a deep clean regularly can keep it from getting too caked in grease and other debris. While most everything can be scrubbed with just soapy water, grates that are particularly grimy can be attacked using a paste of 3 parts baking soda with 1 part water.
Deli containers are great for organizing a pantry
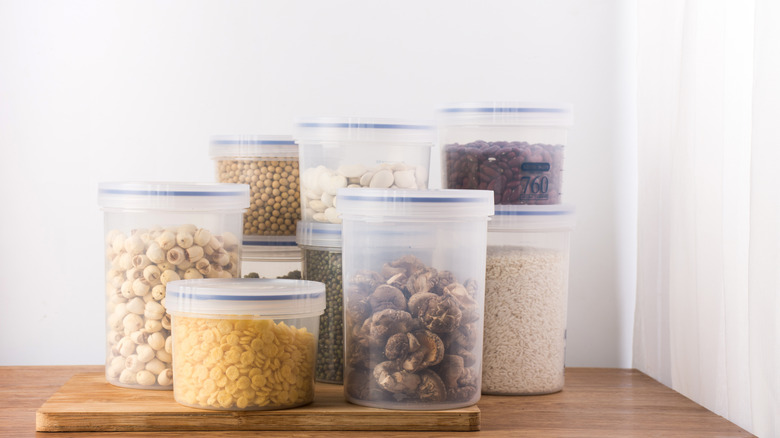
When your pantry is as vast and impressive as the one in Stewart's New York home, you find ways to keep it all contained. "I use a lot of these plastic deli containers in various sizes to store many things," she explained on her blog. "They are easy to stack, easy to label and easy to keep organized." And, yes, her Brother P-Touch label maker is one of her "can't live without" tools, Stewart noting, "We use it to label so many things around the farm." To ensure everything is easy to spot, she advises, "Place the labels on the sides of the containers, so they are visible. Everyone can now know exactly what each item is." With this level of organization, you will find dusting and regular cleaning of your pantry much easier.
And that's just one trick for creating a pantry system that works hard and actually stays organized. To find all those labeled containers with ease, group similar foods together (think: canned goods, baking necessities, cereals) and place your most-used items up front. To utilize every inch of space, make use of risers and under-shelf drawers to store smaller items. And lazy Susans provide a great home for miscellany such as spices and sauce bottles. An option like the Gloxa lazy susan offers plenty of room for all your smaller containers.
Organize your cooking supplies thoughtfully
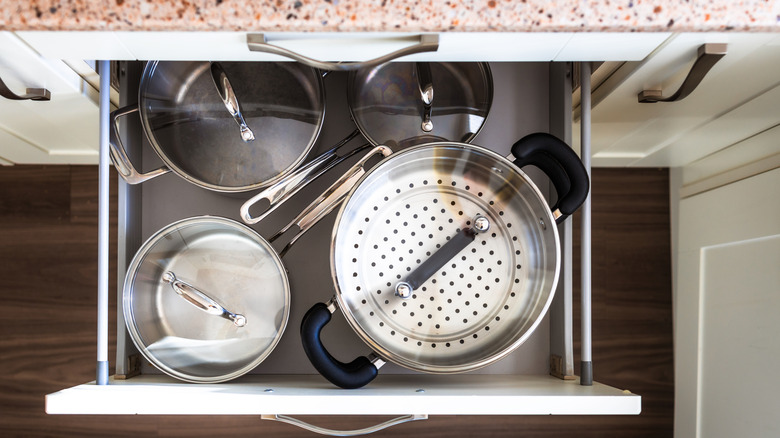
Another key to preparing a perfectly designed, neat, and tidy kitchen is putting some thought into where you stash your go-to tools and cookware. When you set up a system where your most-used supplies are easily within reach, you can really get cooking with gas. "Pots and pans are best kept near the range or cooktop," Stewart suggested in a 2014 YouTube clip. "Keep mixing bowls near the countertop you use for food preparation. And keep your coffeemaker and mugs in the same space." Other smart strategies include storing your cutting boards and knives near each other, keeping essential tools like spatulas and whisks within arm's reach of the stove, and grouping other like items together. "For example," Stewart instructed, "store all your baking supplies in the same cabinet or area."
Another key ingredient in Stewart's kitchen is the tray dividers she uses to separate cooking sheets and other pans. (One to try: The Container Store's 12-inch Tray Divider.) And since she recommends keeping the things you use most at eye level, she likes arranging them on pretty trays or cake stands. A stand such as West Elm's Jupiter Beaded Glass Cake Stand is a great way to artfully display your most-used oils and seasonings for cooking, or you can use it to create a sink station with hand soap, dish soap, and sponges.
To protect shelving, line it with stainless steel sheets
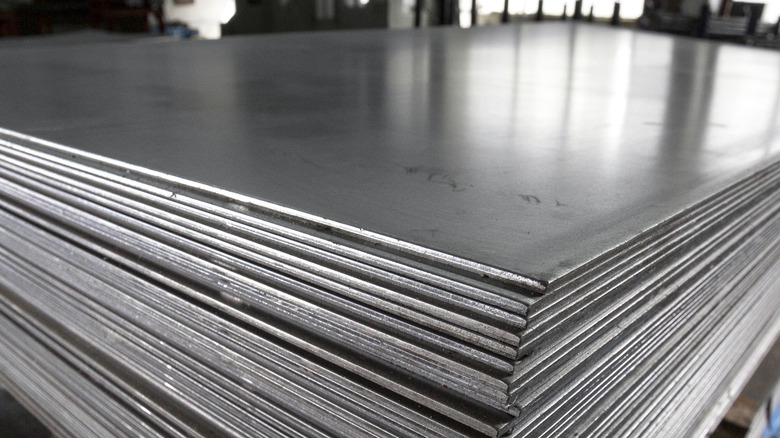
To maximize the shelf life (literally) of her cupboards, Stewart likes to line the pantry with stainless steel. Putting down that strong protective layer helps protect the surfaces from scratches. And, as she noted in a 2017 blog entry, "Stainless steel sheets can be found at hardware stores and cut to various sizes."
To keep them shining bright, Stewart will simply wipe them down with a damp cloth. You can finish the process with this cleaning hack that makes stainless steel appliances shine like new. Once you've sprayed the steel down, finish by wiping the surface with a dryer sheet for a little extra sparkle. Because stainless steel is non-porous, accidental spills and gunk will be much easier to clean, too.
Copper polish can keep metal shining bright
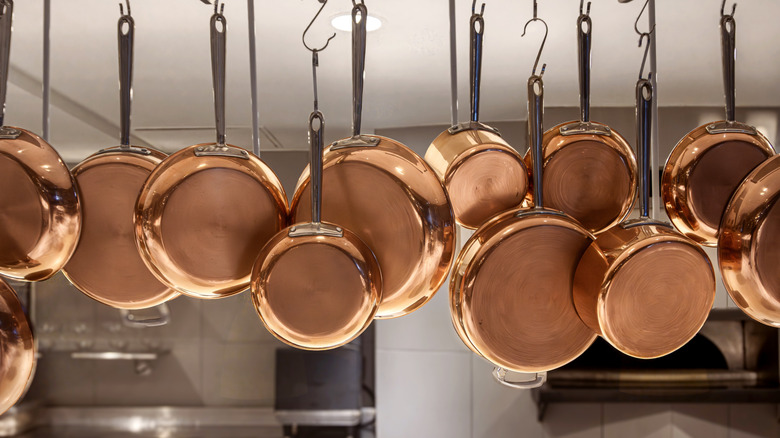
Though copper's distinct pinkish-orange hue is stunning in most kitchen spaces, over time it "loses its luster and acquires a tarnish when exposed to air," Stewart noted in a 2021 blog post, citing the oxidation that occurs when copper interacts with oxygen and moisture in the air. "So it is important to clean it regularly." Her secret ingredient is Wright's Copper Cream. "Whenever cleaning any precious metal, always use a soft moistened sponge," Stewart instructed. "A soft cloth can also work well. And, for tight areas — a soft-bristled brush is good to have on hand."
According to Stewart you should polish copper cookware every few months. To put the pedal to the metal so to speak, "Completely coat the piece with cream," Stewart instructed. "The copper will start to brighten as it is rubbed. This task is time-consuming, but it is well-worth all the work and elbow grease. And remember to get into the cracks and crevices."
A vinegar bath can clean cloudy glasses
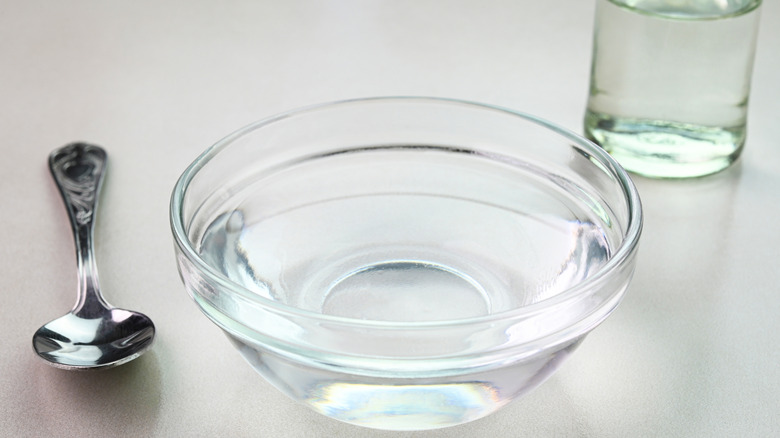
If you've ever found yourself staring at a collection of cloudy-looking glassware, drink in this tip from Stewart. Due to continued exposure to hard water, "over time, glass can collect a cloudy film, but this can be removed with regular cleaning," she shared in a 2018 blog entry. "For stubborn cloudiness caused by calcium and magnesium buildup, wash them in a vinegar bath."
To employ the genius way Stewart brings sparkle and shine back to cloudy glasses, start by warming up closed bottles of white vinegar in large bowls of hot water. Then — depending on how many glasses require cleaning — pour enough vinegar into a mixing bowl or a sink to fully cover the cups and let them soak for an hour. After you've attacked each one with a dishware scrubber, rinse in hot water and dry immediately.
A liquid cleaner helps keep stainless steel sparkling
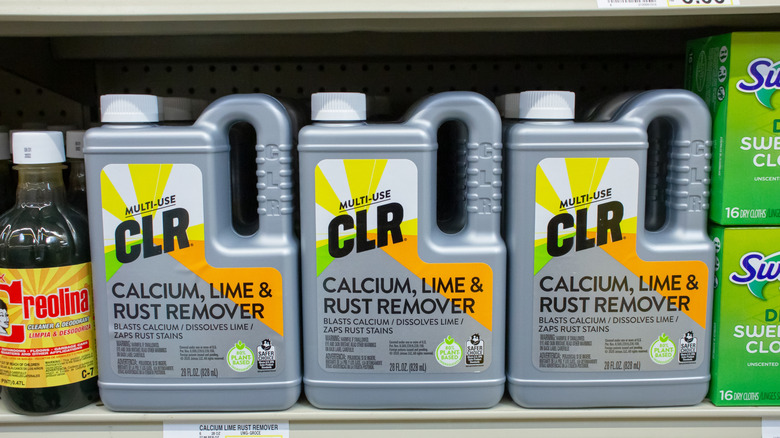
Keeping metal looking shiny and new can be quite the heavy task. "I was looking at my stainless steel pots and pans and steamer baskets and noticed how dull and cloudy their surfaces were," Stewart detailed in a January Instagram post. So, she followed her housekeeper's advice to clear things up with CLR Brands' liquid cleaner, a secret weapon that promises to remove calcium, lime, and rust deposits. Instructed Stewart, "Follow the directions, make sure you wash well with soap and rinse, and your equipment will look like new in a very short time!!!!!!"
You may have to do a bit of detective work, though, to discover if your stainless steel pan needs a deep clean. Look for sticky oil residue, persistent white mineral spots, or rainbow-colored tints. An unsightly brown tint can also form when your pans overheat. Also, if you notice that your food is sticking to the non-stick surface or taking longer to cook, it may be time for a deep clean.
To properly care for cast iron, simply rinse in hot water and dry completely
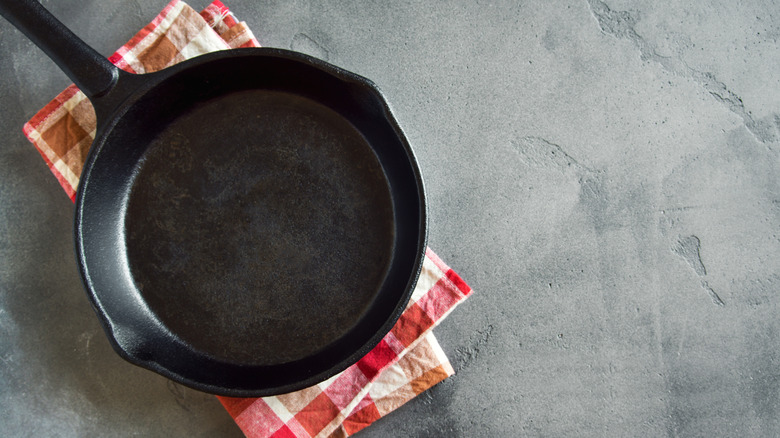
Though cast iron is notably sturdy, making sure it's cleaned properly can be a delicate recipe. Step one, says Stewart, is lining your kitchen sink with towels so the heavy pans can't do any damage. Once you've washed both the inside and the outside with a scrubbing pad and some soap, you'll want to season it everywhere using a solid shortening and let it sit upside down in an oven atop an aluminum pan, at 375 degrees Fahrenheit for an hour or two. "Once you do this and get the pan really seasoned," Stewart stressed in a 2014 YouTube video, "you're never ever going to use soap on it again."
And the not-so-dirty truth about cast iron, she noted, is that it "will last a whole lifetime with the proper care." That means simply rinsing used pans in hot water and drying immediately, storing without any lids on top because if you do, said Stewart, "The moisture in the air might become trapped, causing the skillet to rust." Though if you do find your pans caked with stubborn buildup, a popular product can easily restore cast iron cookware to its former glory. Lye, an alkaline chemical compound, can be carefully applied in a 1-pound of lye to 5 gallons of water mixture to dissolve any grease and grime buildup without affecting the cast iron itself.
Be strategic about what dishes you place in the dishwasher
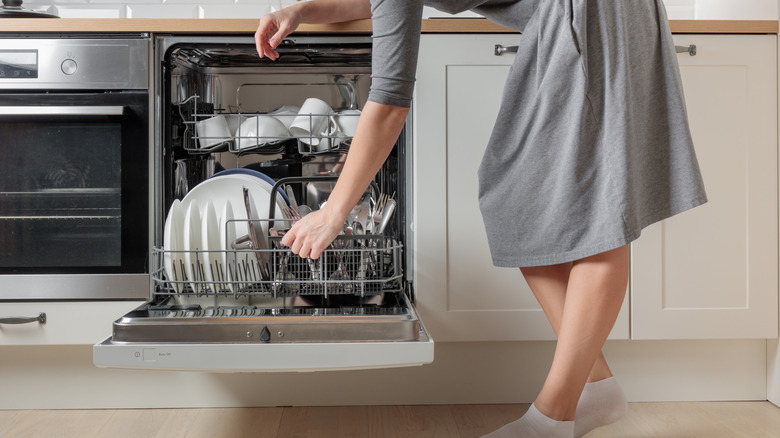
Cast iron isn't the only kitchen tool that requires careful maintenance. In one vintage clip posted to Instagram, Stewart ran through her top dishwasher tips. Anything made out of stainless steel (think: mixing bowls, tongs, strainers), "clean wonderfully in a dishwasher," she said. As do Teflon-lined or non-stick lined pans and white plastic cutting boards. And while some might believe pots and pans are a no-go, "Stainless steel pots and pans come out bright and clean," she shared. "Actually, the more you wash them, the nicer they are."
What shouldn't get cycled, though, are any wood-handled tools: "No matter what you were told," she insisted, "if you really want to prolong the life of beautiful equipment like this, just don't put wood handles in a dishwasher." Another of Stewart's steps for loading your dishwasher includes placing dishes on the bottom rack toward the jets in the center and positioning those on top downward so that the water sprays inside. With utensils, she advises, lay larger tools flat and alternate placing spoons and forks up and down so they don't nest together.
Keeping a tool kit of cleaning supplies makes it easy to get started
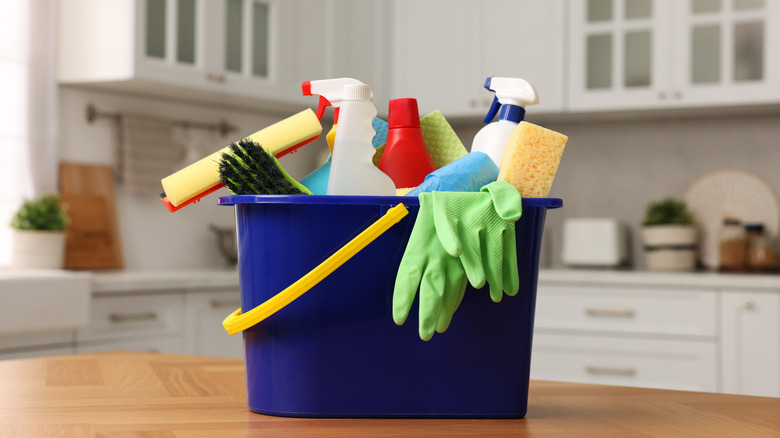
One way to motivate yourself to get cleaning is to make sure you're equipped with all the right tools. Stock a tote, basket, pail, or other container "with all the essentials," Stewart shared during an appearance on Today in 2021. In addition to some baking soda and toothbrushes for those truly tight spaces, "it's really important to have good brushes, very important to have some rags, rubber gloves, of course, to save those manicures, some squeegees, [and] some cleaners."
For extra credit, she recommends making your own organic version that works on all surfaces. The recipe she shared includesa half cup of white distilled vinegar and 2 cups of water. "And just [mix] that into a spray bottle," she explained, "and this is great for all your kitchen counters, for wiping down your stove. It cleans, it [purifies], and it smells good too."
Sweep or vacuum your kitchen floor nightly
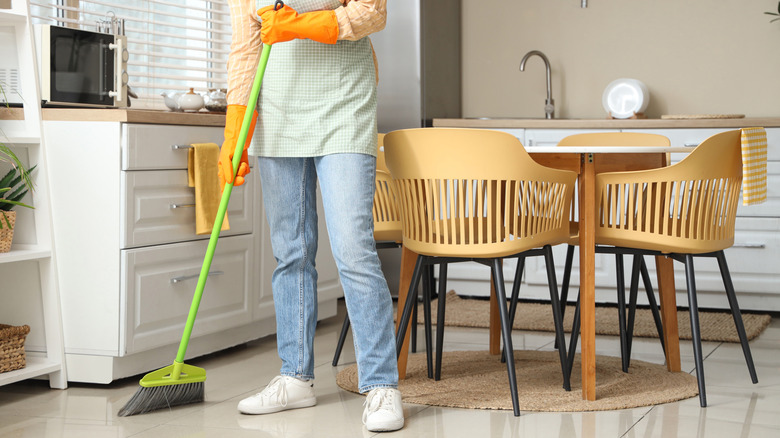
One task not to, uh, sweep under the rug: Cleaning your floors. While that can feel like a particularly onerous task when they're grimy, if you work a quick sweep into your daily routine it will make the process much smoother. "Every evening once you've finished washing up after dinner, sweep the floor," Stewart told Today in 2007, sharing tips from "Martha Stewart's Homekeeping Handbook." That simple, 5-minute process, she added, "will keep tough-to-clean dirt and grime from building up, which will make the weekly mopping much quicker."
And to really keep your floors clean for longer, follow these from-the-ground-up tips. For starters, keep in mind that mopping is not a one-cleaner-fits-all situation. A pH-neutral, mild soap paired with water is best for hardwood and stone, for example. And should you need to attack specific stains, use a blend of baking soda and vinegar for tile, and either rubbing alcohol or baking soda on linoleum. And for a truly clean sweep, consider using an electrostatic broom. Made with rubber bristles or a polyurethane foam brush, it uses a static charge to attract and hold dirt and dust, making sure no filth is left behind.