I've Been Restoring Furniture For 6 Years. Here Is My Number One Rule For Stripping Furniture
Peeling back the layers of a neglected piece of furniture to find the gorgeous wood underneath is one of the most rewarding parts of my day. I've spent the last six years refinishing and restoring furniture, turning forgotten garage finds into pieces people want to showcase in their homes. This journey started as a hobby, but it grew into selling my work online and at a local antique mall. Doing this taught me what buyers look for, from the smoothness of the finish to the sturdiness of the piece. I've handled everything from mid-century modern buffets to Arts and Crafts oak desks, and each one is a new lesson in patience. Through all those projects, I discovered that the secret to a perfect finish is my number one rule: using the right tools for the job. This means knowing when to reach for metal or plastic scrapers, brass or nylon brushes, and which grade of steel wool to use.
I've spent many hours perfecting my process so every item I finish is durable and beautiful. Being able to work on old pieces of furniture requires me to do justice to the piece and let its personality shine. Some pieces have dents, dings, marks, and scratches that are sometimes only seen when the darkened finish or paint has been completely removed. While I do my best to minimize these imperfections, much of the charm in old furniture comes from its history, and that it was used and loved, rather than a flawless, factory-new appearance. Understanding the right way to strip paint from wood is what allows me to preserve the history while preparing it for a new finish.
Use the right tools for stripping furniture to avoid damaging the wood
The biggest mistake some inexperienced refinishers make is trying to force a tool to do something it wasn't designed for, which often damages the piece. Learning how to prep furniture before refurbishing starts with matching the tools to the specific needs of the furniture so you don't create more work for yourself later. I always emphasize that the specific tool you choose depends entirely on the material and the shape of the piece you're working on.
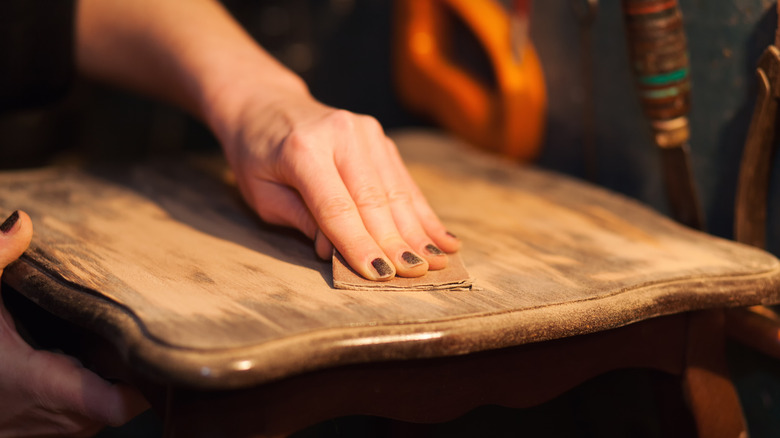
When I'm stripping a flat, wide surface like a tabletop, a sturdy metal scraper is my go-to for removing the softened finish quickly. If I'm working on a delicate piece with a very thin veneer or a soft wood like pine, I switch to a plastic scraper to avoid accidentally gouging the surface. For recessed details, a brass-bristle brush provides enough friction to pull out the old finish or paint without being too aggressive. While many people think brass bristles will scratch wood furniture, they're also the best at removing paint that's stuck in the wood grain.
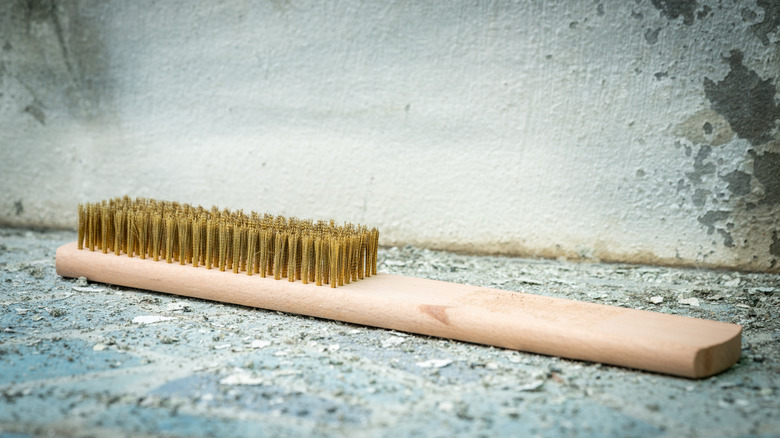
To work on fine carvings or fragile areas, a nylon bristle brush is a gentler option. I also keep different grades of steel wool on hand to scrub away any remaining bits of paint or finish. Choosing the wrong abrasive can leave scratches that become painfully obvious once you apply a fresh coat of stain. So, selecting the right tool for every curve of the furniture keeps the wood in good shape for the next phase of the project.
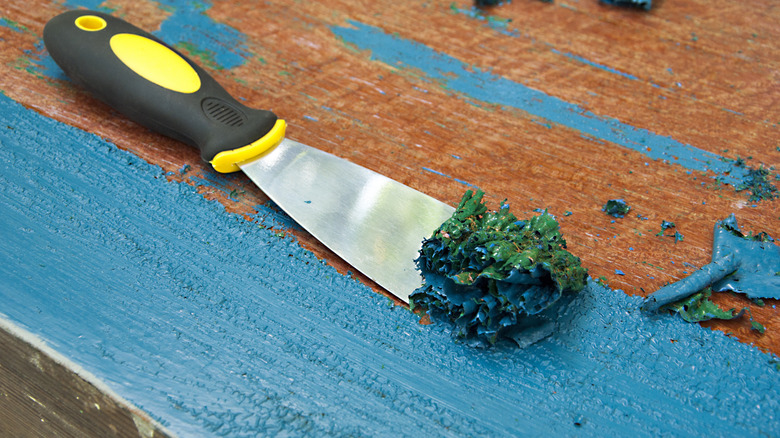
Successful furniture stripping requires patience and proper chemical application
I've learned that the chemical stripper should be doing most of the work, so I don't have to use a carbide scraper to remove it all on my own. So, I apply a thick, generous amount and let it sit long enough (usually 20 minutes or so) to dissolve the old finish or paint. Trying to scrape the surface before the chemical has done its job results in a gummy, difficult mess that can actually hurt the wood fibers if you scrape too hard. I find it much more effective to work on one section at a time so the stripper stays wet and active. If the finish doesn't all come off with the first coat, apply another. While I usually use a gel chemical stripper, I sometimes use denatured alcohol to wipe away shellac or wax finishes, or acetone or lacquer thinner to dissolve lacquer. Choosing stripping furniture vs. sanding is sometimes a safer option to remove the finish on thin veneer or delicate surfaces.
After the old finish is removed, I always use 0000 steel wool and wash it down with mineral spirits or a neutralizer to remove every trace of the stripper. Skipping this step can potentially prevent your new finish from adhering properly, even after sanding. Always be sure to use chemicals like these in a well-ventilated area, wear gloves, safety goggles, and a respirator mask to protect your skin, eyes, and lungs.