Use Dollar Tree Frames To DIY The Cutest Personalized Indoor Planter
We may receive a commission on purchases made from links.
A few photos from your recent vacation are fresh off the printer, and you haven't yet settled on a way to show them off. Dollar Tree's frame selection is surprisingly diverse, and the Special Moments Wooden Beaded Photo Frames are right on trend. If you're a lover of plants — even artificial ones — you can combine a photo display and planter into one clever creation. These wooden bobbin-style frames take framing to a whole other level when they're glued together into a vase shape and affixed to a tiny turntable. With a photo of a memorable moment in each frame, all this spinnable vessel needs to become the cutest thing in the room is a plant.
Tackle this genius Dollar Tree DIY with four frames, wood glue, a pair of scissors, a few large rubber bands, a 6-inch-by-6-inch wood piece, and a turntable like this Qiaoxingai 6-inch Clear Acrylic Lazy Susan. The wood square will serve as a base for the four frames, and pieces like this often come in bulk for a decent price. However, if you won't use a whole pack and want to save a few dollars, skip it and purchase a Crafter's Square MDF Wood Plank that you can cut to size without much trouble. Lastly, these pale wood frames are lovely as is, but they'd be equally stunning with a coat of paint or stain if you want to add that to your shopping list. You can even paint it with brewed coffee, a natural ingredient you can use to stain wood. To go this route, grab some sandpaper to prepare the wood before painting or staining.
Assemble your spinning frame planter

If you're painting or staining the frames, remove the backings and glass, sand the wood, give it a couple of coats, and let the frames dry. Cut the stand off the frames' backing at the hinge. Before assembling the pieces, arrange the photos in the frames; you won't be able to access the backs of the frames once they are glued together. Also, if a Dollar Tree wood plank will serve as the planter's base, cut a 5 ½- to 6-inch-long piece from the plank using either miter shears or a rotary tool. (The board is only 5 ½ inches wide, but it will be concealed under the frames.)
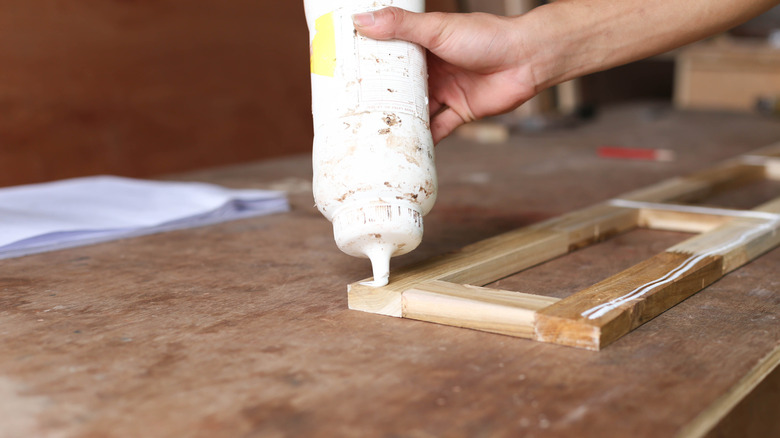
Stripe glue on one long, outside edge of a frame, and press it to the back of another frame's long edge. Continue like this, gluing side edges to back edges for the remaining frames; this will make the finished project more symmetrical. Line the bottom edges of the frames with glue and align the wood square with the frames' edges. Top the mini turntable's upper platform with a bit of glue and set the wooden structure atop this. Secure a few rubber bands around the glued frames to hold them as they dry and cure for 24 hours. However, if you're impatient, check out these tips to speed up the process.
Because of the photos, this project is best for plants you can remove before watering. Faux greenery is an easy and dry solution, but air plants could just as easily keep the pictures free from water damage. A small vase for propagations can also easily slide in and out of the structure for refilling and cleaning.