The Stunning Way To Turn An Old Sweater Into Upcycled Decor
We may receive a commission on purchases made from links.
A hole in a sweater should never condemn it to the trash can. There are countless cute and handy ways to repurpose old clothing around the home. If the garment in question is a nice color or has a pattern you love looking at, it can live on as a cover for a vessel like a vase, a candle jar, or a storage container.
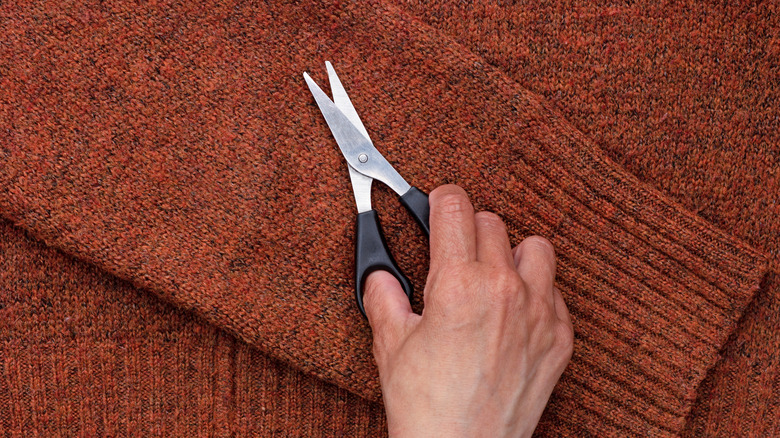
The best options for this upgrade are the sleeves of a thin sweater or t-shirt. Even the ankle portion of an old sock adds a quirky finish to a container, and it may be easier to come by than a worn-out top. Child-sized sweater sleeves and sock tops are great for small containers, while adult-sized sleeves will be a better fit for larger vases. The appeal of a sleeve or a sock top is that it slides easily over the container with no sewing.
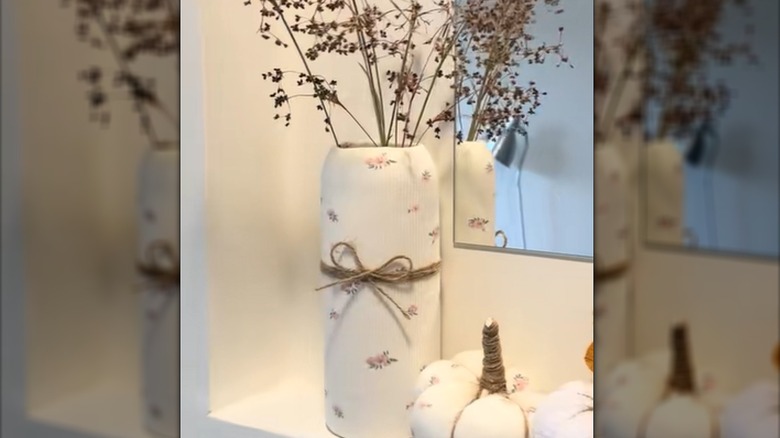
Upgrade a vase-in-need or another container with the help of the aforementioned garment, scissors, and a glue gun with a reliable adhesive like Gorilla Hot Glue Sticks. You can also complete this project without glue so that it doesn't permanently change the vase or jar. Optional embellishments like jute twine or ribbon might be the final touch your creation needs to achieve the cozy winter aesthetic. (Keep in mind that when covering a candle jar with fabric, you're better off sticking with flameless LED candles for safety's sake.)
Steps for a sweater-covered vase
Before picking up the scissors, slide your chosen container into the sleeve or section of the garment to see how well it fits. You'll want enough slack at the ends to tuck under the container's base and to fold over the container's mouth. Once you've manipulated the fabric into a position you like, mark where you'll cut it. If it has a nice-looking cuff, you can make that part of the design, too. A few dots of glue will hold the cuff in place around the outside edge of the container's mouth or the base for a ready-made finished edge. Also, the cuffed version works well without glue; simply fold the excess cut end under the container, and its weight will hold the fabric in place.
Once you've settled on the cut that works best, slide it back onto the container, and trim off all but about 1 ½ inches of the excess fabric at its mouth and the base. (Leave an additional 1/2 inch at each end if the fabric is on the thicker side.) If you're dealing with two cut ends, start by gluing the extra fabric at the mouth. Pull extra slack toward the base so that a small amount of fabric is left around the mouth. Fold it over the edge, and secure it inside the container's mouth with glue, smoothing the fabric carefully as you glue. Fold the excess fabric at the other end over the container's base, and glue it in place. Now your vase is ready to hold your next cheerful arrangement of flowers.