15 Reasons Your Spider Plant Is Dying And What You Can Do To Keep It Alive
We may receive a commission on purchases made from links.
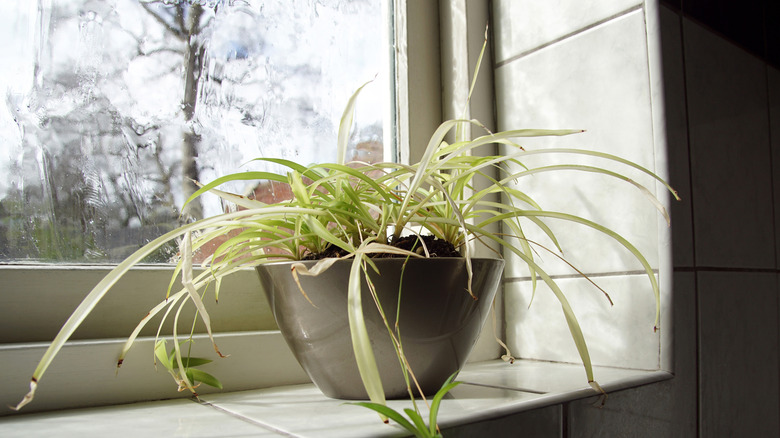
Homeowners wanting to add greenery to their interiors with minimal maintenance are often drawn to spider plants (Chlorophytum comosum). These resilient plants adapt well to typical household conditions, thrive on neglect, grow rapidly, and can produce numerous plantlets. Even those who believe they have a black thumb can boast about keeping a plant alive — and better yet, can expand their collection without paying an extra dime.
However, despite their easygoing nature, certain care mistakes can threaten the life of spider plants. Common issues include improper watering practices, like using tap water, watering too often in the cold season, and not meeting their minimal water needs. Other problems involve poor drainage, overfertilization, choosing the wrong fertilizer, and being placed in an unsuitable location. Household pests such as mealy bugs and scale insects can also be deadly if not managed promptly. With that established, below is a detailed discussion of 14 reasons your spider plant might be dying and tips to prevent that from happening.
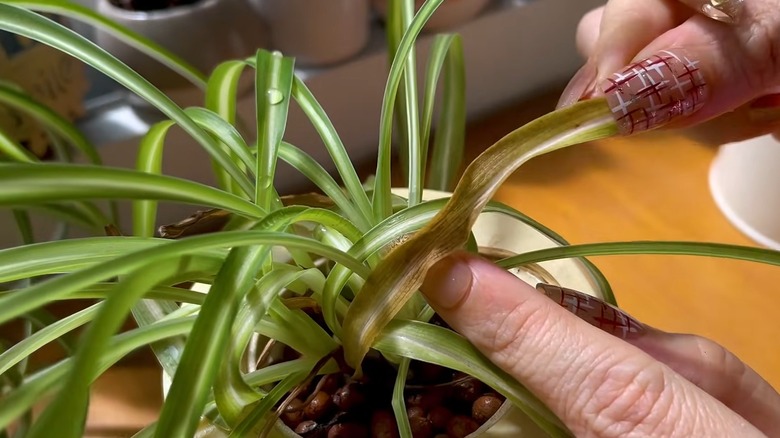
You're soaking its roots in tap water
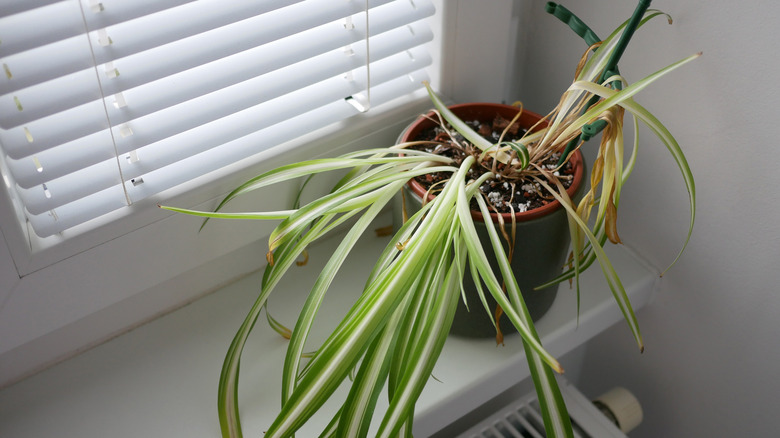
Many cities add fluoride to tap water to protect their citizens' teeth. While this might bode well for your household, spider plants aren't enthused about this measure. They're sensitive to fluoride as well as chlorine, another chemical commonly found in municipal water. So, when you water them with tap water regularly, these chemicals build up to dangerous levels. This causes their leaves to develop necrotic or dead areas, which show up as brown tips along their margins. Unfortunately, this damage is often irreparable.
To rescue your plant, clip out the dead tissue. Then, run distilled water through the soil to remove accumulated salts. Alternatively, repot your spider plant in fresh soil. If you know your city chlorinates the supply, keep the water aside for at least 24 hours in a container to allow the chemicals to partially dissipate before use. But keep in mind, it won't eliminate fluoride. To avoid all these problems, water your spider plant with rainwater instead and DIY your own rain barrel.
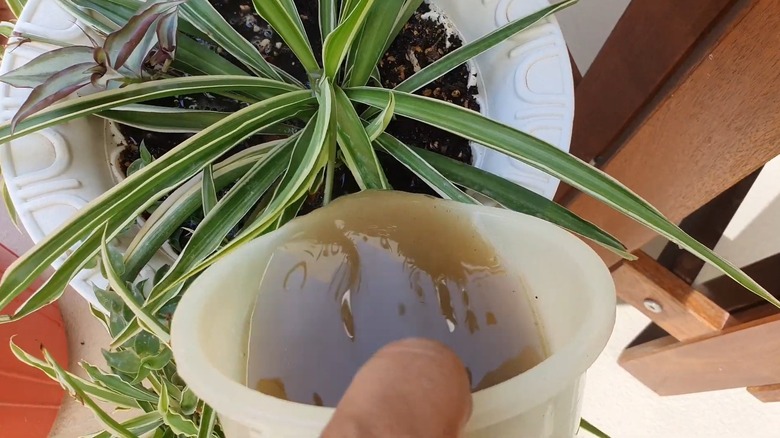
You forgot to empty the saucer after watering it
You can water your spider plant either from the bottom or by pouring water on the top. Regardless of the method, some water may collect on the saucer plate after you put the plant back. If you fail to check and empty the saucer after some time, the standing water may leave the roots soggy, allowing rot to set in. When a spider plant suffers root rot, the roots turn black, mushy, and odorous, while the leaves wilt, become brown, and drop. And if this isn't corrected quickly, it may die.
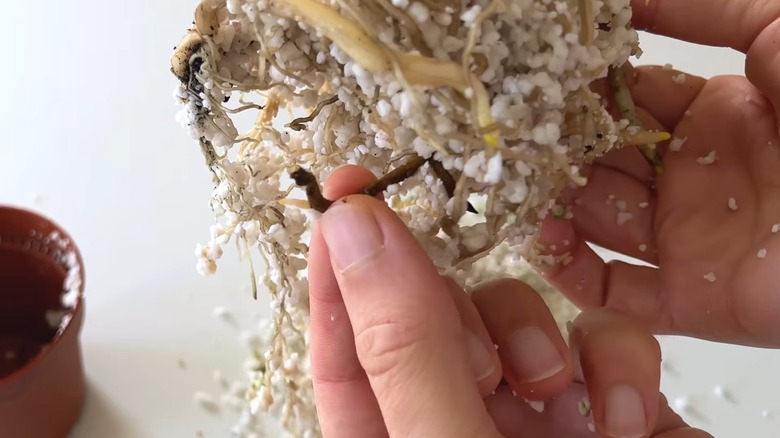
The best way to treat root rot on spider plants is to run the roots under water to get rid of the slime and mushy sections. Next, chop off any damaged areas still remaining until you're left with white, firm roots. Peel off the already dead leaves and repot your plant with fresh soil. Finally, wait for the soil to dry out fully before resuming any water soaking sessions.
You underwater it

Leaving the soil dry for extended periods can endanger the life of your spider plant. When it's underwatered, leaves can't access the requisite nutrients and start to wilt. Initial signs start with browning at the tips, which spreads throughout the plant, leaving it brown, wispy, and shriveled.
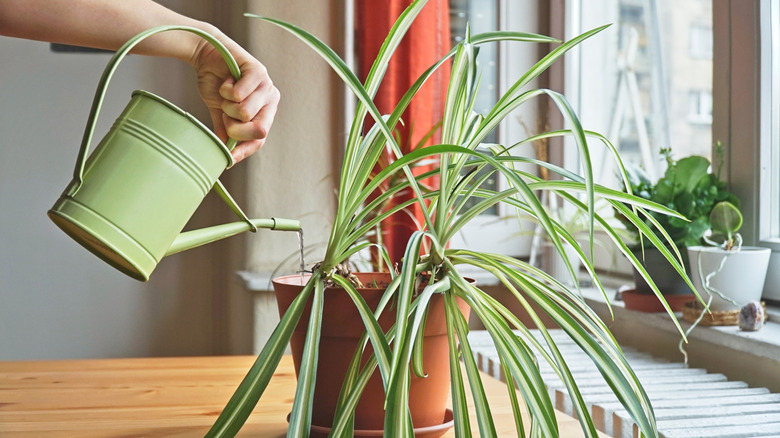
To keep your plant alive, give it a deep soak. For that, thoroughly saturate the soil with water until it drains out from the bottom. That way, you can rest assured that the entire root system is sufficiently wet while salt deposits are simultaneously flushed out. Don't forget to empty the saucer plate after some time — roots standing in water for extended periods risk rot — and remove the dead leaves. Moving forward, make it a point to check the soil every 10 days or more for dryness. You could do that with a moisture meter, such as the Growit Plant Moisture Meter, or by simply pushing your little finger into the soil whenever you notice the leaves looking sad or droopy. You may have to check more frequently if your home has drier air or the plant sits in a sunny spot, like a west-facing windowsill.
You didn't taper off on water during fall and winter
To keep things convenient, plant parents often follow a fixed schedule to water their houseplants. However, this clockwork routine doesn't always work. Spider plants slow down during fall and go semi-dormant by winter. That's why they require comparatively less water to support their essential functions than they would during the growing season. If you fail to taper off on watering in the cold months, you risk overwatering the plant and promoting root rot. The outcome? A tatty plant with brown leaves and sludgy roots that may well be on its last legs.
Under such circumstances, hold back on watering the plant. Rather than watering your spider plant in winter on a fixed schedule, examine the soil condition and its environment. This is because you may have to water more frequently if your plant is located in a hot spot, such as around warm air vents, or vice versa. The best way forward is to keep checking the soil for dryness. Water only when the soil is dry down to 2 centimeters.
Its potting medium remains soggy
Sometimes, your spider plant starts nearing its end not because of your poor watering techniques, but because of the medium it's planted in. Poorly-draining mediums or moisture-retentive potting mixes force spider plants to put up with wet feet, which they dislike. When roots remain wet for longer than necessary, they become breeding houses for mold and rot. And plants experiencing root rot show brown, dead foliage and black, gooey roots.
As we mentioned earlier, the best way to salvage a rotten plant is to remove the bad, damaged sections and repot it in fresh potting mix. To loosen your potting medium, mix in sphagnum peat moss, like Epsoma's Organic Peat Moss. Otherwise, add bark to improve drainage. However, avoid perlite, as it's known to hold more water in its pores. Also, make sure the pot has adequate drainage holes to allow excess water to flow out.
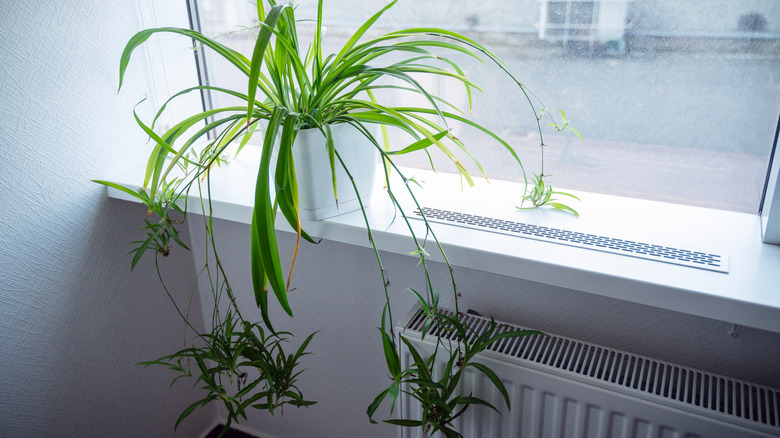
It isn't getting much light
Your spider plant may suffer if it doesn't receive adequate light. Plants require sunlight to carry out photosynthesis and food production — and spider plants are no exception. When this requirement isn't met, they react by growing pale. Unlike the sharp yellow-green variegation you're accustomed to seeing on their leaves, a sun-starved spider plant will appear paler or translucent. Sadly, over time, it'll grow limp.
If you catch the problem in time and increase the sun exposure, your spider plant can soon recover and produce healthy new growth. Remember, "bright indirect light" doesn't mean you can pop the containers in a shaded area. If the spot is too dark for you to read a book, it is too dark for your plant, too. Move it to a window where the pane filters the light or a porch. If that isn't a viable option, invest in good-quality grow lights. Sansi and Yadoker are some of the best grow lights for indoor plants, according to reviews.
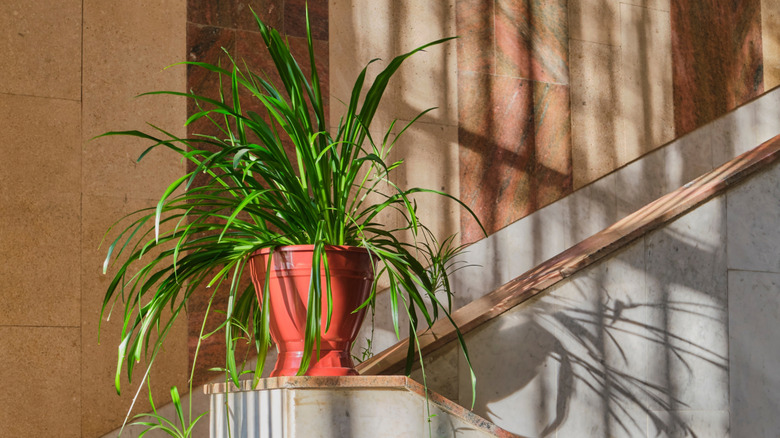
It's overexposed to sunlight
Too much of everything, especially sunlight, is bad for spider plants. Although they can handle direct sun exposure to a certain extent, there's a caveat: The light shouldn't be very intense. For instance, if your spider plant is placed on a west-facing window, it'll be exposed to hot afternoon or midday sun. This damages the leaves (also called "leaf scorch"). As a result, your prized beauty will lose its luster and the ability to manufacture food, causing you to wonder if it's dying.
To get out of this predicament, choose a spot where the spider plant only receives morning sun or is exposed to sun for a short stretch (no more than six hours a day). East- or south-facing windows and walls usually provide such desired sun exposure. Alternatively, you can relocate your plant to a bright spot and use grow lights to make up for any inadequacies.
It's placed near drafty windows, doors, or vents
The worst spot in your home for indoor plants, including spider plants, is where they will experience drafts. They don't take well to sudden temperature swings, especially if they're frequent. Stressed plants show brown tips on mature leaves, while the new growth is weak. Even shoots carrying baby pups appear disheveled and die off, preventing you from propagating new plants.
To stave off further damage, relocate your spider plant away from your air conditioning and heating vents, as well as the fireplace. Also, examine your windows and doors for drafts and move your plant a few feet away from them to limit exposure. In short, place them where temperatures remain relatively constant and your plant will bounce back eventually.
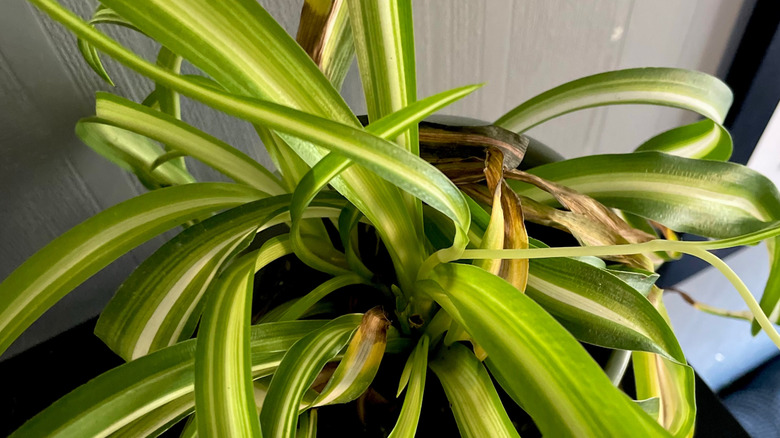
Your indoor air is super dry

Like in the soil, a lack of moisture in the air can set back your spider plant. More common during the winter when most homeowners have their heat pumps, radiators, or fireplaces running on full blast, your houseplants are forced to endure dry air or low humidity. The direct exposure (in case of heating vents), combined with the desiccating effect of the dry air, damages the leaves. You'll initially notice this as browning or dead tips on the foliage.
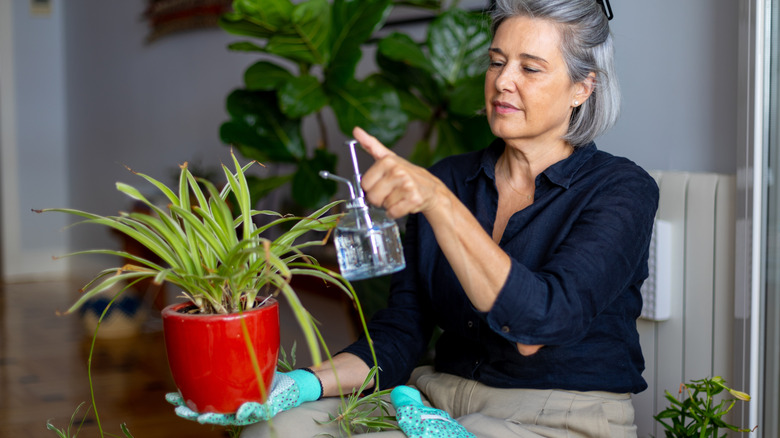
The good news is that by increasing the humidity for plants, you can relieve them of the stress and revive their growth. Spider plants require about 40% to 60% relative humidity levels consistently. You can install the TempPro TP50 Digital Hygrometer in your room to track humidity levels and switch on the humidifier accordingly. If you have several houseplants, consider keeping them together so they may benefit from shared transpiration. You could also use a humidity tray containing water and pebbles to create a localized humid area for your spider plants. Misting plants infrequently might help, too. Finally, you may also keep this indoor plant in your bathroom if it gets some morning sun.
It's gotten too chilly for them
Another reason that your spider plant may not be thriving is that it's located in a cold spot. Even though spider plants are known to tolerate a wide range of temperatures, they are, ultimately, native to tropical Africa. This means they favor warmer temperatures over anything chilly. If the temperature swings lower than their tolerance levels, their growth and performance will suffer dramatically.
If you notice any signs of stress, such as brown tips or slow growth, check the room's thermostat settings. Anything between 65 and 90 degrees Fahrenheit hits the sweet spot. But an unevenly heated room where temperatures drop under 55 degrees Fahrenheit will be too chilly for your spider plant. If placed on the windowsill, ensure their leaves do not touch the glass, especially in winter. Such cold exposure can harm the foliage.
You used the wrong fertilizer
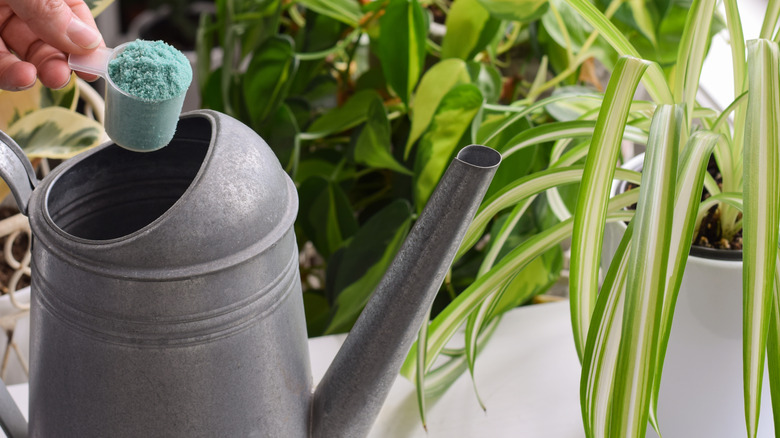
Poor fertilization practices can also kill your spider plant. Like tap water, superphosphate-based fertilizers are a source of fluoride, which we've already established that spider plants dislike. Fed regularly, fluoride accumulates in the soil, causing the plant to develop reddish necrotic tissue along with brown tips on the leaves. The presence of boron is equally problematic and has similar consequences. On the flip side, if the fertilizer has lower concentrations of nitrogen, the new foliage growth will appear dull, pale, and weak.
If the plant has already taken significant damage, remove the brown edges and dead foliage to redirect resources into new growth. Switch to a high-quality, well-balanced, water-soluble fertilizer, such as Miracle-Gro Water Soluble All Purpose Plant Food, to feed your spider plant. Regardless of the brand, ensure it's fluoride-free and has little to no concentration of boron.
You were too generous with fertilizer
Another area your spider plant can do without any mollycoddling is fertilization. Sure, it'd thrive with a nutrient boost about six months in from initial planting. However, you don't have to be too generous with the dose, as the roots can suffer from fertilizer burn. In the case of spider plants, this shows up as brown tips on the foliage. They may also not produce many plantlets. This problem is especially acute during the fall and winter months. Since the plant isn't actively growing, it can do without any fertilization during this time.
To rescue an overfertilized spider plant, flush the soil with water to leach out extra nutrients. Better yet, repot it in fresh soil after removing the damaged areas. And if you enjoy babying your plants, choose a balanced liquid fertilizer. Dilute it with water to half strength and feed spider plants every four weeks during spring and summer. Alternatively, apply a granular fertilizer every four months (or three if it shows a marked slowdown in growth). Avoid any fertilization once the plants go dormant in the fall and winter.
Scales got to your spider plant
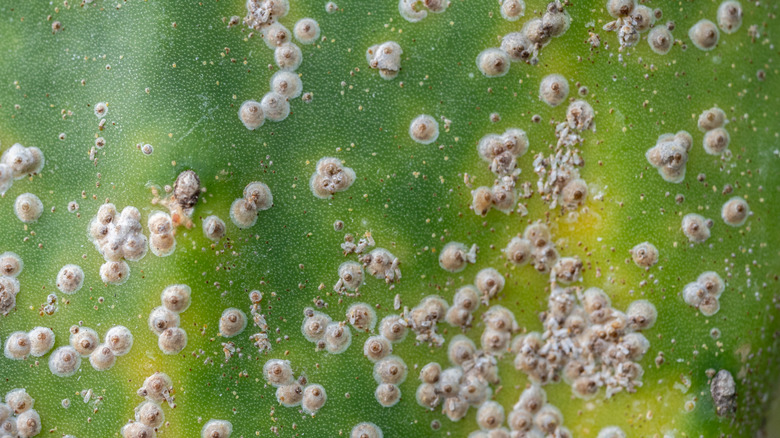
If you notice tiny, grey or brown bumps or shell-like structures along the stems or on the leaves, your spider plant may be dying due to a scale infestation. These tiny pests, without any visible legs or eyes, attach to plant tissue and suck away its nutrients. Since they have no natural enemies indoors, they can produce multiple generations and evicting them can be challenging, if not downright impossible. Apart from their shells, you may also notice a sticky substance on the plant or underneath the pot. This is honeydew that is excreted by scales. You may also notice black mold-like growth around these areas.
When dealing with a scale-ridden spider plant, start by separating it from other plants to prevent further spread. Consider running soapy water over the plant to dislodge the pests, but make sure it doesn't seep into the soil, taking any surviving pest with it. In case of a light infestation, knock them off individually with a toothbrush. Wipe down the stems in 70% isopropyl alcohol, like this one from Rapid Protectant. But be sure to conduct a patch test first on a hidden area, as alcohol can damage plant tissue, which can take about two days to fully show. If safe, repeat the process every week until the infestation is under control. That being said, it's best to trash the plant in case of a heavy infestation.
Mealy bugs may have taken home in your spider plant
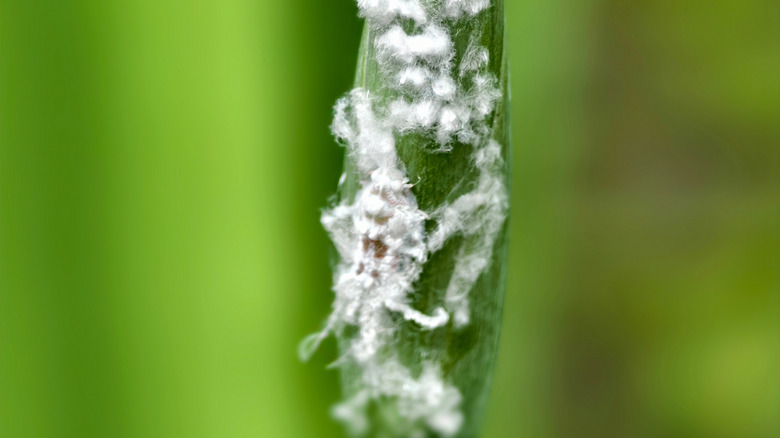
Closely related to scales, mealy bugs, too, can wreak havoc on spider plants. They appear as tapered, white cottony substances along the stems, leafy nodes, and sometimes, on the roots. After sucking the plant nutrients — which leaves the foliage looking brown, tattered, curled, and dead — they release sticky honeydew that can invite black mold and aggravate your plant's stress.
At the first sign of mealy bugs, isolate your spider plant from your other houseplants. Run it under warm water to displace the bugs. Next, test rubbing alcohol on a small infested area. If you don't see any tissue damage to the leaves, dab it on all infested portions. You may also use home-safe horticultural oils, including neem oil. Repeat this process over successive weeks until you're fully rid of the insects. However, if your plant is heavily infested, try to salvage healthy portions by clipping out the damaged sections. But if the bugs return, dispose of the plant.
Your spider plant is infested with spider mites
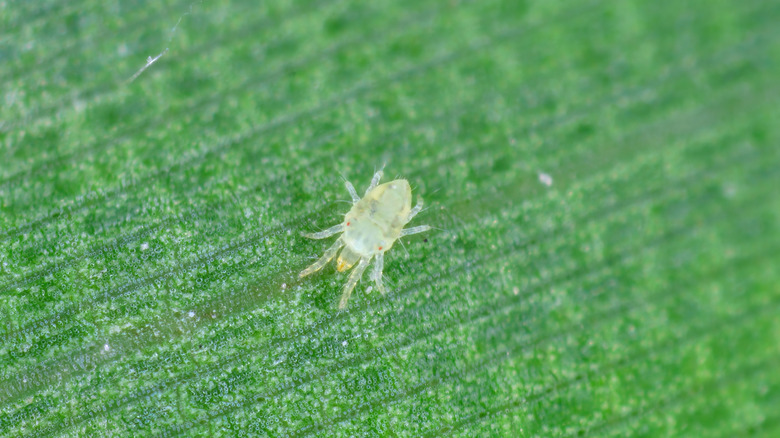
Besides scale and mealy bugs, you may also want to keep an eye out for spider mites. They similarly zap the plant of all of its nutrients, especially chlorophyll, leaving the leaves discolored, pale, and mottled. With the plant unable to manufacture much food, it begins shedding leaves, while its growth slows down. If the infestation isn't brought under control, your spider plant may eventually die. Although spider mites have a variable appearance, they typically appear as tiny green, yellow, or brown insects. To confirm their presence, hold a white cardboard sheet under an infected leaf and lightly tap it to dislodge the insects — if the "dust" moves, spider mites might be present. Another tell-tale sign is the presence of fine webbing on the bottom of the leaves, which ultimately takes over the whole plant.
Since spider mites are difficult to control, it's best to discard a young plant rather than trying to save it. For small infestations on larger plants, cut off the damaged tissue and wash the plant in a tub to remove any remaining eggs. Then, repeatedly apply horticultural oil, neem oil, or home-safe miticides with bifenthrin or malathion as active ingredients, according to the manufacturer's instructions, until your spider plant is fully rid of the infestation.